Get Lost: March Kindred Stamps Release
Never grow up… we know it’s a trap… bills to pay… deciding what to make for dinner every…single.. night…. The Get Lost stamp set gives us permission to never grow up and I am here for it! These boys are staying young as long as they can and so you can you! Let’s go back to our childhoods and go on adventures with our friends once more, no bills to pay, just friendship and imagination… but first a PSA…
This blog utilizes affiliate links. If you choose to click on the links provided to purchase, you are supporting me as I receive compensation for your purchase. If purchasing is not in your books, no worries, I hope you find inspiration for projects you design. By clicking on the links, you are letting Kindred Stamps know that you like my content and to keep bringing me back. Thanks for your time and I’d be lost without you.
Project 1: Marching Hill
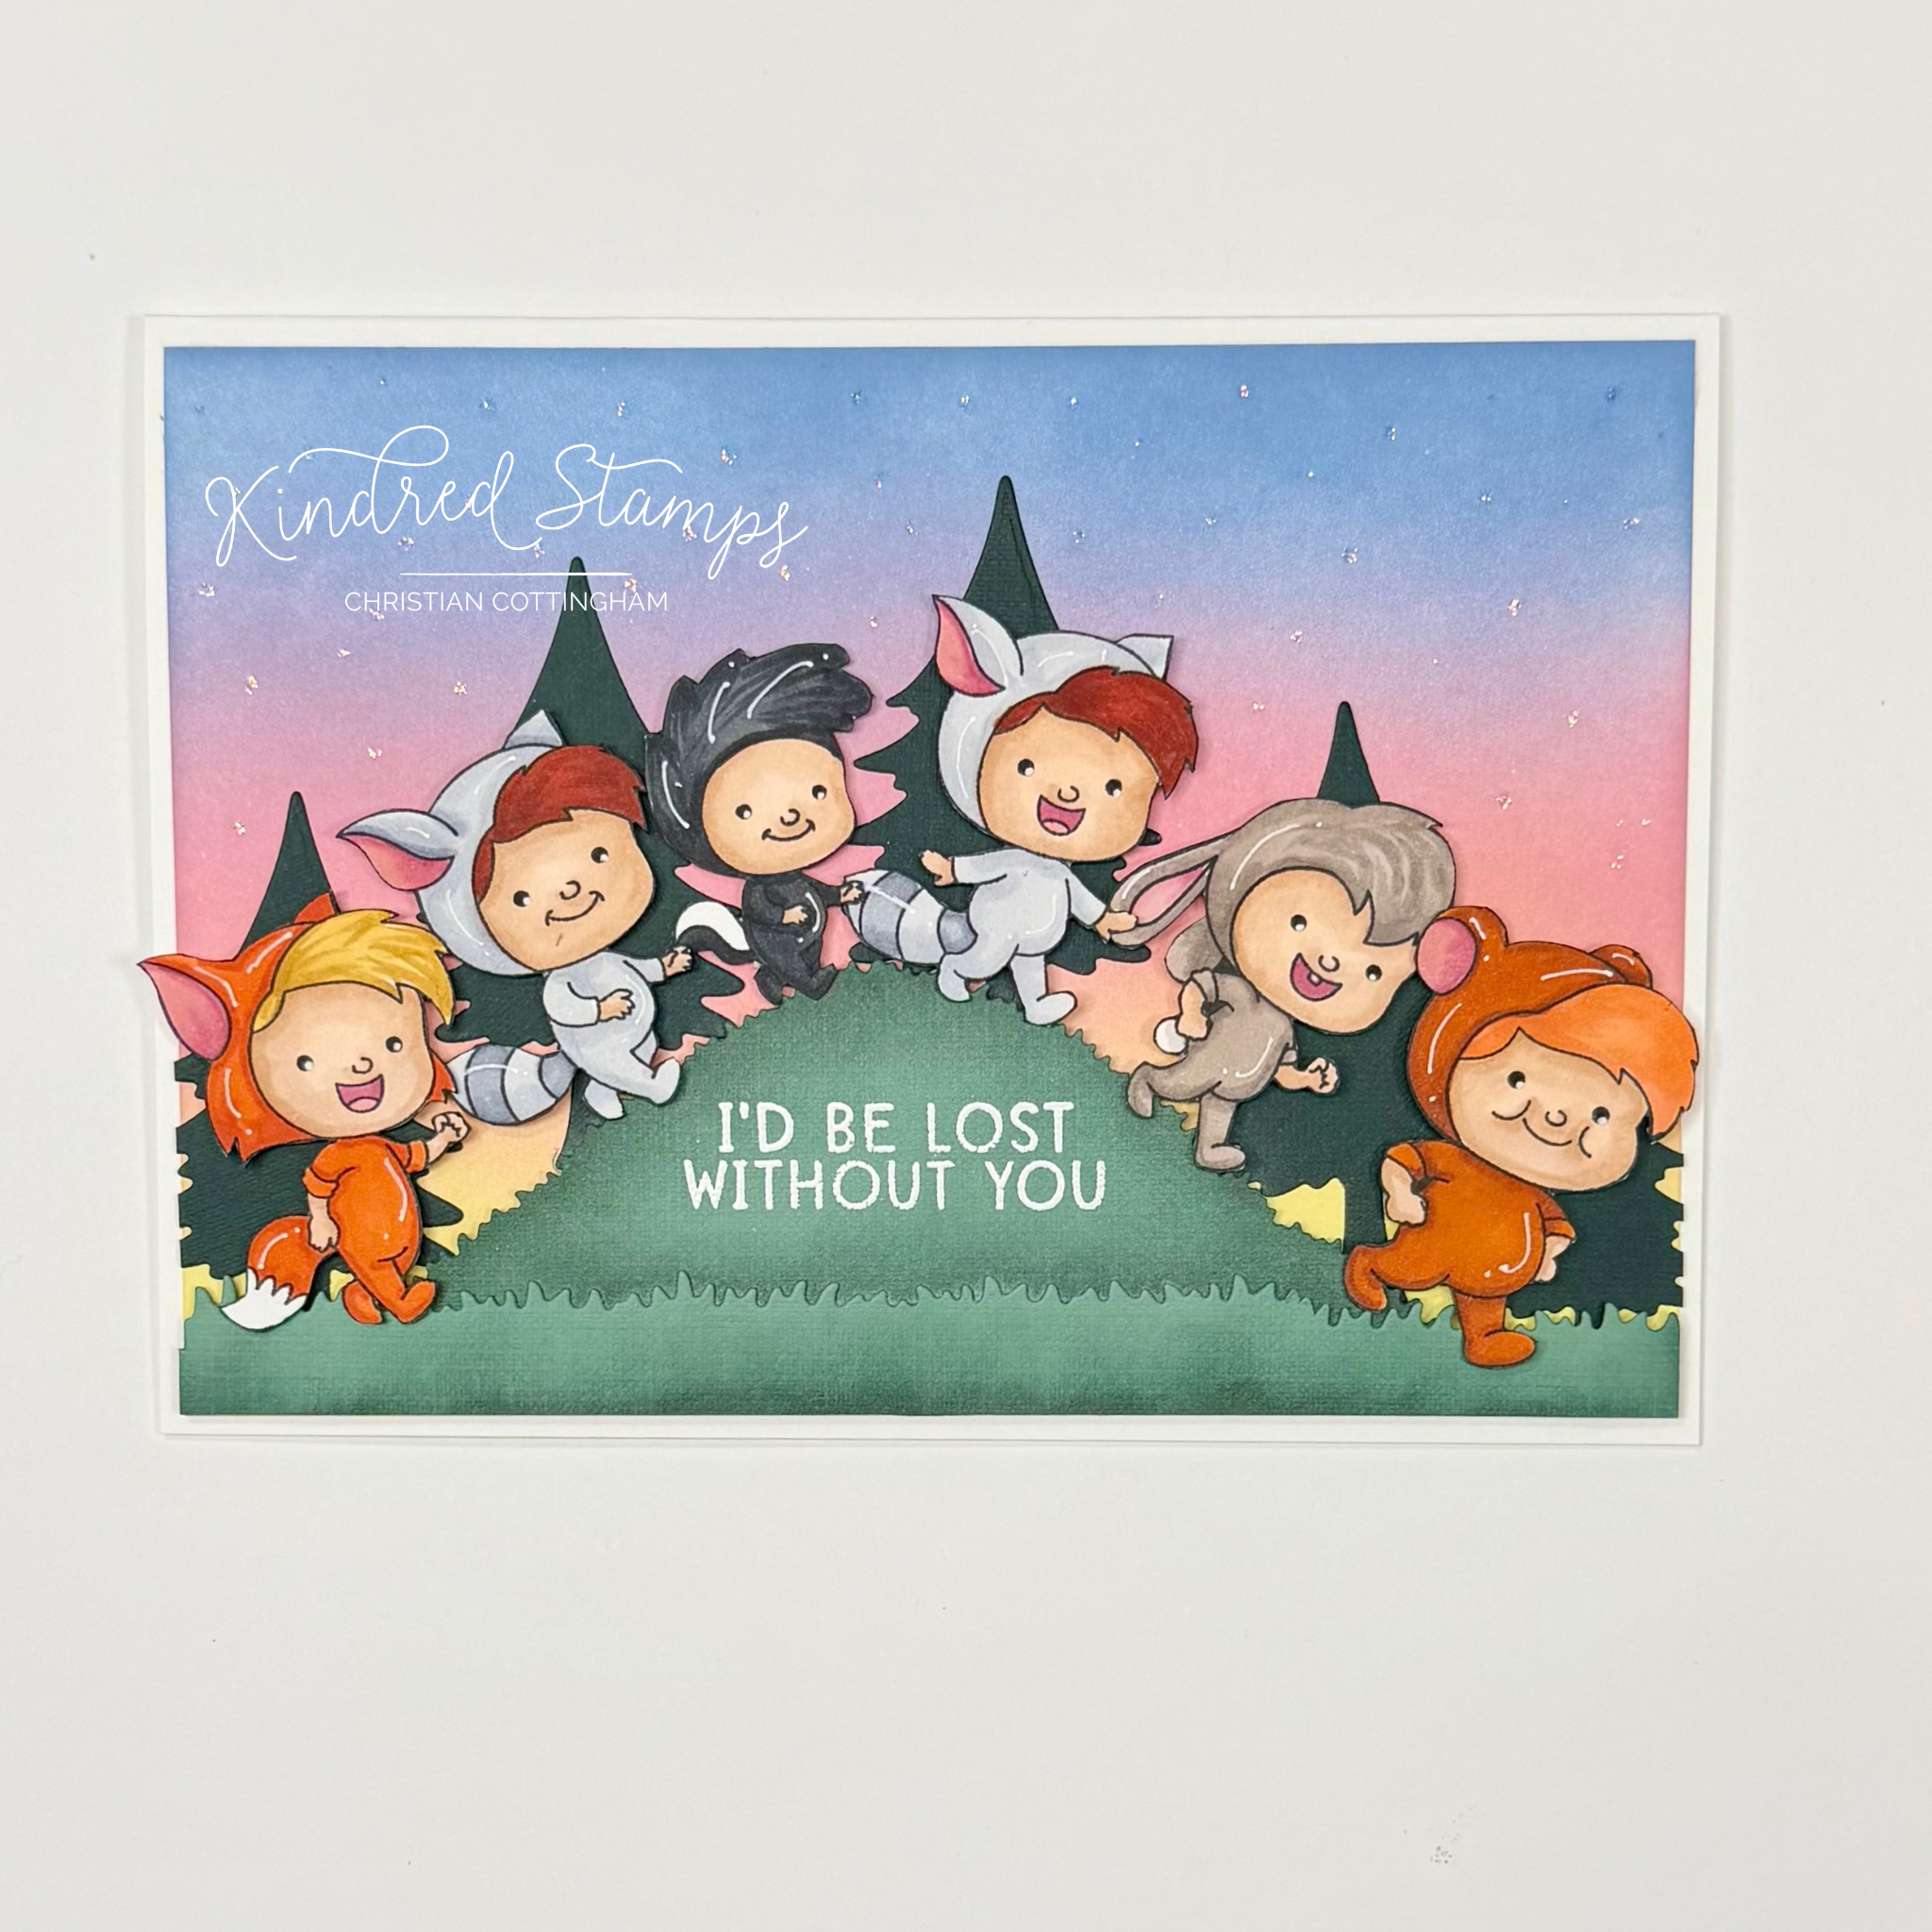
Get Lost, Kindred Stamps
The Get Lost boys are out marching and singing on one of their adventures. No hill to big for them to climb. This A7 card pulls in some die cuts and simple ink blending to make build the scene. Let’s break it down.
A panel of smooth white cardstock was trimmed to 4 3/4 inches by 6 3/4 inches. With a soft hand, the panel was inked in a gradient sunrise or sunset… you get to choose! Yellow on the bottom and blue on the top. Inks utilized: Gina K Designs Lemon Drop/ Dusty Rose/ Powder Blue. This was set aside to dry.
The Get Lost images were stamped in alcohol ink and colored with Olo Markers (See Color Guide). The boys were fussy cut out on the line and were edged with a black fine liner brush pen to hide the irregularities in my cutting. Thin foam tape was applied to the back of the boys. These were set aside to prepare the remainder of the scene.
The House In The Hill Die will provide the hill, the grass, and finally the trees for the scene. Five trees were die cut from a deep green cardstock. The hill was cut from a medium green cardstock. Finally, a strip of medium green cardstock was cut twice with the grass die to make the length needed for the card. The hill and the base of the grass panel were edged with Gina K Designs Dark Spruce ink to give a little dimension. When dry, the hill was prepped with an antistatic tool, the sentiment was stamped with a watermark ink, sprinkled with Snowfall embossing powder, and finally heat embossed.
Thin foam tape was applied to the hill and the outer section of the grass to avoid excess bulk to the card. The center section of grass was glued flat to the hill. The hill was placed lightly to the card (allowing me to lift and tuck before pressing it down completely). The five trees were glued flat behind the grass and hill.
The Get Lost images were arranged marching up and down the hill! Finally some Stickles were applied across the sky line to give the card a little bling without taking away from its design.
Size: A7 (5 inches by 7 inches)
Project 2: Marching Rocks
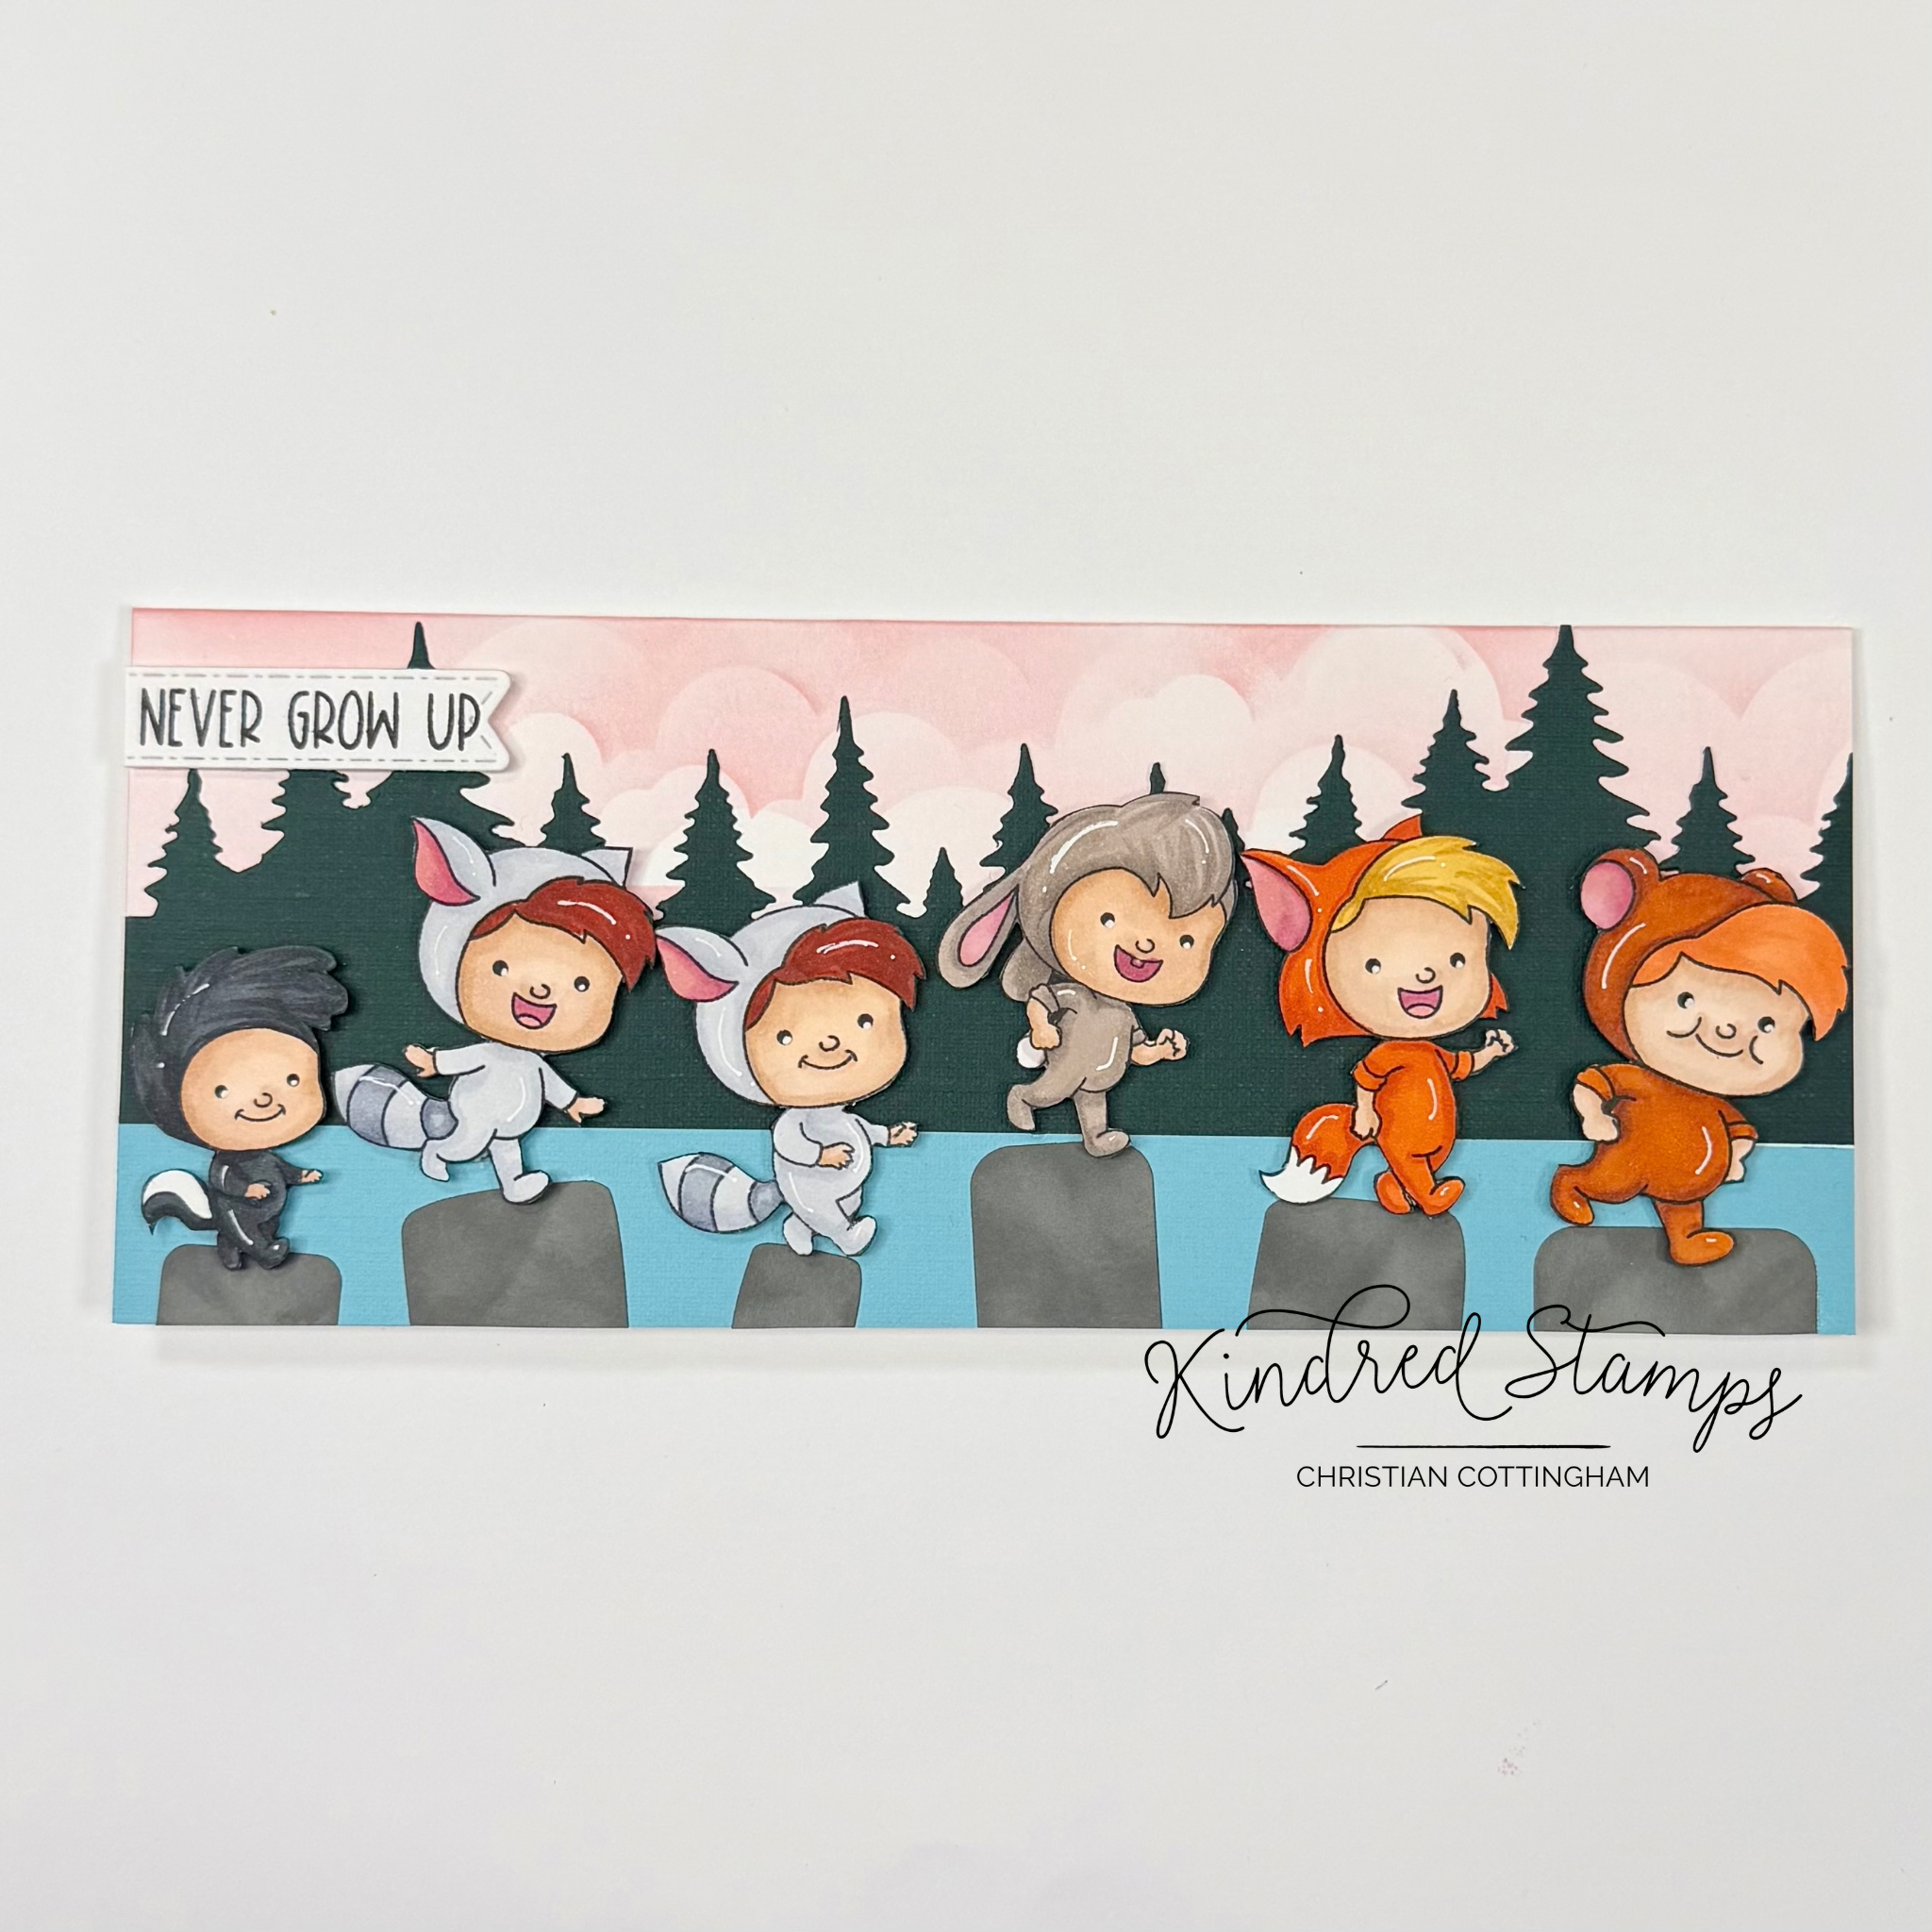
Get Lost, Kindred Stamps
Not only did they march over a hill, but across a stream with a waterfall! To get through the water without getting wet, the Get Lost boys are skipping across the stones. This slimline showcases their shenanigans perfectly.
The slimline card base was stenciled on with the Grass and Cloud Stencil with Innocent Pink (Gina K Designs). This was set aside to dry while the coloring commenced.
The Get Lost images were stamped in alcohol safe ink, colored with Olo Markers, and fussy cut out on the line. (See Color Guide)The edges of the stamped images were marked with a black fine liner. Thin foam tape was applied to the back of each of the boys.
Since I was inking up the stamps, I stamped the sentiment on a piece of scrap paper. Utilizing the Sentiment Strip Dies, the sentiment was positioned with the sentiment close to one side. A thin foam tape was attached to the back of the strip and set aside.
Green cardstock was die cut with the Tree Scene Die, twice on the same line for the length of 8.5 inches. A piece of blue cardstock was cut down to be the water. These two pieces were glued to the card base. The sentiment was placed on the top left corner with the sentiment lining up with the far left side. The overhang was trimmed off.
Finally, it was time to make some rocks. Looking through my stash, I found the Chocolate Candy Dies and thought… “self, don’t you see those rocks?” “Sure do’” I responded back. Pulling out some of the chocolate dies and a piece of gray cardstock, the rocks started to come to life. To give the rocks some “rockiness” a small blending brush and Stormy Sky ink (Gina K Designs) the rocks came to be.
The rocks were arranged flat along the base of the card with the overhang cut off. The Get Lost images were arranged skipping across the rocks.
Size: Slimline (3.5 inches by 8.5 inches)
Project 3: Marching Attention
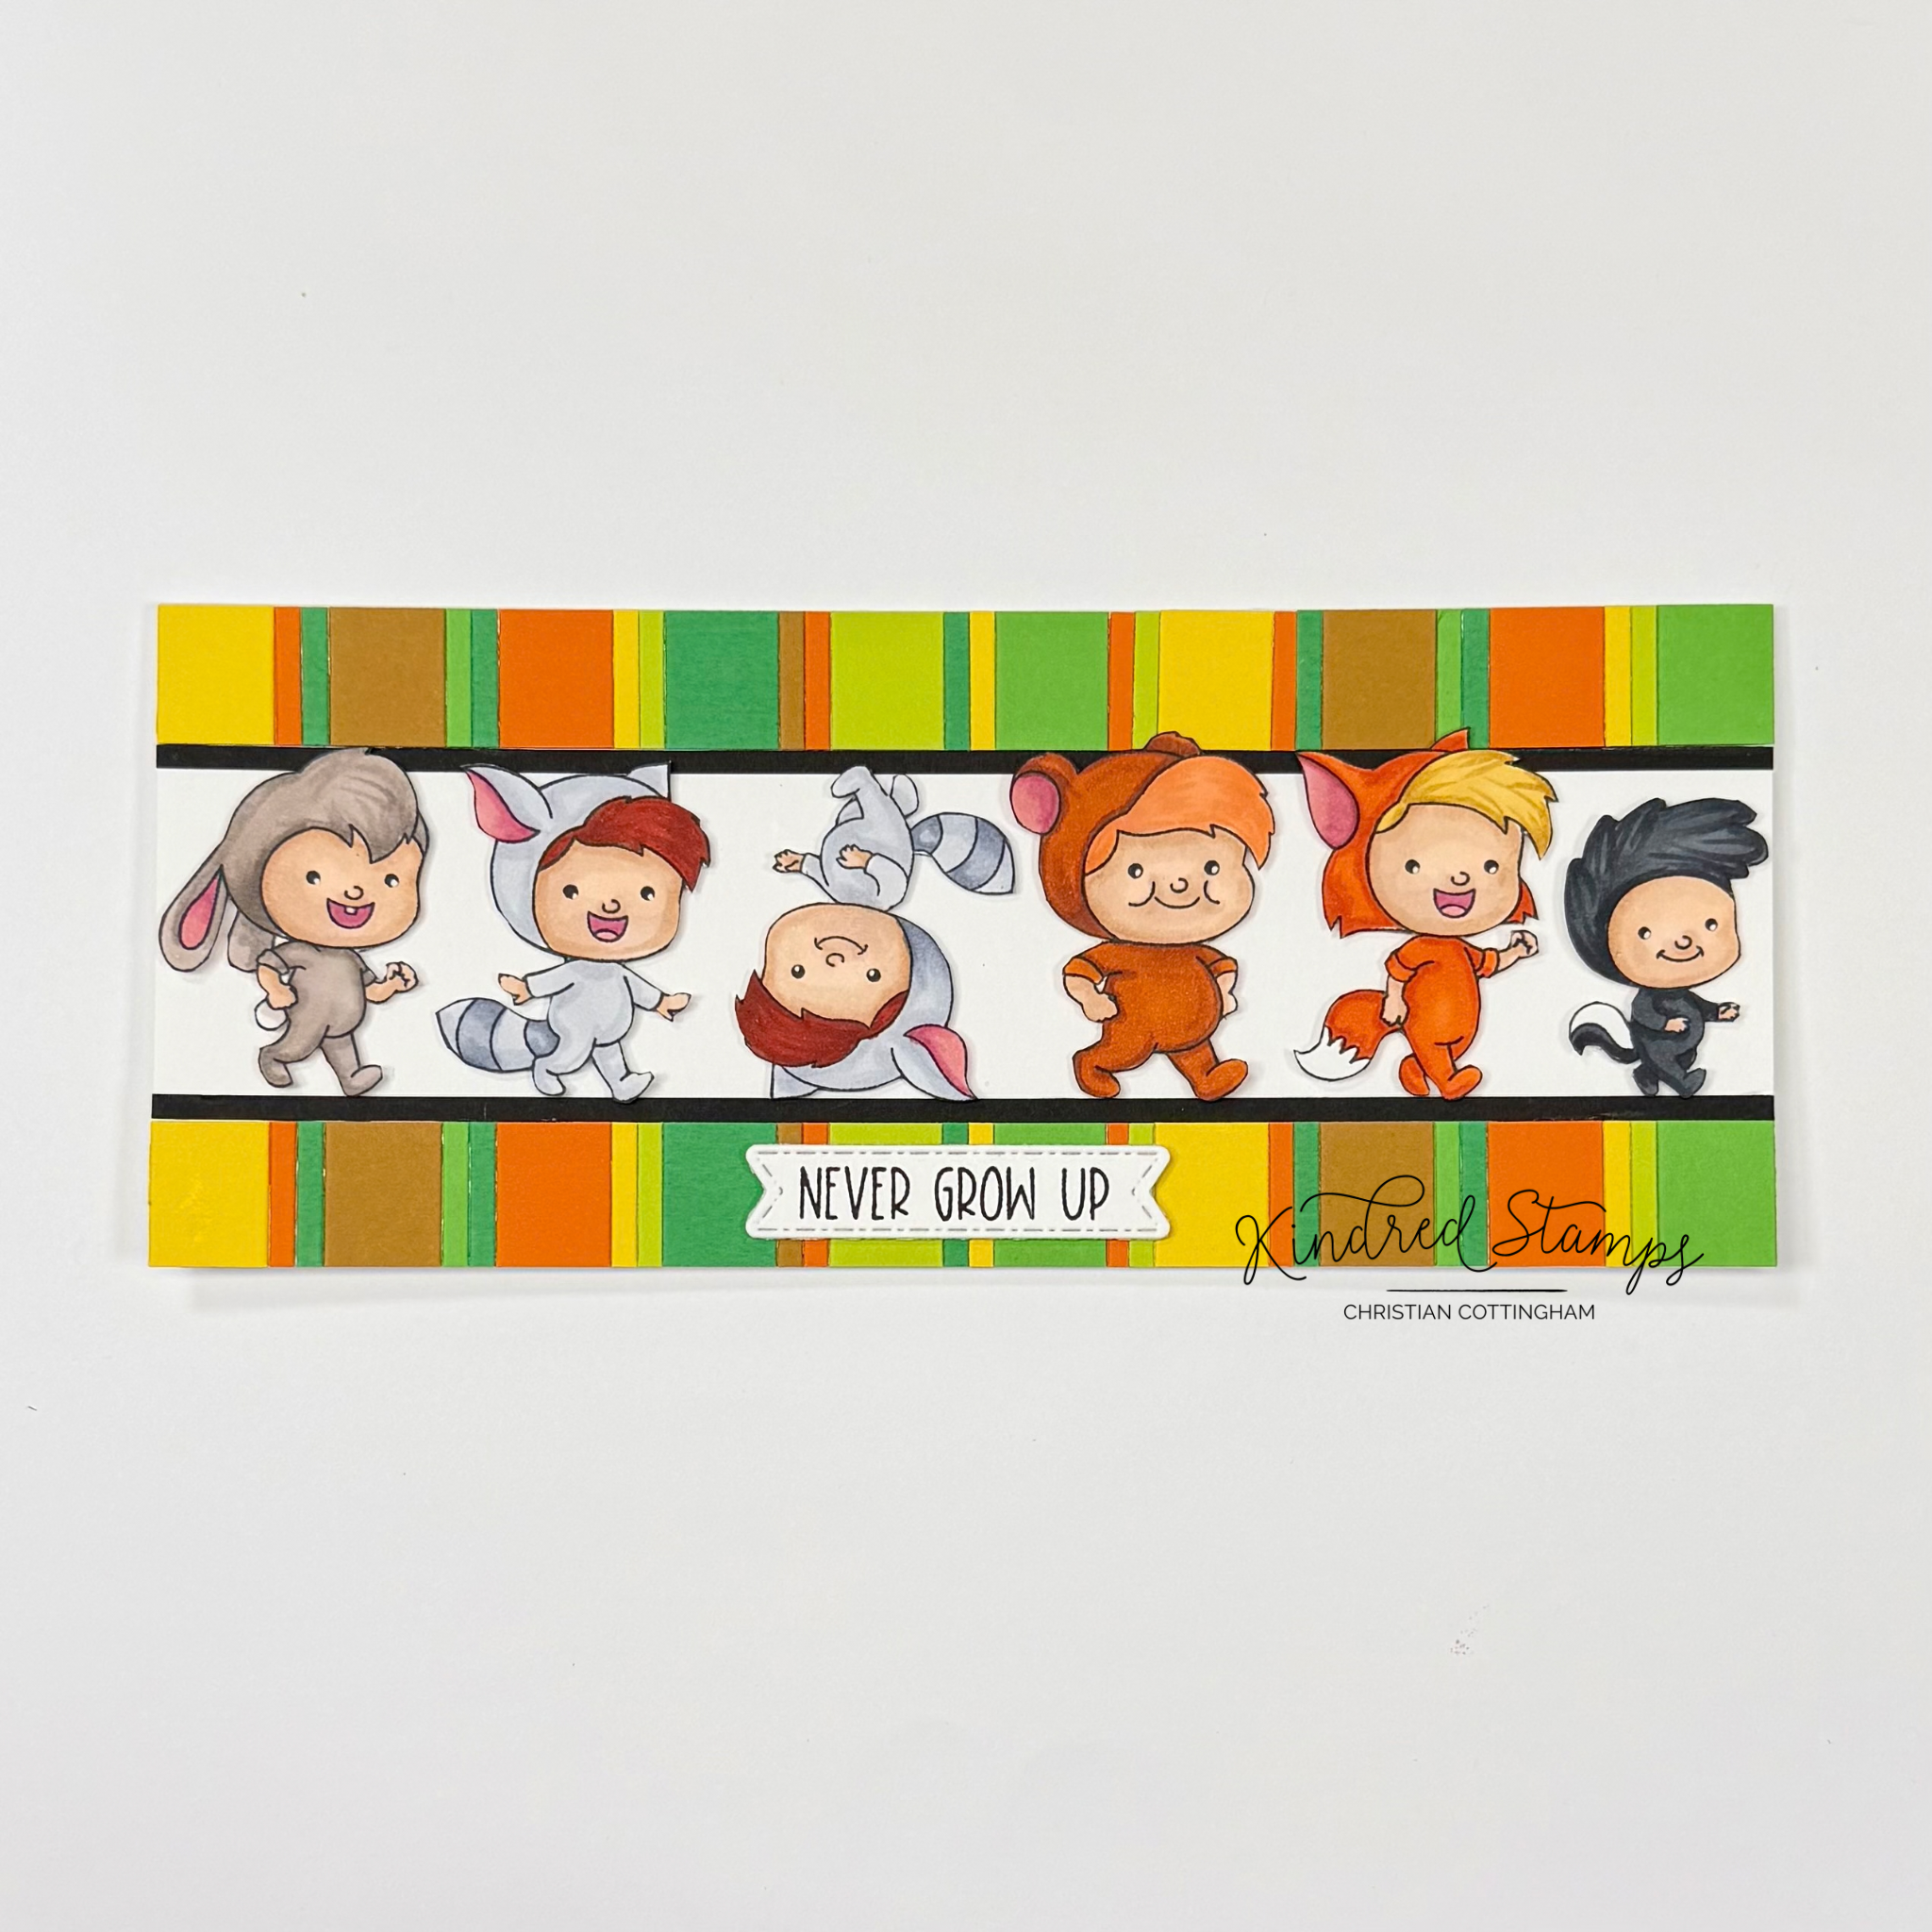
Get Lost, Kindred Stamps
If you watched Part 1 of the Crafter to Collector Series on YouTube (Kindred Stamps or Cardigans & Cards), you will recognize a great way to add some spunk to a card by keeping the theme with some paper strips. This simple card is bright and cheerful and has some unexpected twist to add interest.
Pulling out an assortment of green, yellowy-brown, orange, and yellow cardstock multiple strips were cut down. With a double-sided adhesive on a piece of copy paper approximately 2 inches wide was prepped and assembled in a repetitive sequence. The panel was trimmed into two 3/4 inch strips. These panels were adhered to the slimline on the top and bottom edges, leaving a crisp white center. Two thin black strips of paper were glued lengthwise along the the top and bottom striped strip line. This breaks the vertical lines, drawing the eyes to the white center panel.
The Get Lost images will fill out the center panel. The boys were stamped with alcohol safe ink and colored with Olo Markers (See Color Guide). After fussy cutting on the line, a black fine liner was run along the edges. Thin foam tape was applied to the back of each boy.
The boys were spaced equally in a marching order across the white panel. One of the boys was turned upside down for an unexpected punch to add some playfulness to the layout. Finally, the sentiment was stamped on a matching piece of white cardstock and die cut with the Sentiment Labels Die set. The sentiment was popped up with some thin foam tape and centered onto the bottom striped section. This card pops with some simple colored card stock arranged in a fun pattern.
Size: Slimline (3.5 inches by 8.5 inches)
Project 4: Hiding Tree
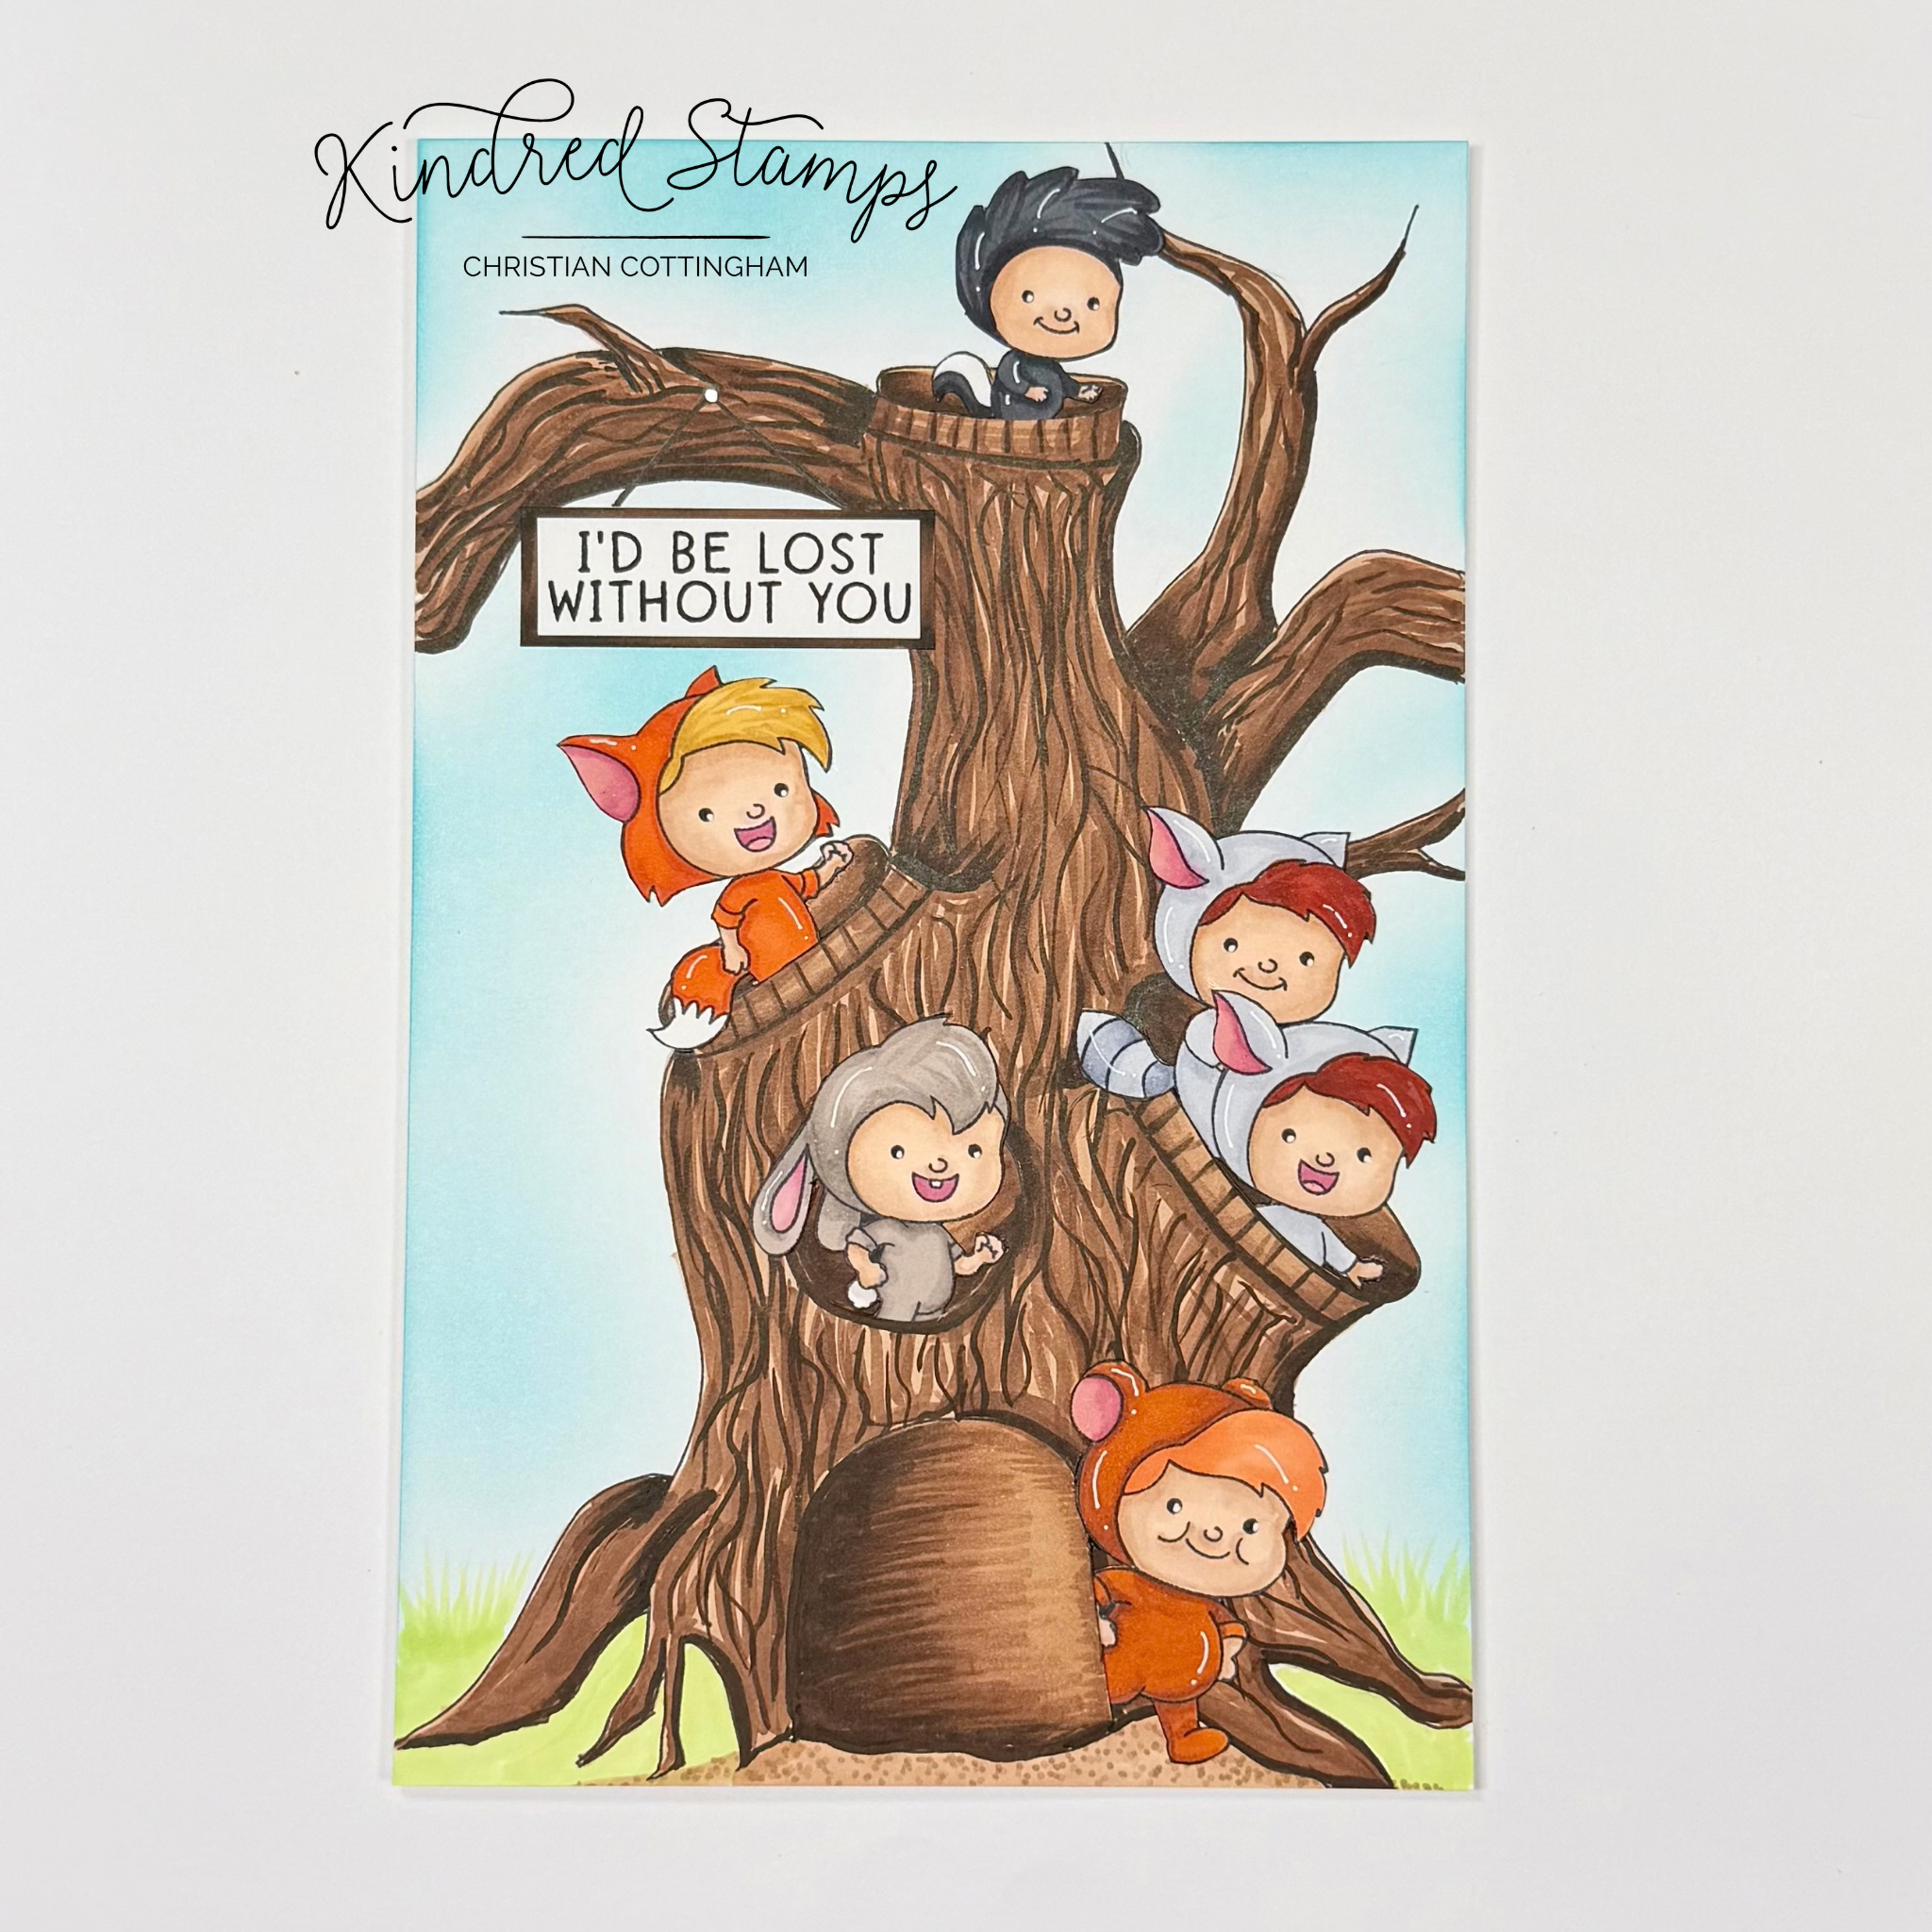
Get Lost, Kindred Stamps
Having a secret hiding spot is essential when you are living in the woods. This card is a go big or go home type of card, especially to fit this ginormous tree on it. Let’s dive in on this sticking but simple to make card.
The Get Lost images were stamped with alcohol safe ink and colored with Olo Markers. (See Color Guide). The boys were fussy cut out and edged with a black fine liner.
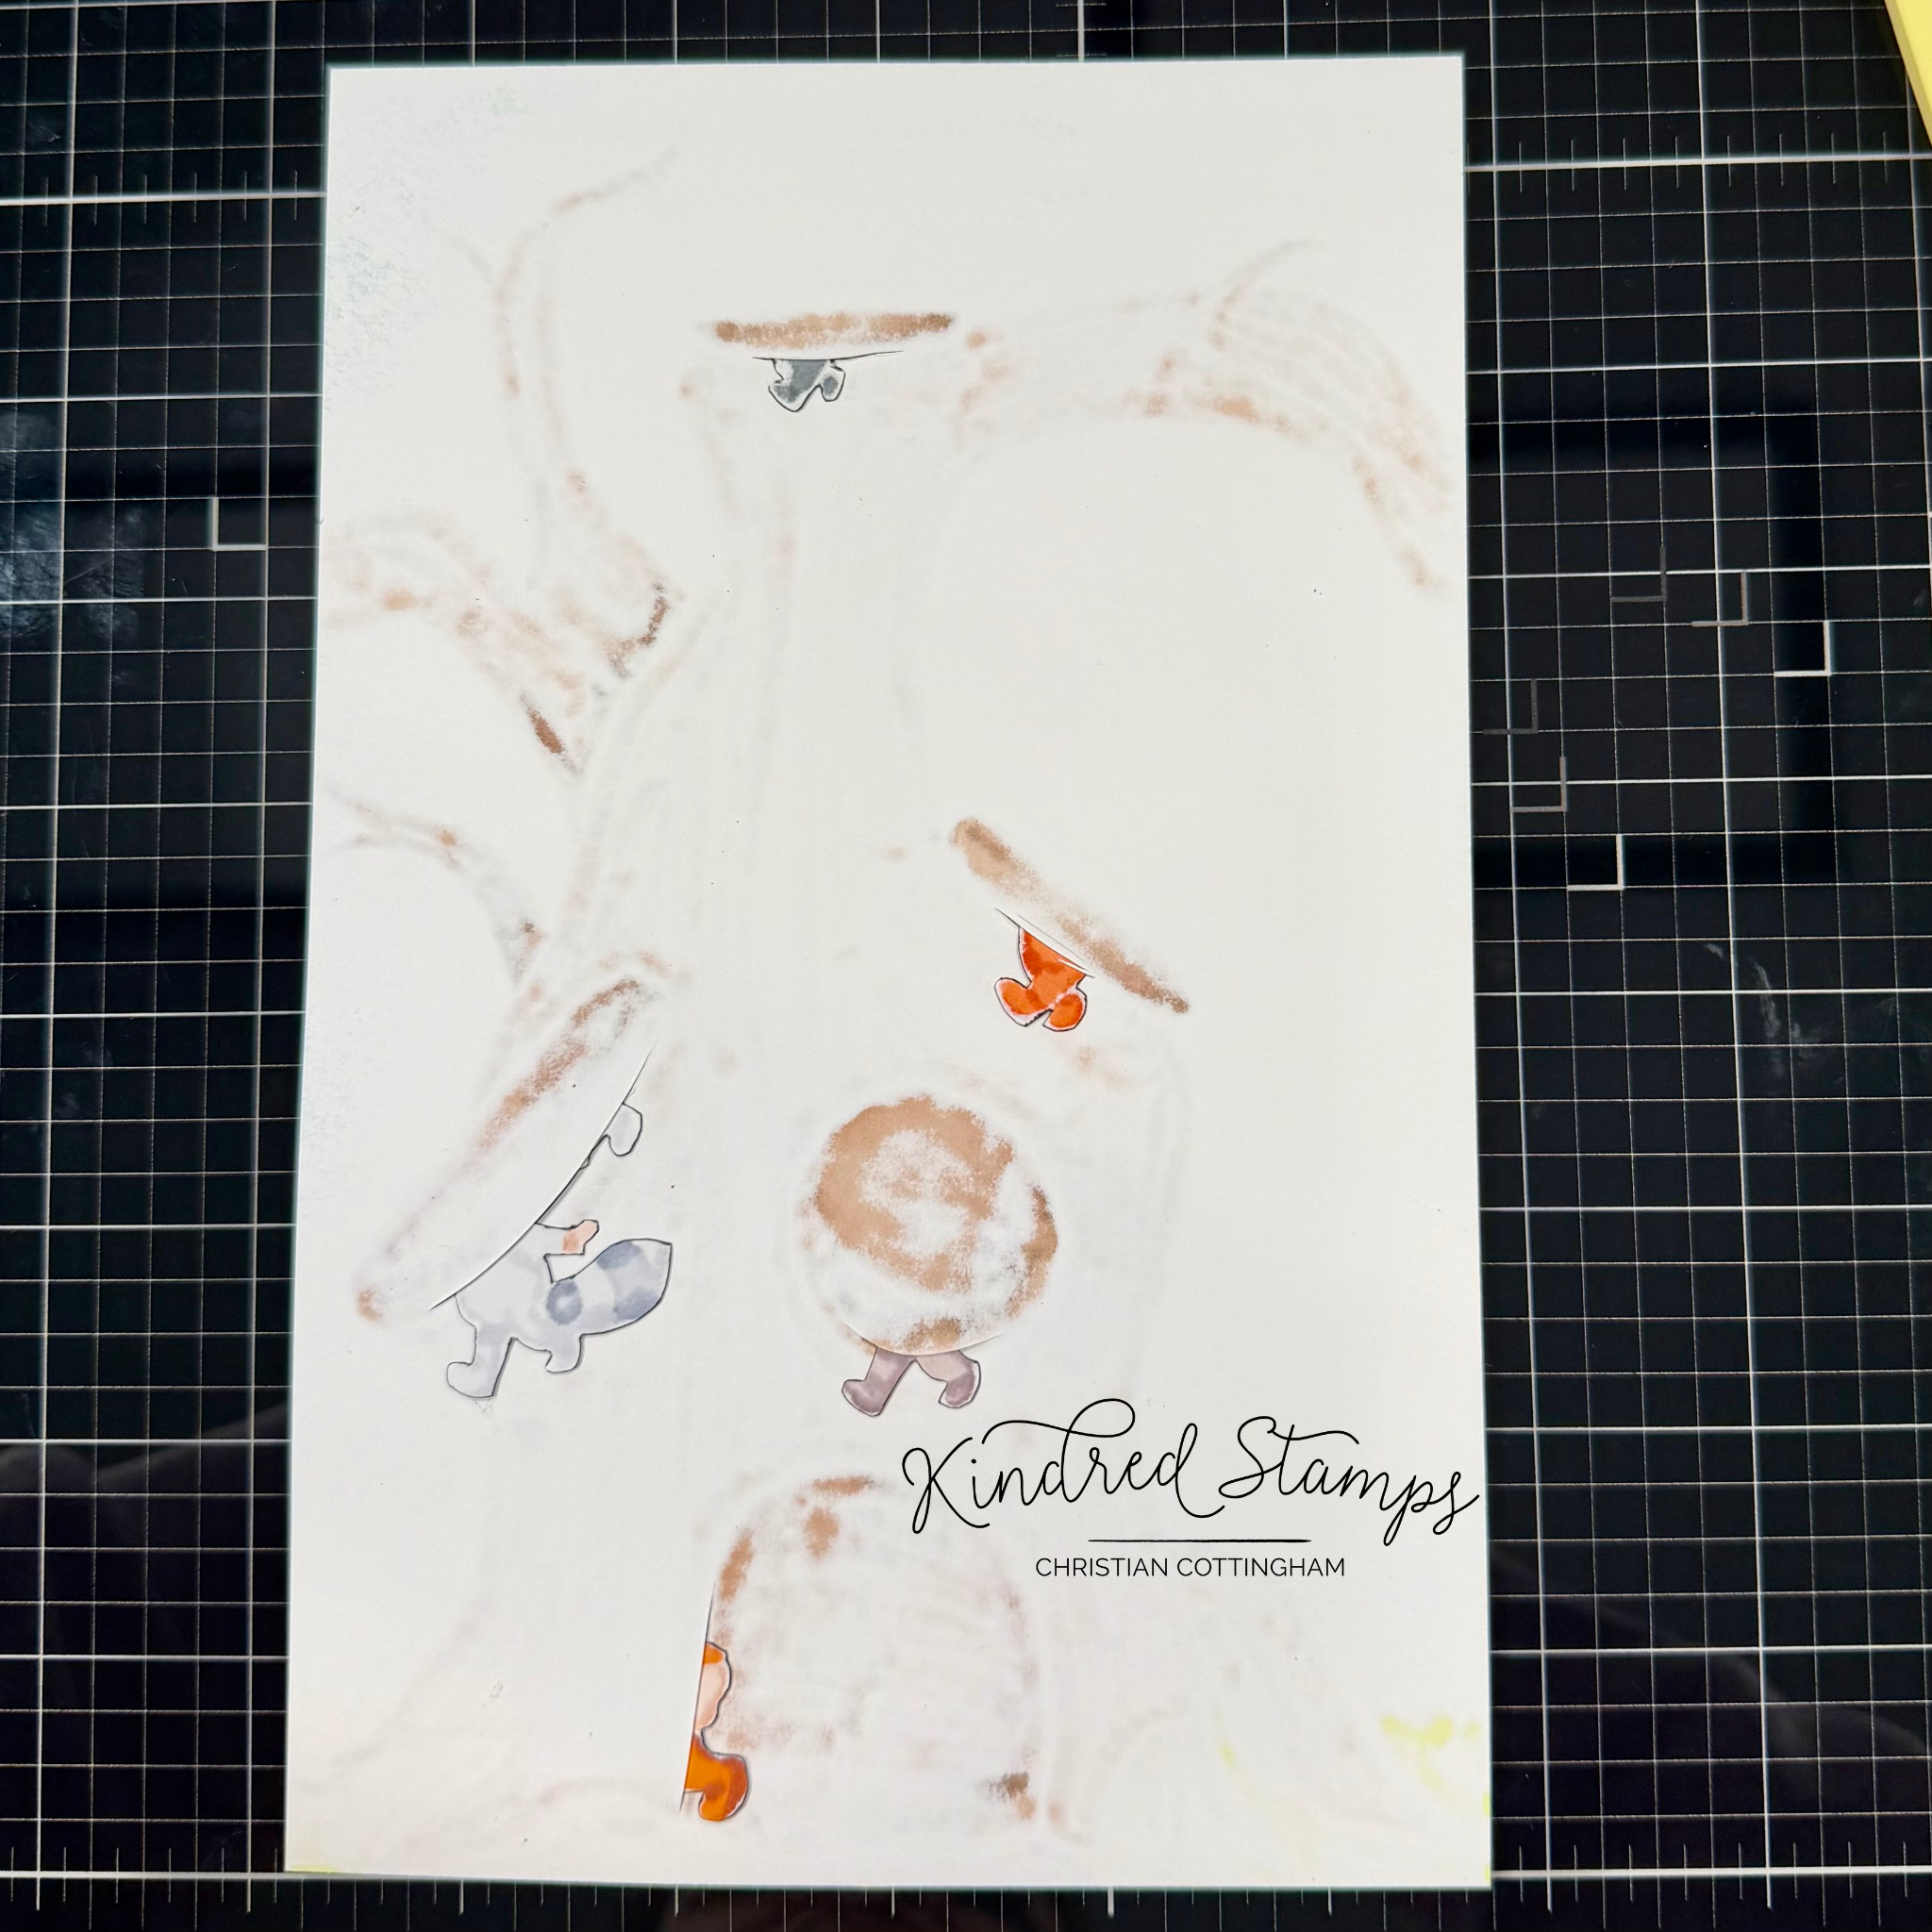
A piece of white cardstock (8.5 inches by 5.5 inches) was cut down, okay who am I kidding, I took it from my card base stock…. I roughly sketched a tree on the card panel using the Get Lost images to determine the size of the openings needed for the entry points. Once my tree was sketched to my liking, I used a fine liner pen and traced the basic tree outlines (think of a coloring book page, just the black lines and you get to do the magic).
The sky was ink blended (Sea Glass Gina K Designs) with a light hand and no cares if it went inside the lines of the tree as it was going to be colored brown. I did leave the ground color free as that was going to be filled with an alcohol marker.
To color the tree, in sections I layered the colors. The tree base was inked with Altenew Artist Markers in Y911 (Sand Dunes). Then the wiggly lines were added with Y821 (Rocky Shores) and Y932 (Mocha). The grass was flicked into the sky with G702 (Frayed Leaf) and the path in front of the door was colored with Y911 and Y821 stippling.
The sentiment was stamped on a piece of white card stock. A mat was cut slightly larger from the same white cardstock and the colored with the Y932 and Y821 markers. The sentiment was glued to the tree card panel. Using a black fine liner, the lines were drawn to a point to act as the strings for hanging the sign. A silver gel pen dot was placed were the lines intersected.
To insert the Get Lost images into the tree, a craft knife was called into action. Small slits were cut and the boys were inserted and glued into place.
Finally, the card panel was ready to be glued to an A9 card base. It truly amazes me that just drawing some simple line and some sloppy coloring of squiggly lines really brings this tree house to life. I’ve always like bigger cards and this one is no exception!
Size: A9 (5.5 inches by 8.5 inches)
The entire Kindred Stamps release will be available this Friday at 8am PST/11am EST. Be sure to subscribe to the Kindred Stamps blog to see a daily line up of sneak peeks from our amazing Design Team! Come join the Fan Club and release event to be part of the release fun, and you may just win some Kindred Stamps credit!!
Coloring Guide:
Bear:
Flesh: OR7.2/ OR7.1/ OR2.0
Ears: R5.5/ R5.3
Suit: O2.5/ O2.7
Hair: OR2.3/ OR1.3
Fox:
Flesh: OR7.2/ OR7.1/ OR2.0
Mouth: R5.5/ R5.3
Hair: YO2.5/ YO2.3
Ears: R5.5/ R5.3
Suit: OR1.6/ OR1.4
Rabbit:
Flesh: OR7.2/ OR7.1/ OR2.0
Mouth: R5.5/ R5.3
Suit: RG5/ RG3; RG0
Ears: R5.5/ R5.3
Skunk:
Flesh: OR7.2/OR7.1/ OR2.0
Suit: NG9/ NG7
Raccoons:
Flesh: OR7.2/ OR7.1/ OR2.0
Mouth: R5.5/ R5.3
Hair: OR2.7/ OR2.6
Suit: CG5/ CG3/ CG1