Kindred Stamps July Release: Unstoppable Hero
When you have love for humanity, nothing is unstoppable! The Unstoppable Hero sees the good in everyone and that empathy defines humanity. This stamp set showcase the Unstoppable Hero who will never give up no matter what is thrown at them. Let’s fly right into the making of these cards.
This blog utilizes affiliate links. If you choose to click on the links provided to purchase, you are supporting me as I receive compensation for your purchase. If purchasing is not in your books, no worries, I hope you find inspiration for projects you design. By clicking on the links, you are letting Kindred Stamps know that you like my content and to keep bringing me back. Thanks for your time now let’s be unstoppable!
Project One: Unstoppable Pinwheel

Unstoppable Hero, Kindred Stamps
When you can’t decide on just one scene, you have to make four!! This pin wheel card features all four of the characters from the Unstoppable Hero stamp set each on their own page. Let’s break down this simple by fun design!

Unstoppable Hero, Kindred Stamps
To make the card base pin wheel that the scenes will be on, I pulled out some heavy weight black card stock. The black card stock was cut down to 4 1/4 inches by 3 3/4 inches. The panels were then scored one inch from the left on the 3 3/4 side of the panel leaving two distinct areas (1 inch and then 2 1/4 inches). The one inch section was glued to the next panel by lining up one inch scored section with the the score line and the on another panel. This was repeated until all four pieces were attached and the the final connection was closed to form the box in the center of the pin wheel card. The pin wheel was set aside for some scene building.

Unstoppable Hero, Kindred Stamps
Four pieces of white card stock were cut to 4 inch squares. This will be the scenes that will be adhered to the pin wheel. To make life easier, the scene will be made than cut prior to assembly. Because I did not want added weight and bulk to the card, I choose to have my scenes drawn flat. I am not an artist and can barely draw a straight line even with a ruler… So I pulled out the City Scapes Die and die cut it from a piece of heavy weight 5 inch by 7 inch card stock. The die was centered in the middle of the card stock because I will be using this paper as a stencil and a mask.
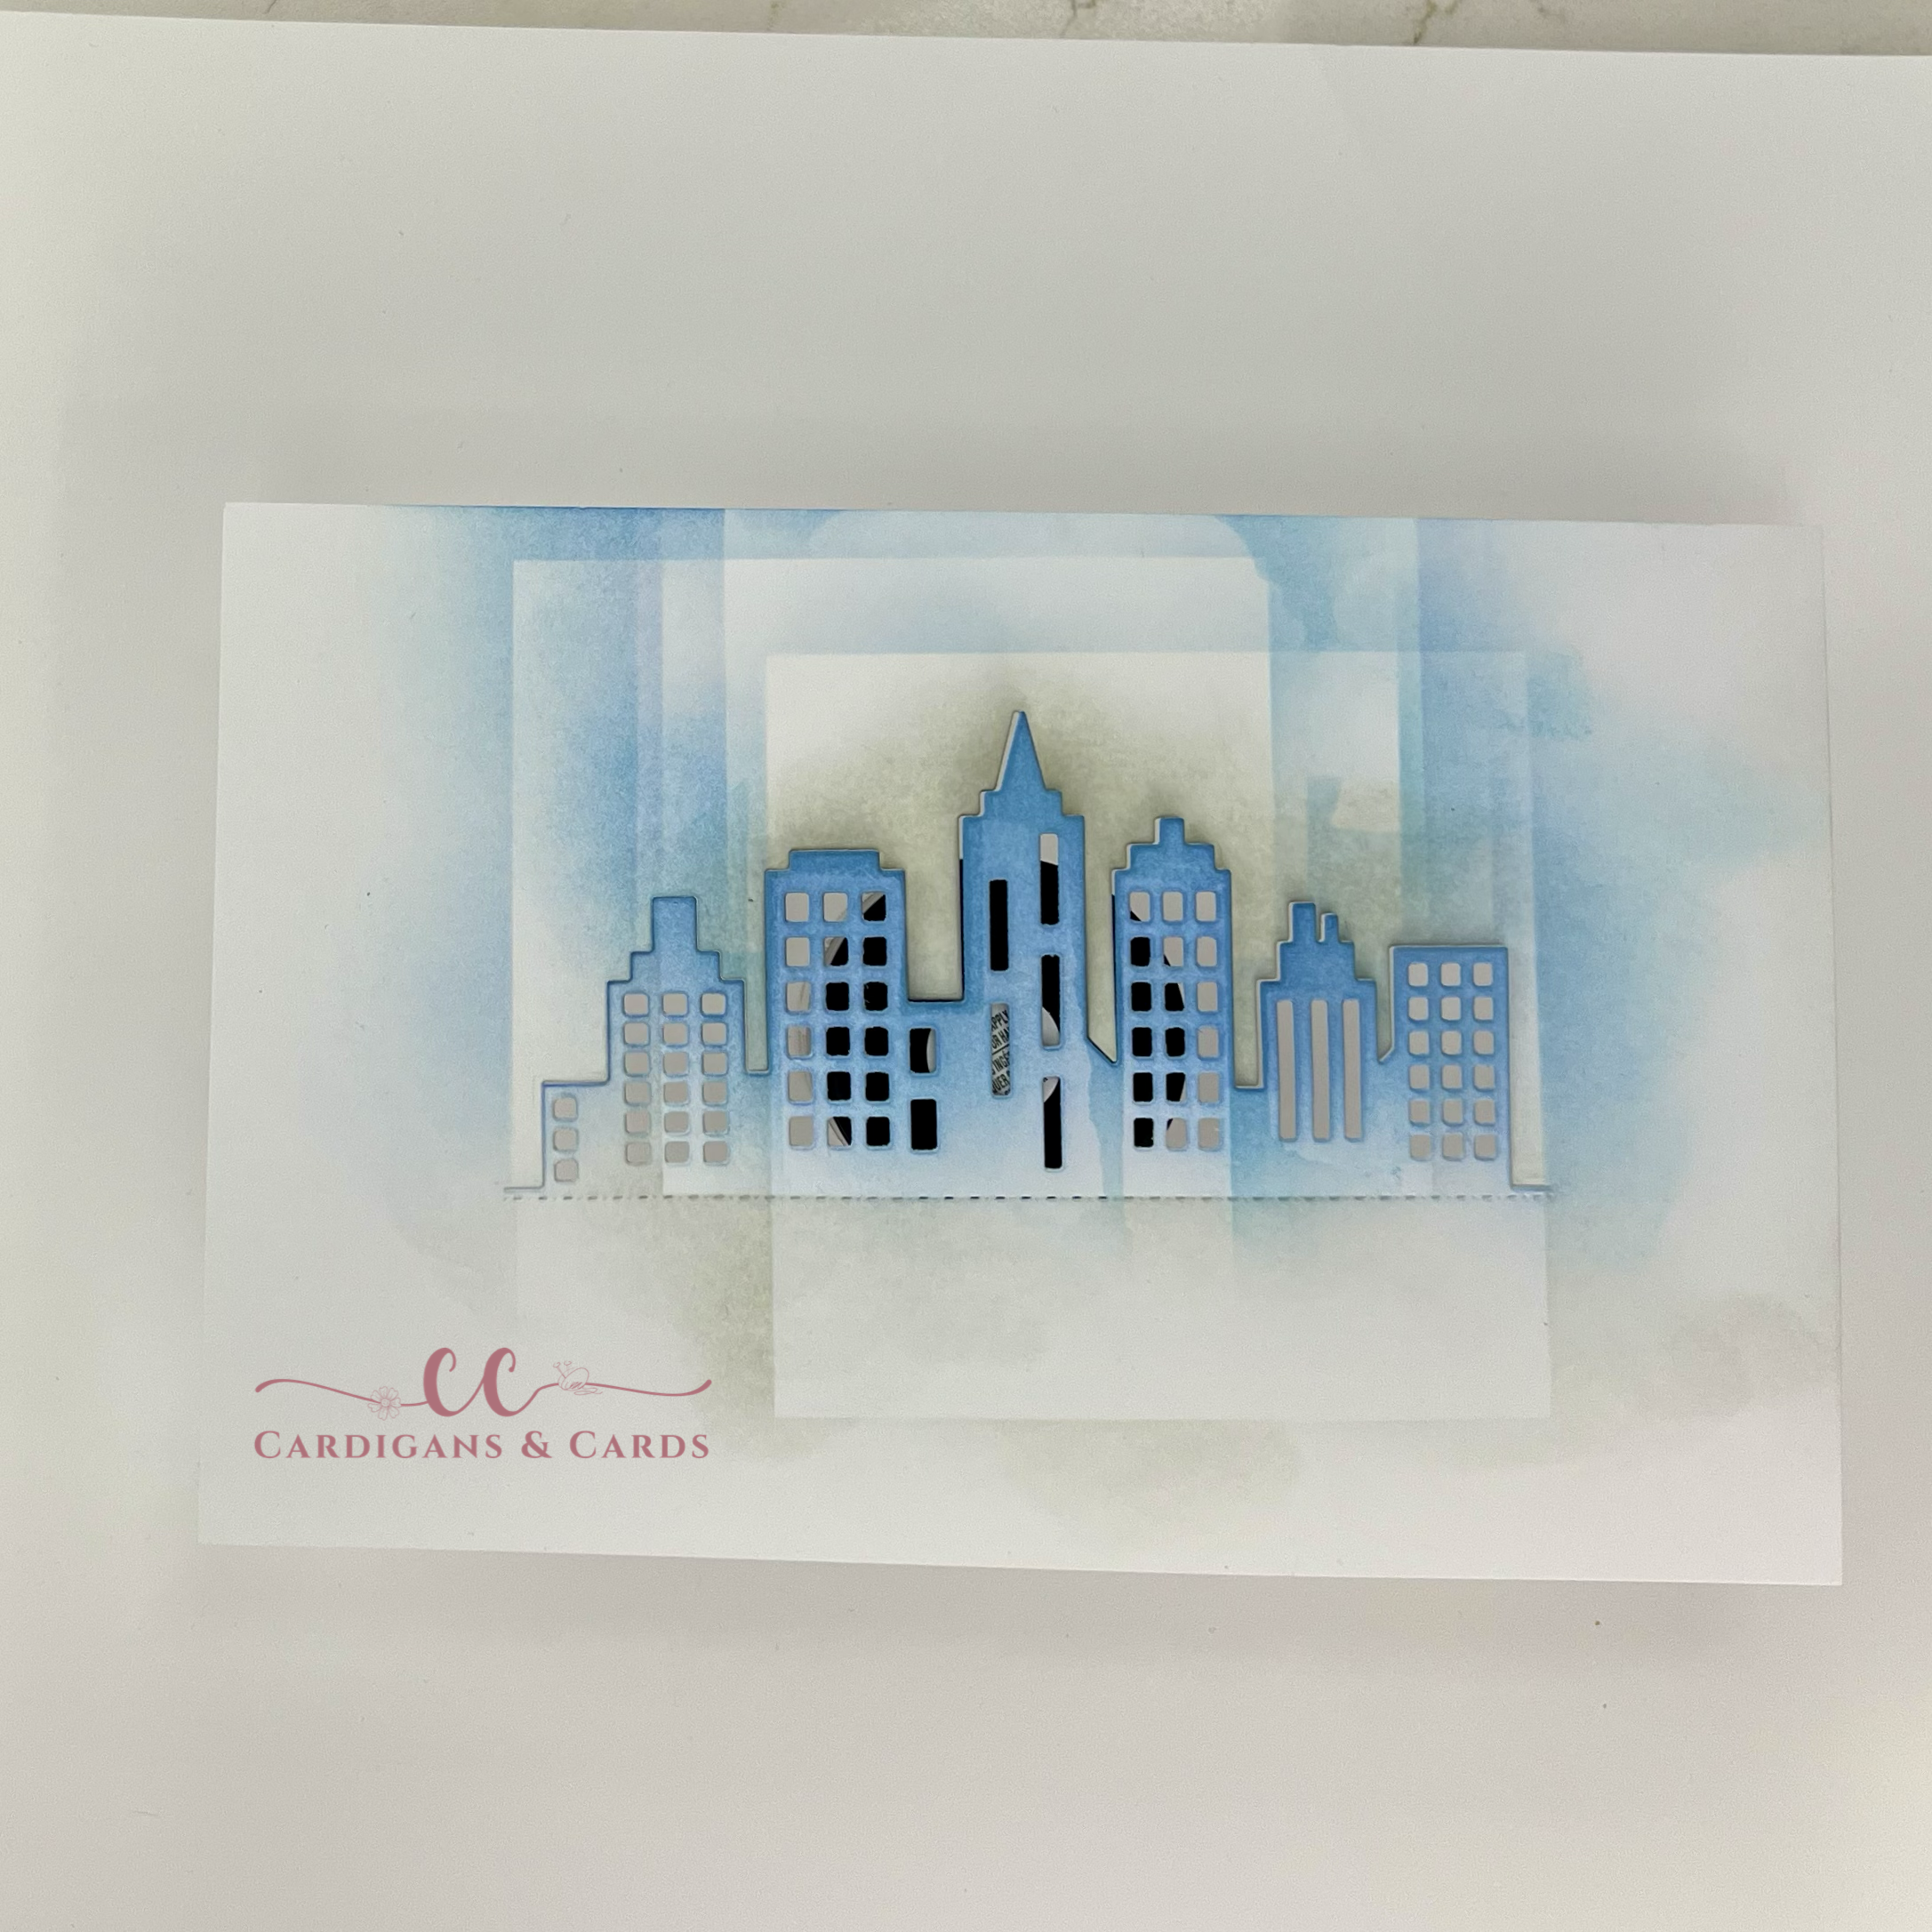
To make the background, the homemade stencil was placed on the 4x4 inch panel. To ink the sky, the panel was inserted to have the buildings be on the front of the panel. Low tack tape masked the windows and held the panel in place on the back of the stencil. The sky was inked with Gina K Ocean Mist unevenly to give the appearance of soft feathery clouds. When the sky was completed, the stencil was repositioned and now the building were behind the panel and the sky was masked with the top of the building cut outs. The building was then inked with Altenew Limestone. I pulled out my fine liner pen and drew the lines around the stenciled areas. The windows were then colored with an Olo Marker (B2.0). I did not try for perfection on the lines, they are supporting characters in my scene.
Unstoppable Hero, Kindred Stamps
Each of the 4 panels were completed alternating where the buildings were placed and which buildings made it to the scene. On three of the four panels, a matching sentiment was stamped in pigment ink. The fourth panel was left blank for writing a personal greeting. With the four panels complete, the scene panels were cut at 1 1/2 inches. These panels were centered onto each of the pin wheel bases.

Unstoppable Hero, Kindred Stamps
The Hero Boy, Hero Girl, Villain, and Reporter were stamped in alcohol safe ink and colored with Olo Markers (See Coloring Guide). Each of the images were fussy cut out on the line and edged with a black marker. The Unstoppable Hero images were glued to their designated scenes. Who says you can only pick one image for a card, you to can be Unstoppable!
Card Size: A2 (5.5 inches by 4.25 inches)
Project Two: Comic Pages

Unstoppable Hero, Kindred Stamps
Reading the comics when I was younger was one of my favorite things to do. This card features all the characters from the Unstoppable Hero stamp set to create a comic style card. Newsflash…. It worked!
To start the planning the card, I took a 5 inch by 7 inch piece of white card stock and found the center…. This was a feat of its own because, math…. I penciled in the center line and then divided the card into 3rds. This gave me a total of 6 panels for the comic story to occur in. It was now time to start stamping.
The top left panel was up first. I masked off the surrounding boxes with sticky notes and was ready to start stamping… But I needed a monster for out Hero Boy to save us from. Pulling out the Dino-Mite stamp set I stamped the monster coming into the scene. With a pencil I sketched in some buildings in the background and then went over the lines with an alcohol markers safe fine liner pen. This box was then colored with Olo Markers. (Dino> YG2.5/ YG2.3/ CG3; Road> RK; Building 1> CG3/ CG5; Building 2> O7.3/ WG5/ WG3; Sky> B2.0).
The top right panel was up next! The monster needed a villain to be the mastermind behind the plot to kill our superhero and he had to have the secret gems in his possession. The gems from the Mine Workers stamp set were stamped on masking paper and cut out on the line. The gems were stamped with the points up to provide the jagged look that I wanted, masking as I stamped along. The Villain was then stamped over the masked gems so he appear behind the pile. The Villain was also stamped on masking paper and the masking was applied so I could have an ink blended background. The area around the gems were blended with Altenew Parrot fading up towards the top of the panel and then Jet Black ink from Altenew was applied from the top and outer panels into the center in a gradient application. Masks were removed and the gems were colored with Olo Markers (YG2.3/ YG1.2). The Villain was colored with Olo Markers (See Color Guide).
The masks around the panels were removed and the middle left panel was designated for our favorite Reporter. The sides of the panel were masked with some new sticky notes and the Reporter was stamped to the left of the panel to allow a space for her to call for help. She was also stamped on some masking paper, cut out, and applied to allow some ink blending on her panel. I also placed a piece of masking paper as the call out. This was traced with a fine liner pen. To ink up her scene, I used Blueberry ink from Concord & 9th. The masks were removed, and “help” was written with the fine liner. The Reporter was colored with Olo Markers (See Color Guide).
Our Hero Boy had to come in and kick some butt, and I felt that called for 2 panels. Masking paper was applied to the 3 completed panels and to the bottom right panel. The Boom and Pow from the Unstoppable Hero stamp set were stamped in their respective boxes with Gina K Cherry Red and Marigold ink. They were also stamped on masking paper and cut out. The masking paper was applied and the panel was ready to be stamped with a pin dot background stamp in black ink. All masks were removed and it was now time to finish up the last panel.
Masks were applied on 2 sides of the last panel. The sentiment and Hero Boy were stamped. A piece of masking paper was trimmed down to cover the sentiment and a mask was made for the Hero Boy. Utilizing the same Marigold ink, I applied a solid application to the panel. Prior to removing the sentiments mask, I traced the mask with a fine liner. All masks were removed and the Hero Boy was colored with Olo Markers (See Color Guide).
My comic page was trimmed down to 4 3/4 inches by 6 3.4 inches and foam tape was applied to the back. The panel was adhered to a black 5x7 inch panel which was then applied to a A7 card base.
Card Size: A7 (5 inches by 7 inches)
Project Three: Girl Power

Unstoppable Hero, Kindred Stamps
The Hero Girl from Unstoppable Hero is the floating focal point on this card. She just kicked some butt with the booms and pows and is flying away as the victor to tell you, you are amazing!
The Hero Girl was colored with Olo Markers (See Color Guide) and was fuzzy cut out on the line. A black marker was applied to the edges of the die cut to clean up the edges from my cutting abilities. She was set aside to make the pattern papers.
A piece of 5 inch by 7 inch white card stock (Neenah Classic Crest Solor White 80 lb) was placed in a stamping platform. Using the “Boom” and “Pow” exclamations, I stamped randomly around the boarder of the card panel. These were stamped intentionally off of the panel to give the illusion that the pattern was continuous. These sentiments were stamped in Gina K Design Cherry Red and Marigold inks and Concord & 9th Blueberry ink. Using an A7 die set, the inner portion of the paper was cut out, leaving the colorful paper as an inch frame. This panel was set aside for the preparation of the card base.
An A7 card base (5 inches by 7 inches) was prepped. Utilizing a pin dot stamp and black pigment ink the dots were stamped onto the front of the card base. The base was set aside to allow ink dry time while the sentiment was prepped. On a scrap of white card stock, the sentiment was stamped in the same Cherry Red ink from Gina K. This sentiment was cut down and a black mat was applied.
It was almost time to bring it together, but first I needed 2 strips of thick acetate to act as the bridge between the sides of the frame. These were approximately 0.5 inches by 4.5 inches. Using some double-sided tape, the acetate bridges were adhered to the frame sides. Foam tape was then applied over the edges of the frame. For stability, foam was applied over the entirety of the frame. The frame was attached to the card base. With liquid glue, the Hero Girl and the sentiment were placed on the acetate and allowed to dry. This does take longer than paper to paper, so don’t rush it. Finally a few shiny stars were scattered across the scene and POW we are unstoppable!
Card Size: A7 (5 inches by 7 inches)
Project Four: Flying High

Unstoppable Hero, Kindred Stamps
Our Hero Boy appears to be flying above the buildings in this fun box card! Having a card that is multi-dimensional makes the recipient feel so much more special. Let’s breakdown how to make this card featuring the Unstoppable Hero stamp set.
The Hero Boy was stamped in alcohol safe ink and colored with Olo Markers (See Color Guide). He was fussy cut out on the line to make his appearance be more eye catching. He was edged with a black marker to conceal the white edge of the paper and to crisp up his edges. He was set aside to work on his scene.
The Box Card die was cut out of heavy weight black card stock for the side, back panel, front panel, and one insert. All score lines were reinforced before assembly. The single insert was cut in half to drop the line of site and emphasize the flying nature of the Hero Boy. Because I have trust issues with sticky tape and tape runners, I used liquid glue to assemble the box card. While this dried, I cut out the front panel, side panels, the main background panel, and a piece of card stock for the back panel of the box card out of white card stock.

Unstoppable Hero, Kindred Stamps
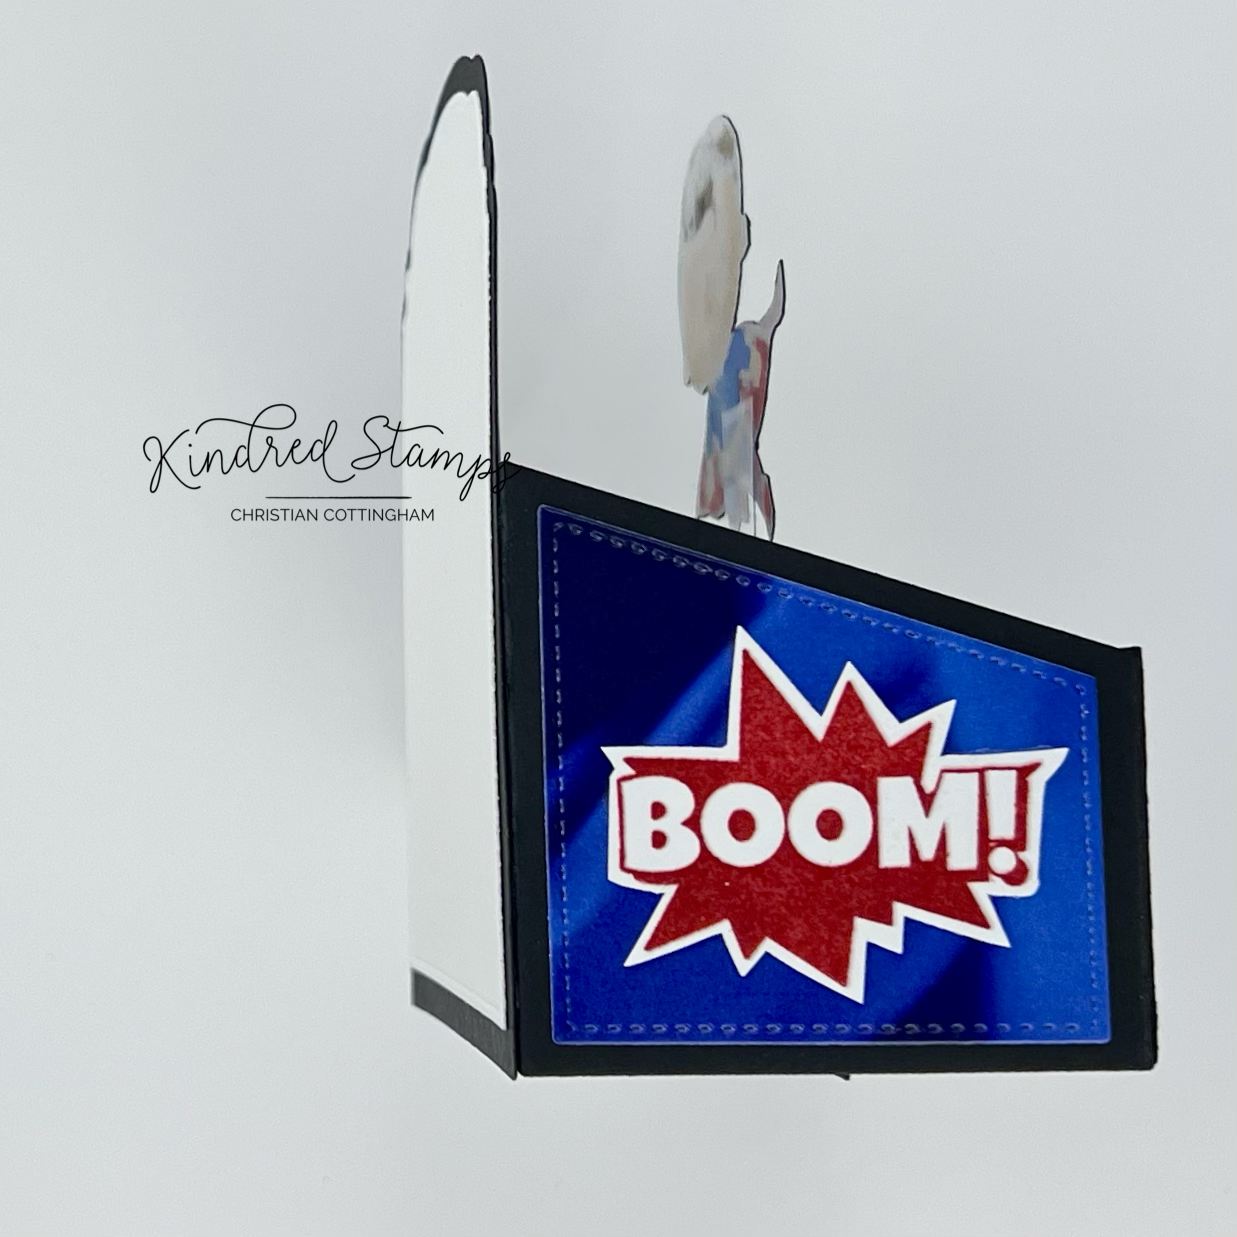
The side panels were up first. They were stamped with “Boom” and “Pow” with Gina K Designs Cherry Red and Marigold ink. Without removing them from the stamping platform, I allowed the ink to dry a few minutes. The panels were then prepped with an antistatic tool and the stamps were inked again with embossing ink. Clear Embossing powder was applied and heat set. This provided a little shine and kept the images vibrant. This worked a lot better than my first brilliant idea… I used Glossy Accents over the die ink and lets just say it wasn’t pretty. The colors bled and the Glossy Accents tinted. They were thrown away… it’s just paper. Don’t be me, be patient and use Clear Embossing powder. The side panels were glued to their respective sides.
Unstoppable Hero, Kindred Stamps
Next up, the front panel. The sentiment was stamped using masking so there was a two-tone effect on the sentiment. The top portion of the sentiment was stamped in Gina K Cherry Red and the second line of the sentiment was stamped in Blueberry ink by Concord & 9th. It was finally time to create my back panel for the box card.
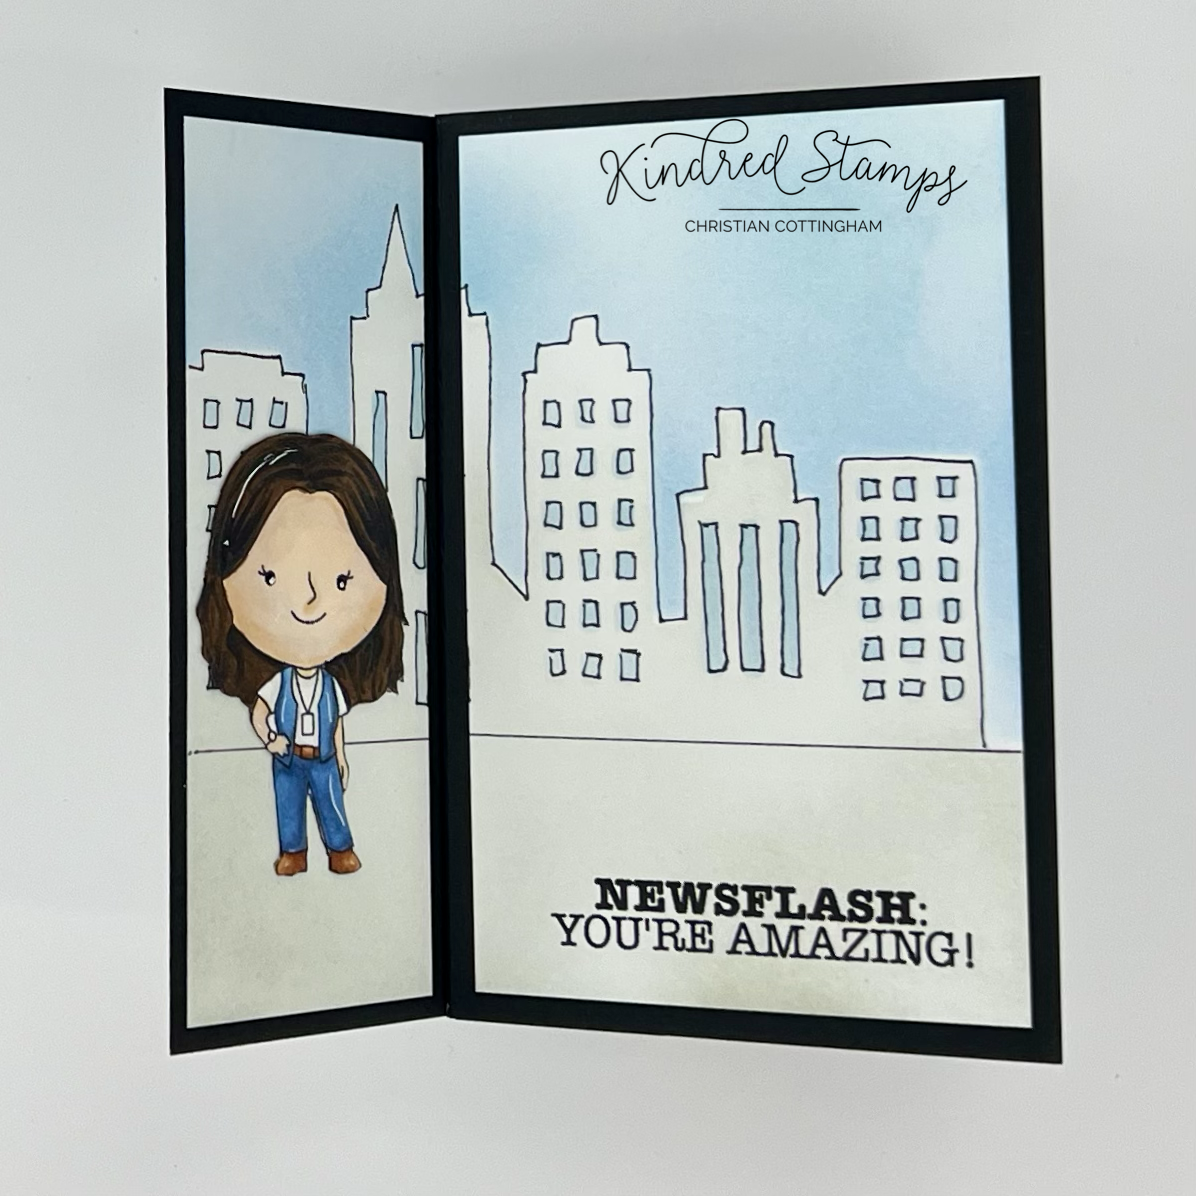
The City Scape Die was cut from black card stock and then cut again with the panel die from the Box Card Die. This was done so the stitching would be continuous. This was set aside for the coloring of the sky. To achieve this, I utilized the mask from the Pin Wheel card. I place tape over the windows and positioned the building mask at the level that I had die cut the City Scape at. Utilizing the Grass and Clouds Stencil, I placed the negative clouds on my scene. With the buildings and clouds masked off, the sky was ink blended evenly with Gina K Ocean Mist ink. The masks were removed leaving white space where the buildings will be placed. In the window sections, I tinted the paper with Olo B0.2 marker. Finally, the City Scapes die cut was glued to the sky panel. The complete scene was glued to the black card base. The white panel for writing the personal greeting was also applied to the back of the Box Card base.
The Hero Boy was almost ready to take flight! A piece of thick acetate was trimmed down and attached to the back of our hero. When the height was acceptable, the acetate was adhered to the base of the back side of the insert. To complete the card, a few shiny stars were arranged around the sentiment. The Hero Boy was now flying high!
Card Size: A2 (5.5 inches by 4.25 inches) when in envelope.
Project Five: Shaker Up
Unstoppable Hero, Kindred Stamps
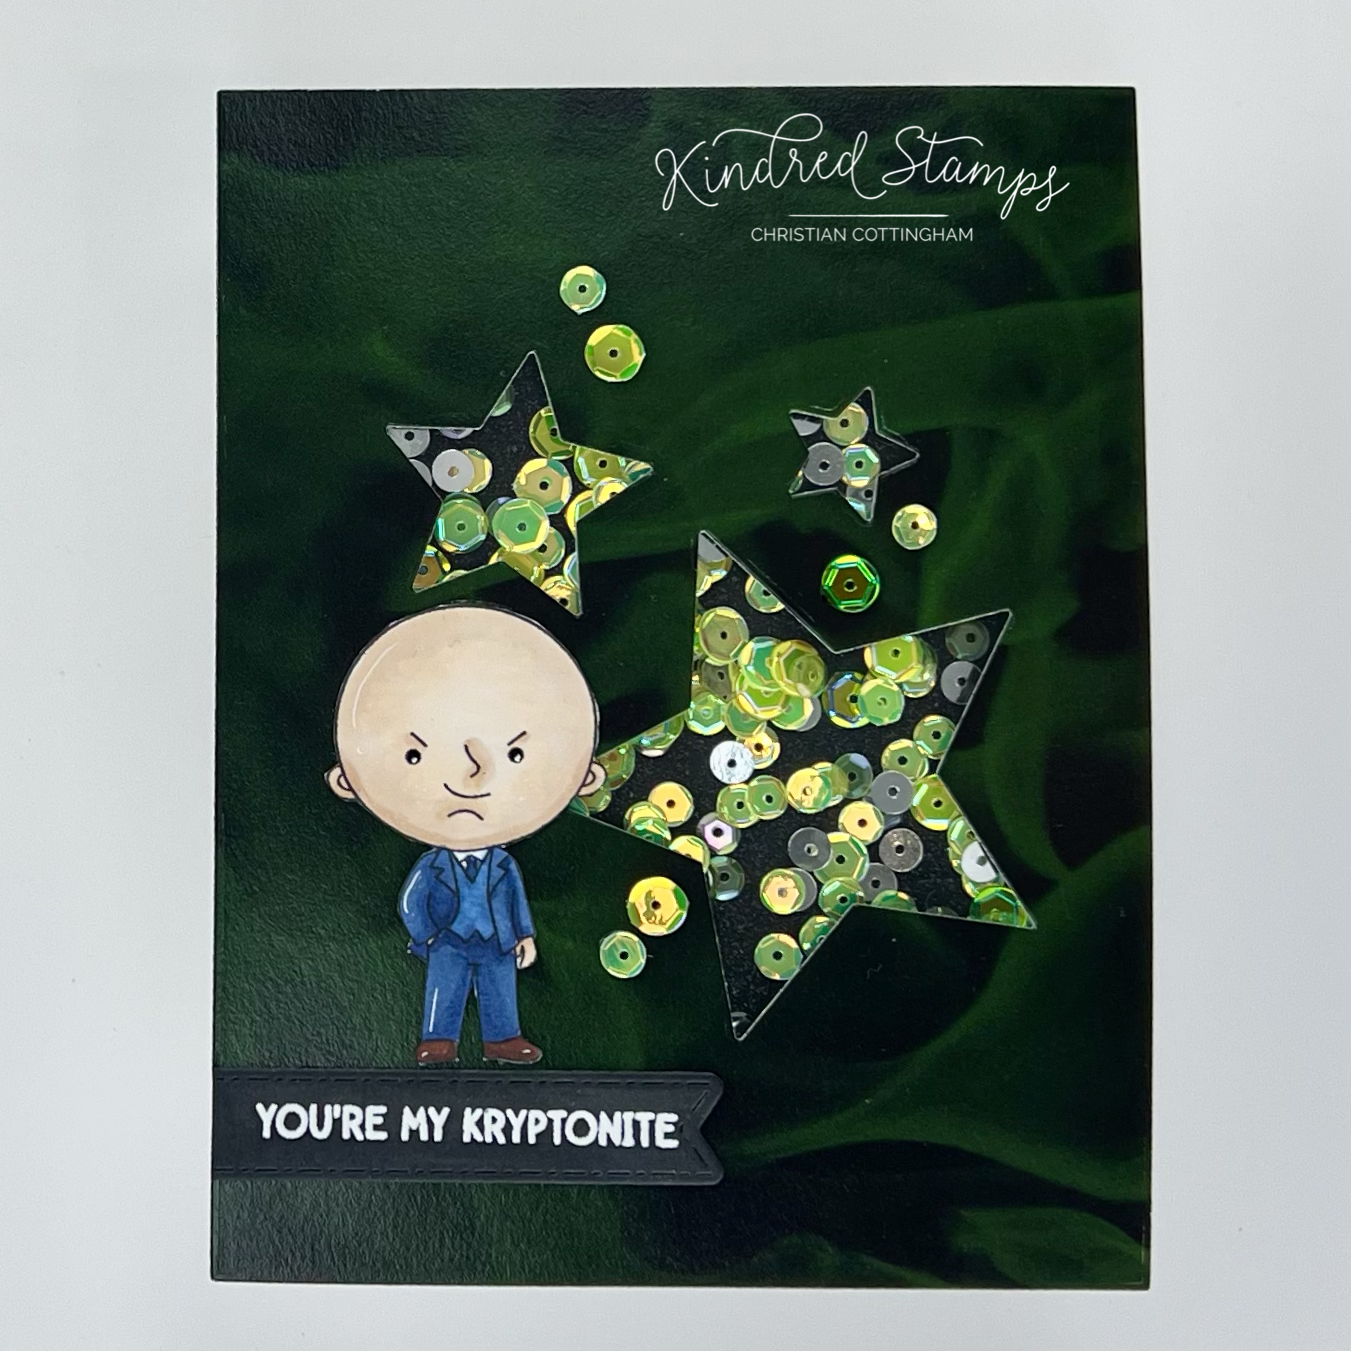
Everybody has a weakness of some sort and this villain knows that you are mine! This card show case the villain in all his glory from the Unstoppable Hero set! Let’s shake it up and see how this card was made…
The Villain was colored with Olo Markers (See Color Guide), fussy cut out on the line, and then edged with a black marker so no white would show on the sides. He was set aside for the making of the shaker panel.
Pulling out the Flames Paper Pack, I picked of the green flames to match my sentiment. The card stock was cut to an A2 panel (4.25 inches by 5.5 inches). I pulled out the Card Basic die set and select the 3 sizes of the star. I placed my villain on the paper to judge where to place my stars. The stars were taped down with low tack tape and die cut out. Using the packaging that the stamp set came in, I cut down a panel of acetate that fit behind the stars. This was adhered with strong double sided tape. Foam tape was then applied around the stars to make each star it’s own shaker pocket. A piece of black glitter card stock was cut to fit behind the stars. Shaker bits were placed in all of the star wells and the cut down piece of glitter card stock was adhered to the foam tape around the stars. This encapsulated the shaker bits and made it easier to apply the card panel to my card base.
With the base attached, the front was finished. The sentiment was stamped with Embossing ink on a prepared piece of black card stock. Snowfall Embossing Powder was applied and heat set. When cooled, the sentiment was die cut with the Sentiment Strip Dies. The sentiment was positioned hanging off the page and the excess was trimmed off. This will act as the grounding for the villain. The colored villain was glued flat to the card panel. Finally, a few sequins from the shaker bits were adhered to add a little funk. I love the simplicity and unexpected shaker elements in all the stars.
Card Size: A2 (4.25 inches by 5.5 inches)
The entire Kindred Stamps release will be available this Friday at 8am PST/11am EST. Be sure to subscribe to the Kindred Stamps blog to see a daily line up of sneak peeks from our amazing Design Team! Come join the Fan Club and release event to be part of the release fun, and you may just win some Kindred Stamps credit!!
Coloring Guide (Old Markers):
Hero Boy:
Flesh> OR2.0/ OR3.2/ OR4.2
Belt> Y2.3/ Y1.2
Bodysuit> B0.7/ B0.5
Cape/ Boots/ Roos: R0.5/ R1.5
Hair> O7.8/ O7.7
Hero Girl:
Flesh> OR2.0/ OR3.2/ OR4.2
Hair> YO2.5/ YO2.3/ YO2.2
Belt/ Boot Tip> Y2.3
Shirt> B0.7/B0.5
Villian:
Flesh> OR2.0/ OR7.1/ OR7.2
Suit> B4.7/ B4.6/ B4.3
Shoes> OR4.8/ OR4.7
Reporter:
Flesh> OR2.0/ OR7.1/ OR3.2
Teeshirt> WG1
Belt> O2.7/ OR4.4
Pants/ Vest> B4.6/ B4.3
Hair> BK/ OR3.7