Space Smut: Kindred Stamps June Release
Mission Log… encountering a new Kindred Stamps release with Space Smut puns of the perfect kind… Well to the June release of Space Smut!! This small but mighty set is perfect for some spacey smutty puns! There is a card for every sentiment on this set, so buckle in friends before we head into warp speed.
This blog utilizes affiliate links. If you choose to click on the links provided to purchase, you are supporting me as I receive compensation for your purchase. If purchasing is not in your books, no worries, I hope you find inspiration for projects you design. By clicking on the links, you are letting Kindred Stamps know that you like my content and to keep bringing me back. Thanks for your time and let’s get naughty *wink wink*
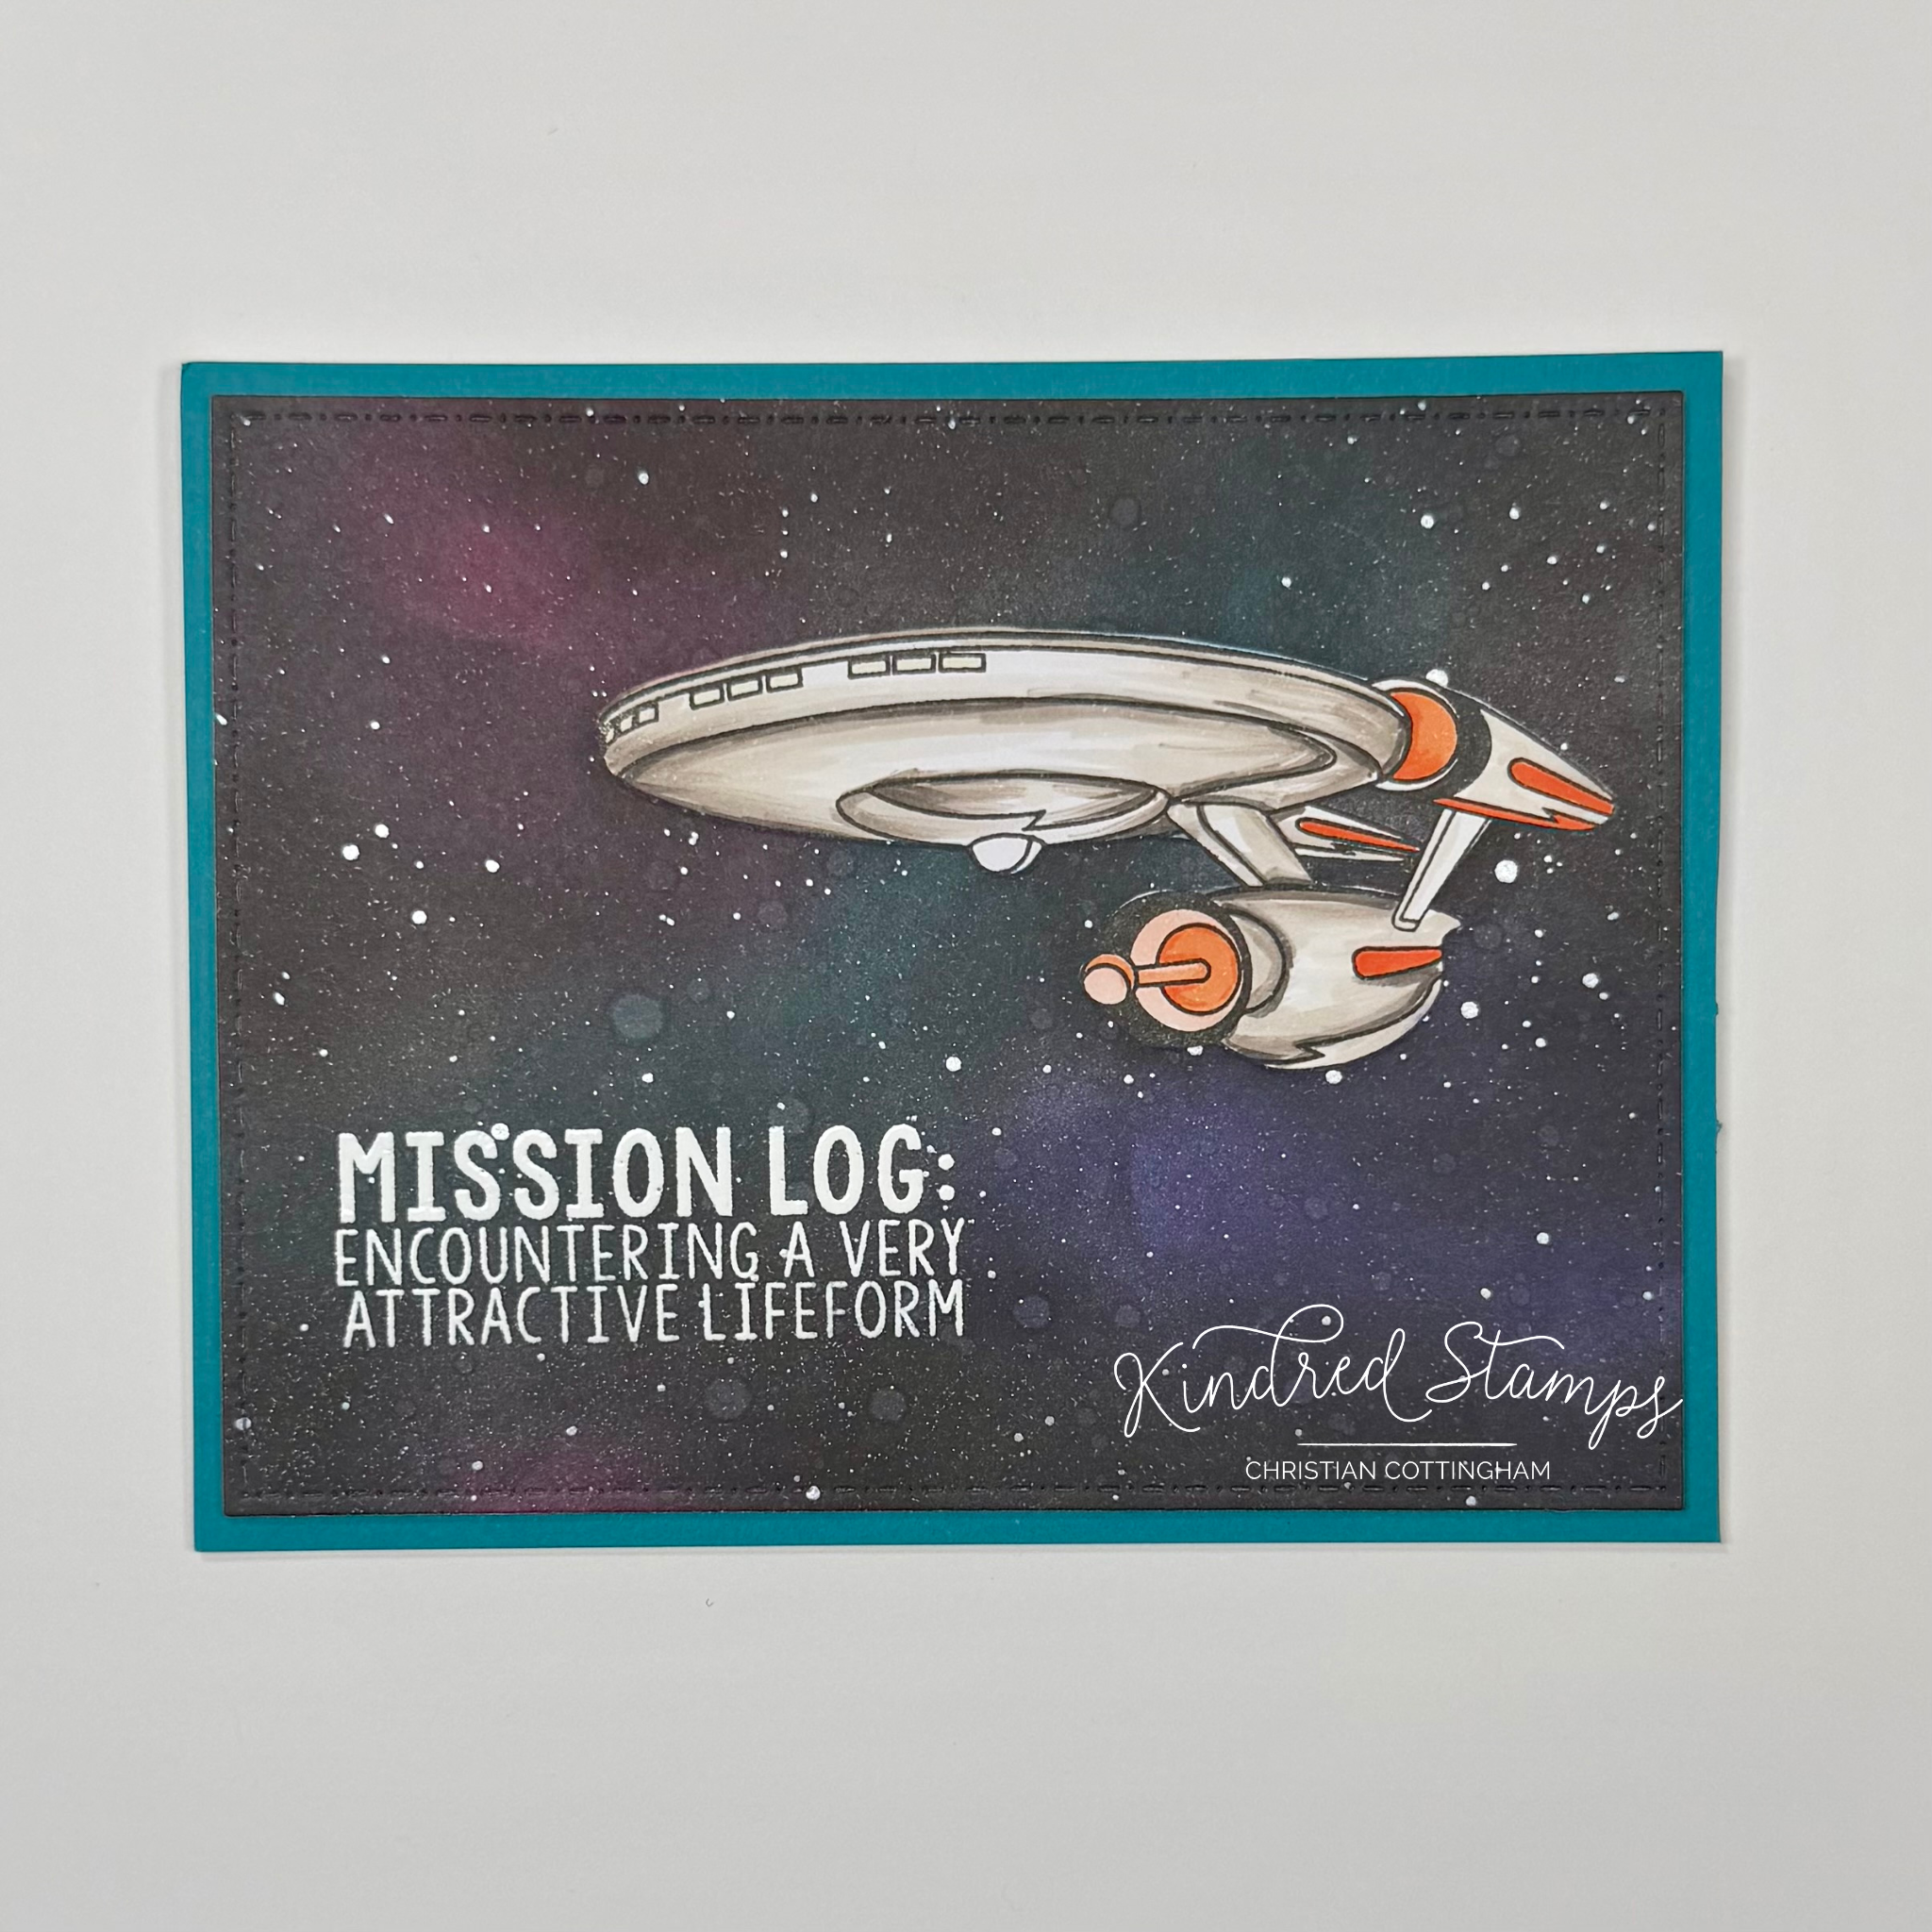
Card One: Mission Log
Space Smut, Kindred Stamps
Mission Log; Encountering A Very Attractive Life Form…. This Space Smut sentiment screamed galaxy and what better to show of the sentiment than some deep dark space!
The Ship from Space Explorers was stamped with alcohol safe ink on a panel of smooth white cardstock. A mask was stamped at the same time, fussy cut out on the line and then placed over the ship on the card panel.
The galaxy was ready to be made! Blue Lagoon/ Dark Lilac/ and Petunia (Gina K Designs) were blended haphazardly blotchy pattern on the card panel and over portions of the mask. Once happy with the mess on the paper, the Black Soot (Distress Ink) was applied liberally with a foam applicator over the entirety of the card panel. Allowing a lighter hand over the colorful splotches but still ensuring there was black over them. Once satisfied, a sprinkling of water was spattered over the very inky card panel. A piece of paper toweling was utilized to lift any spatter pooling that remained. With Perfect Pearls, in the color way Perfect Pearls, a fine spattering was applied.
The panel was allowed to drive. When ready, the mask was removed and color was to commence. The Ship was colored with Olo Markers (See Color Guide). The panel was set aside to completely dry for a day. There was a lot of ink on the panel and Distress especially needs a longer dry time.
The dried panel was cut down with the largest rectangle in the Card Basic Die set. The galaxy scene was prepped with an antistatic tool and the sentiment from the Space Smut set was then stamped with embossing ink. Snowfall Embossing powder was applied and head seat.
An A2 card base was prepped. A piece of teal cardstock was applied to the front panel of the card base. The galaxy panel was popped up with thin foam tape. This mission was accomplished!
Card Size: 5.5 inches by 4.25 inches (A2)
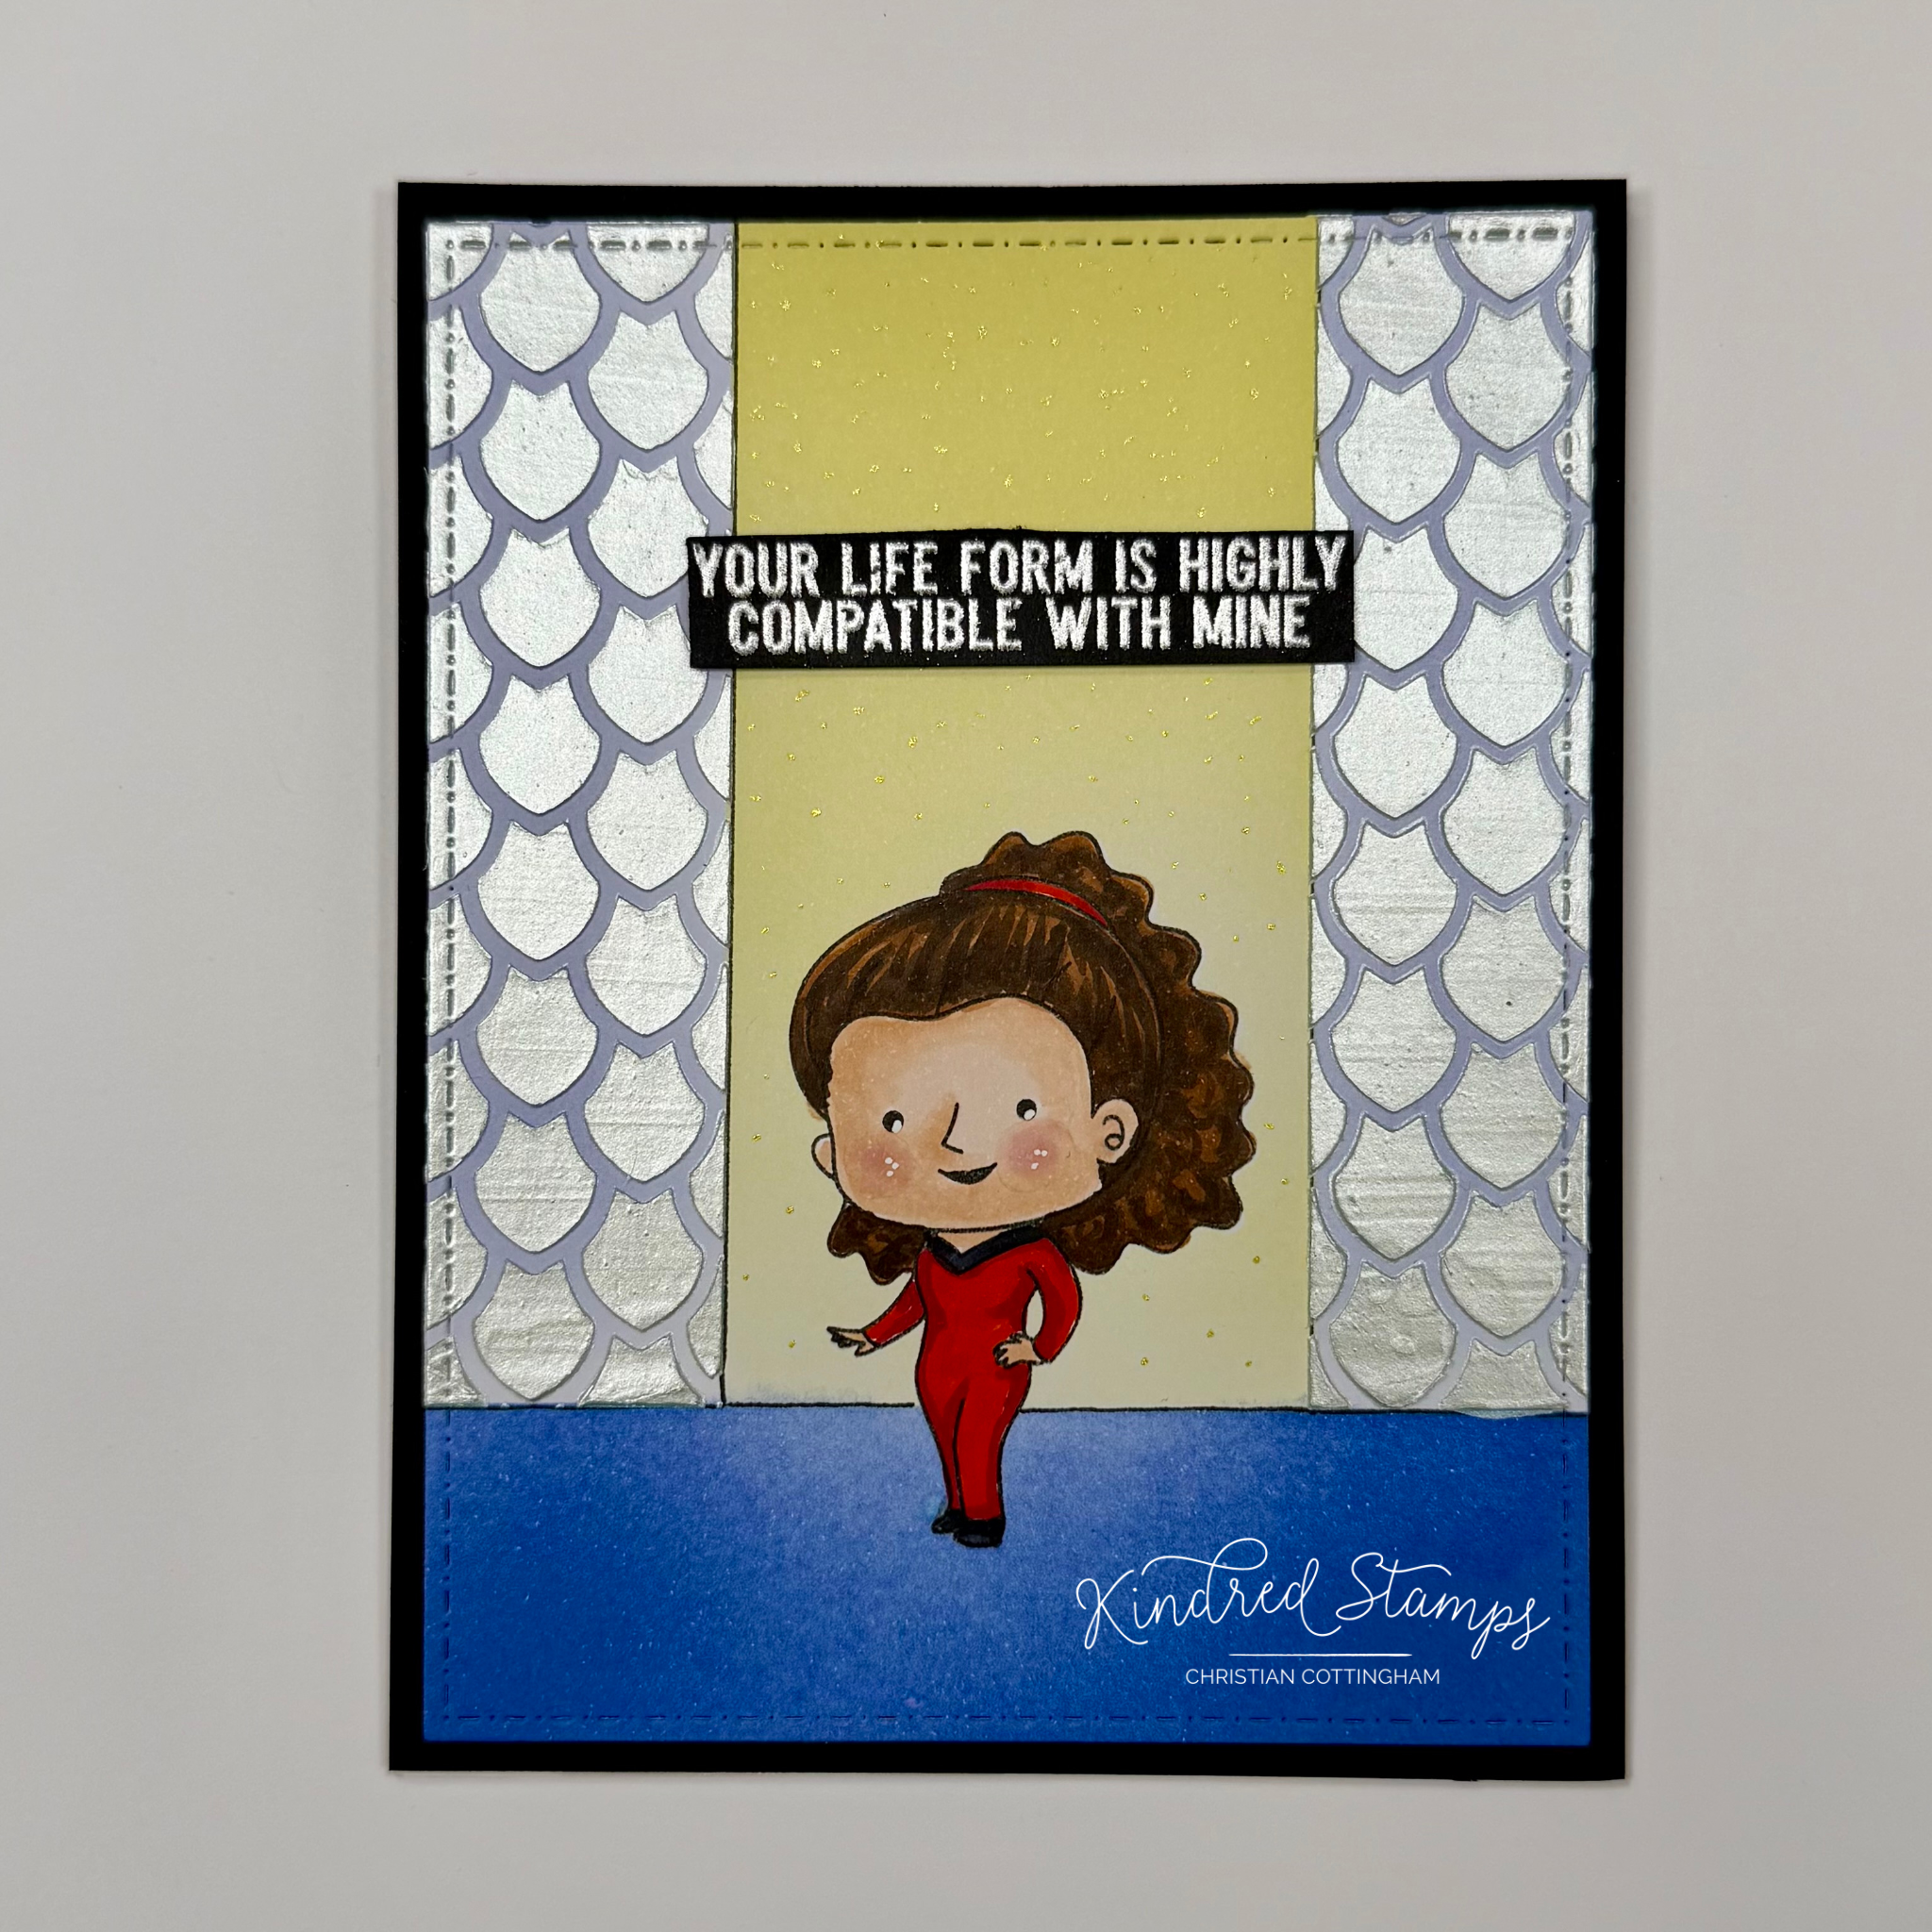
Card Two: Compatible Life Form
Space Smut, Kindred Stamps
Compatibility is what it’s all about! Boy oh boy, the Space Smut delivers! This sentiment goes with any stamp set, but The Next Space Explorers paired perfectly. Lets break it down.
The Next Space Explorer Woman was stamped in alcohol safe ink on a piece of smooth white card stock. The Woman was then stamped on a piece of masking paper and fussy cut out on the line and placed over the stamped imaged. The floor was sketched with pencil and then traced with a fine liner pen. Masking paper was applied. The floor was ink blended with Blue Denim ink (Gina K Designs). The mask was removed and placed over the blue blended floor.
A mask was then placed on each side of the center of the panel, leaving a “beam” area that was centered around the woman. A fine liner pen was utilized to trace the line on the masking paper. This was ink blended with a gradient appearance with Lemon Drop ink (Gina K Designs) with a heavier hand at the top of the panel and then lighter towards the floor. Once this blended, the masks were removed and new mask was then placed to cover the beam. With the remaining ink on the brush, a light blending of the ink was applied to tint the paper.
Pulling out the Dragon Scales Stencil, the card was centered and a thin layer of TCW Stencil Butter in Oyster was applied. The masks were removed carefully to prevent any smearing of the paste. The panel was set aside to dry.
The Woman was then colored with Olo Markers (See Color Guide). The panel was die cut with the large rectangle from the Card Basics Die Set. Thin foam tape was applied to the back of the panel.
The sentiment from the Space Smut stamp set was stamped with embossing ink on a black cardstock that was prepped with an antistatic tool. Silver embossing powder was heat set. This was trimmed down to be a sentiment strip. A piece of thin foam tape was applied to the back of the strip.
To assemble the card, an A2 card base was prepped. A panel of black cardstock was adhered to the card base. The card panel was applied with the foam tape to the panel. With a yellow glitter pen a dotted pattern, heavier at the top of the beam and lighter at the floor level, was applied. The sentiment strip then adhered at the top third of the card centered in the beam.
Card Size: 5.5 inches by 4.25 inches (A2)
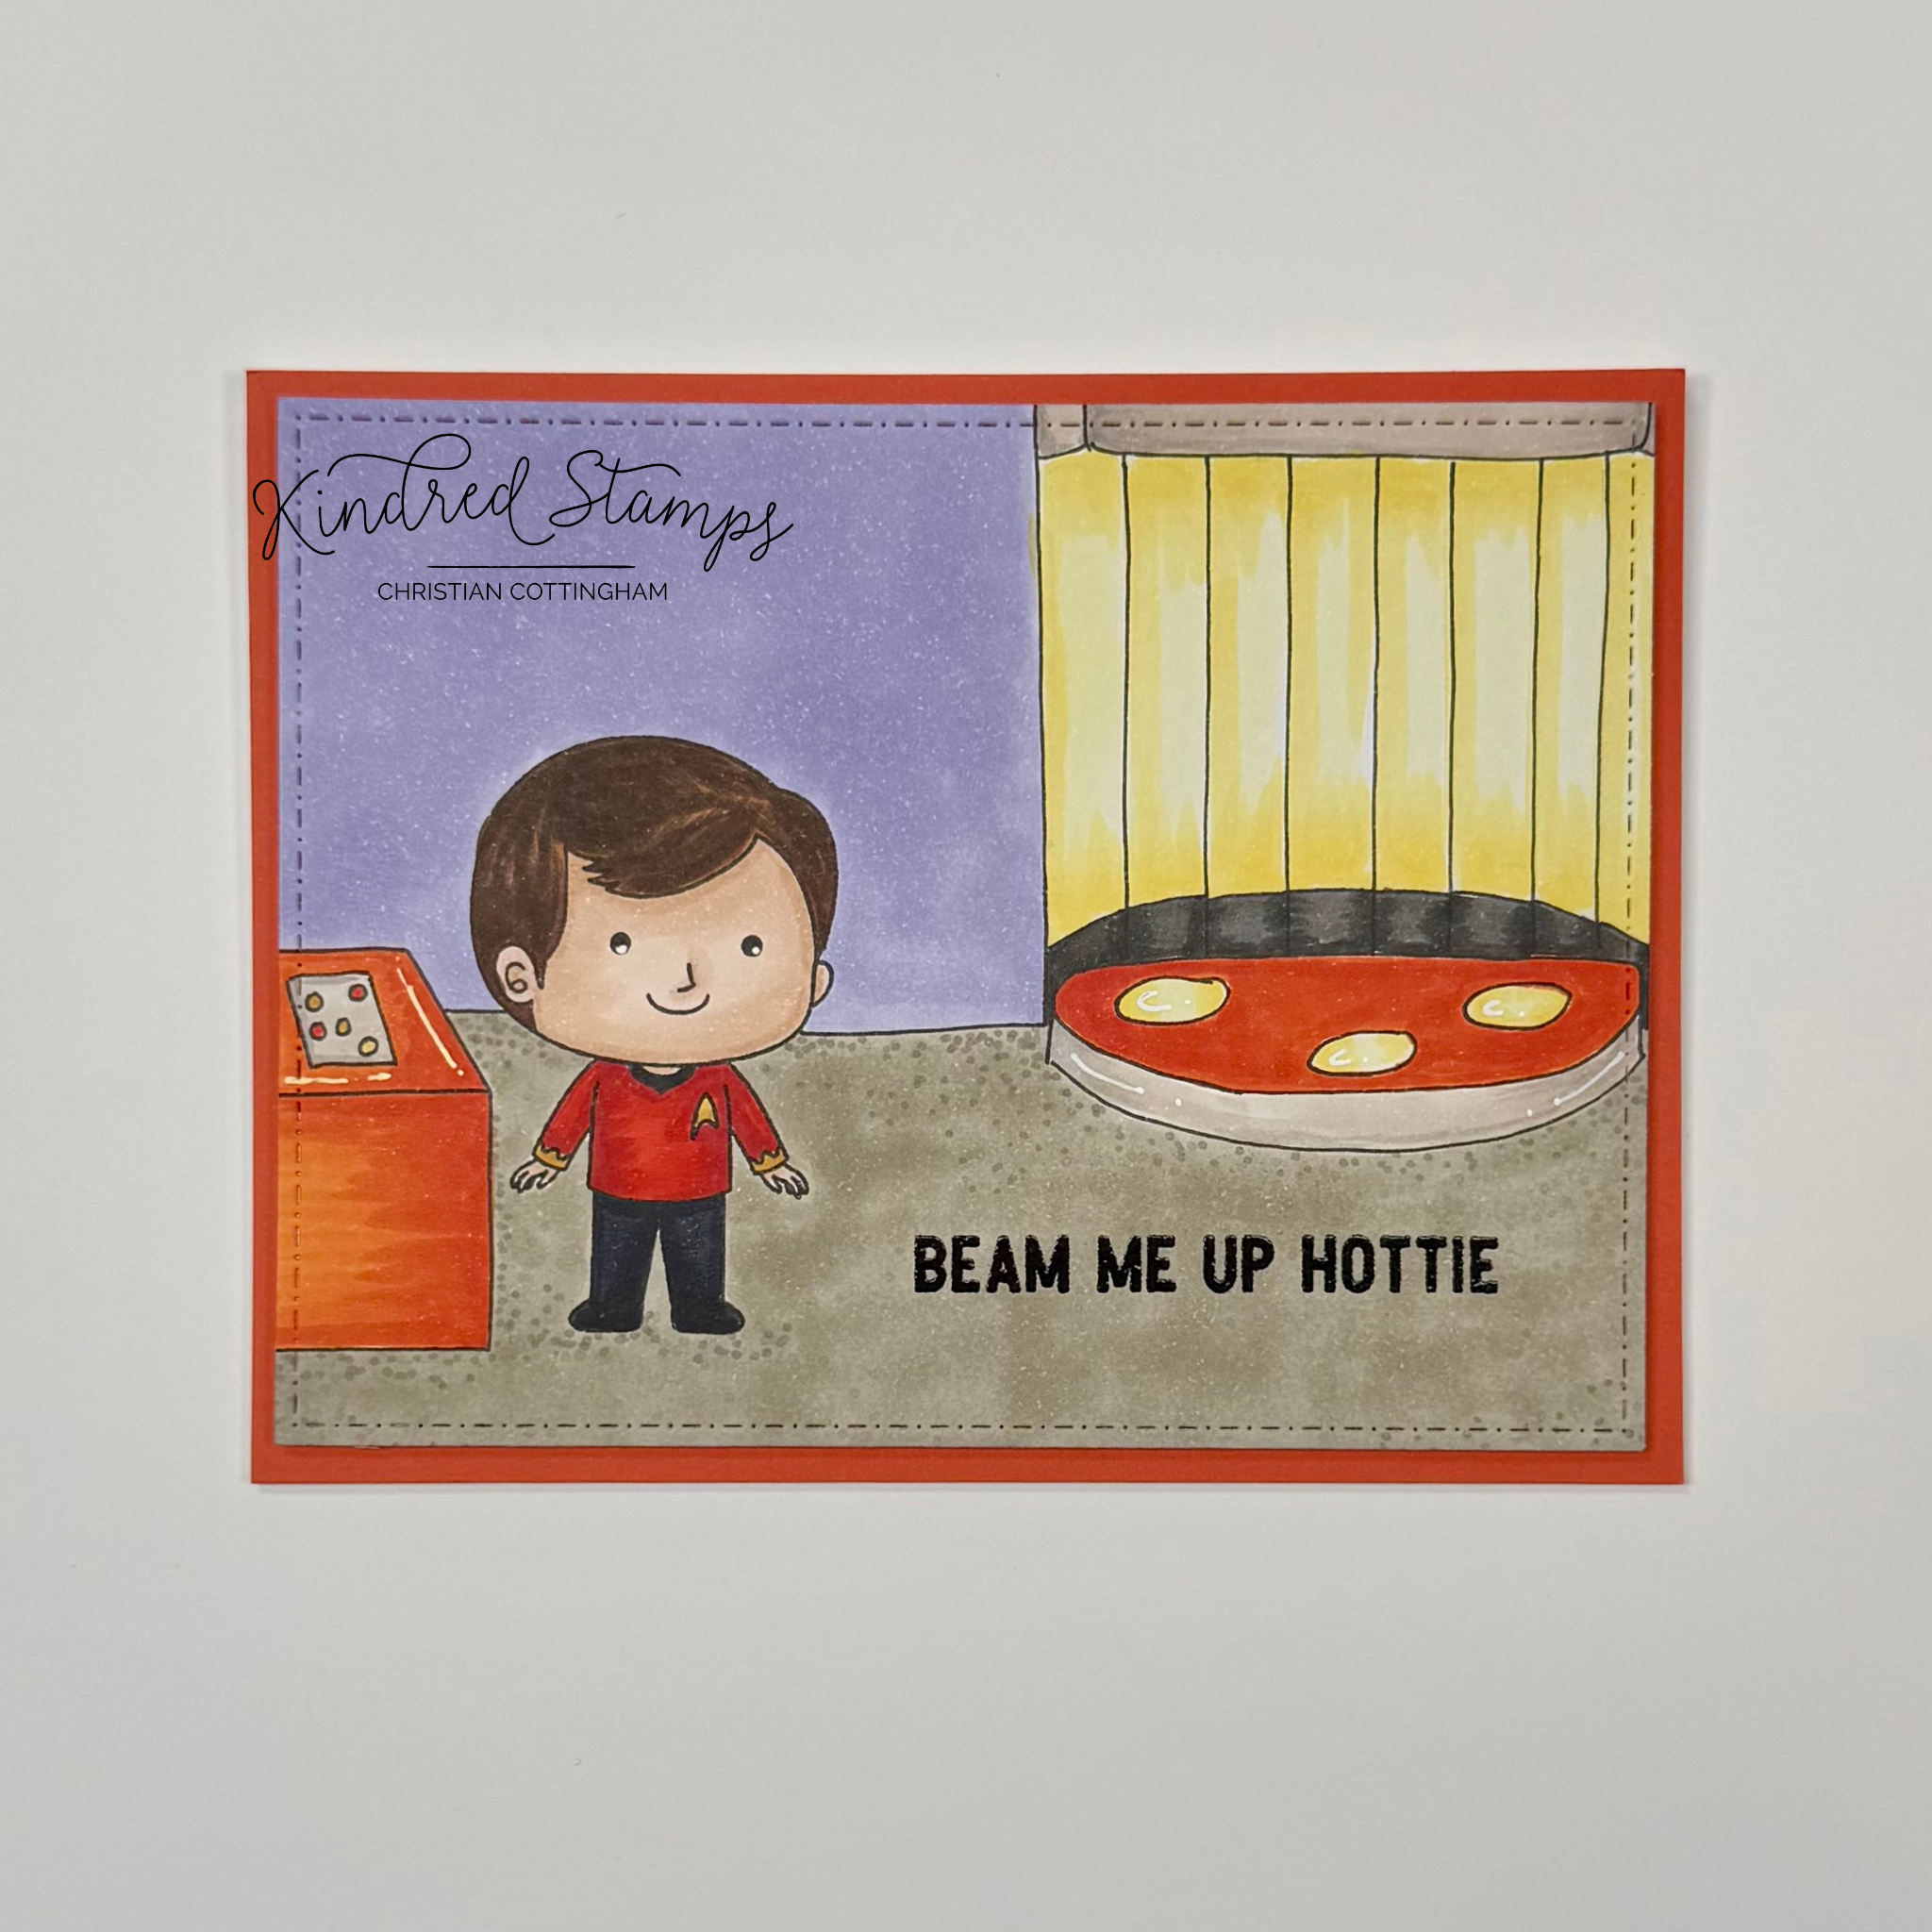
Card Three: Beam Me
Space Smut, Kindred Stamps
Nothing like a little beaming to get the point across… Space Smut just makes me giggle. When I read the sentiment I know exactly what I wanted to do!
On a piece of smooth white card stock the Engineer from Space Explorers was stamped in alcohol safe ink. With a pencil, the computer, floor, and beaming stage was sketched. With a fine liner pen, the lines were traced and the pencil lines erased.
The Engineer was colored with Olo Markers (See Color Guide). The remainder of the scene was colored with Altenew Artist Markers with the exception of the light wall of the beaming stage (Olo Markers Y2.2/ Y2.0) (Floor> TG03/ TG02; Stage/ Computer> TG07/ TG05/Y817/ Y608; WG03/ WG01).
The sentiment “Beam Me Up Hottie” was stamped in a black pigment ink and embossed with Kindred Stamps Clear Embossing Powder. The panel was die cut from the rectangle die in the Card Basic Die set. Thin foam tape was applied to the back of the colored scene.
An A2 card base was prepped. A piece of orange cardstock was cut to fit the card base and adhered. The colored panel was centered and applied. This sentiment just pulls the scene together!
Card Size: 5.5 inches by 4.25 inches (A2)
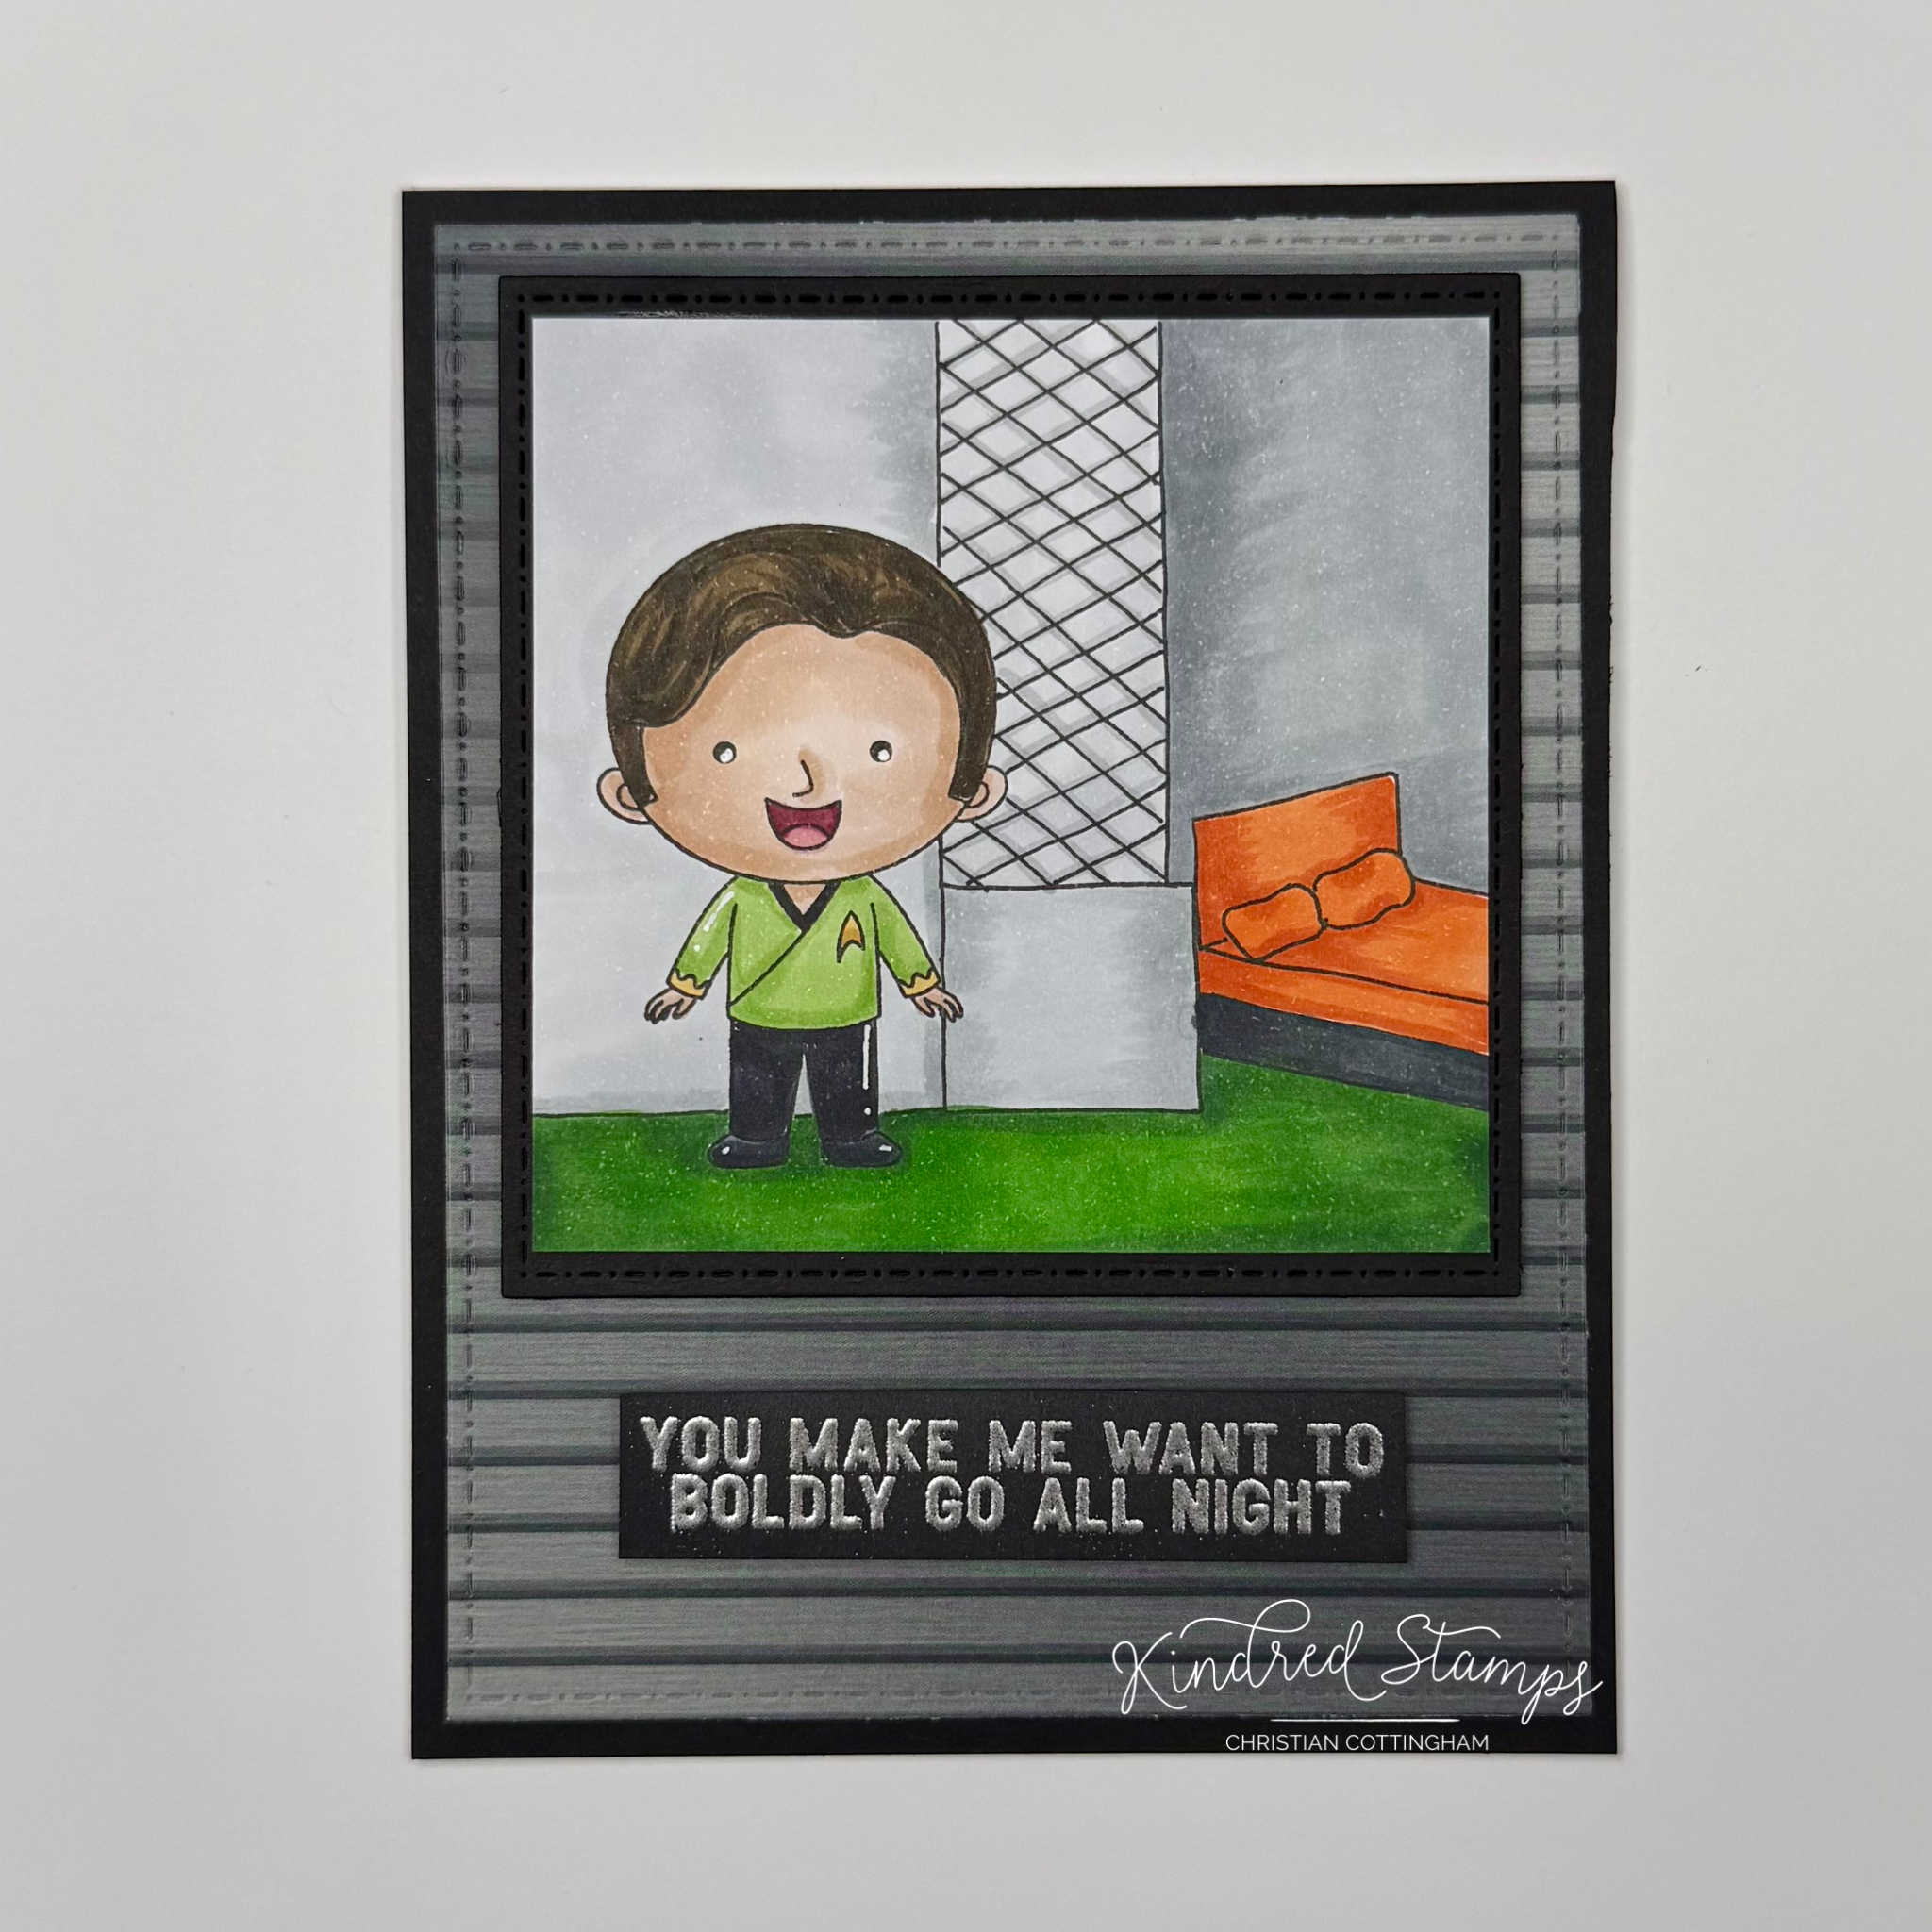
Card Four: Boldly
Space Smut, Kindred Stamps
Time to Go Boldly…. Into a bedroom… The Space Smut stamp set sentiments take you boldly into the world on innuendos. Let’s breakdown this card.
The bedroom scene was put together first. On a piece of smooth piece of cardstock the square from the Card Basic Die Set was traced on the inside lines of the die. In this square sketch the Leader from Space Explorers was stamped in alcohol ink safe ink. The bedroom scene was sketched in pencil and then traced with a fine liner pen. All pencil marks were erased. The scene and Leader were colored with Olo Markers. (Bed> OR1.6/ OR1.4; NG9/ NG7; Carpet> YG1.7/ YG1.6; Walls> NG3/ NG1; NG5/ NG7).
A piece of black cardstock was then cut with the square from the Card Basic Die set. The colored bedroom scene was cut out along the boarders of the scene. The panel was glued to the black square die cut. Thin foam tape was placed on the back of the die cut.
The sentiment from Space Smut was stamped on a piece of black cardstock that was prepped with an antistatic tool with embossing ink. Silver embossing powder was heat set and the sentiment was trimmed down into a strip. Thin foam tap was placed on the back of the sentiment strip and set aside.
A piece of cardstock from the Galactic Paper Pack was die cut with the rectangle from the Card Basic Dies. Finally, a piece of black cardstock was cut to 4.25 by 5.5 inches.
To assemble the card, a card base was prepped. The black cardstock panel was glued to the card base. The Galaxy Paper Pack die cut was popped up on the card base with thin foam tape. The bedroom scene and sentiment were positioned on the card. This card goes boldly into the night.
Card Size: 5.5 inches by 4.25 inches (A2)
Card Five: Prosper
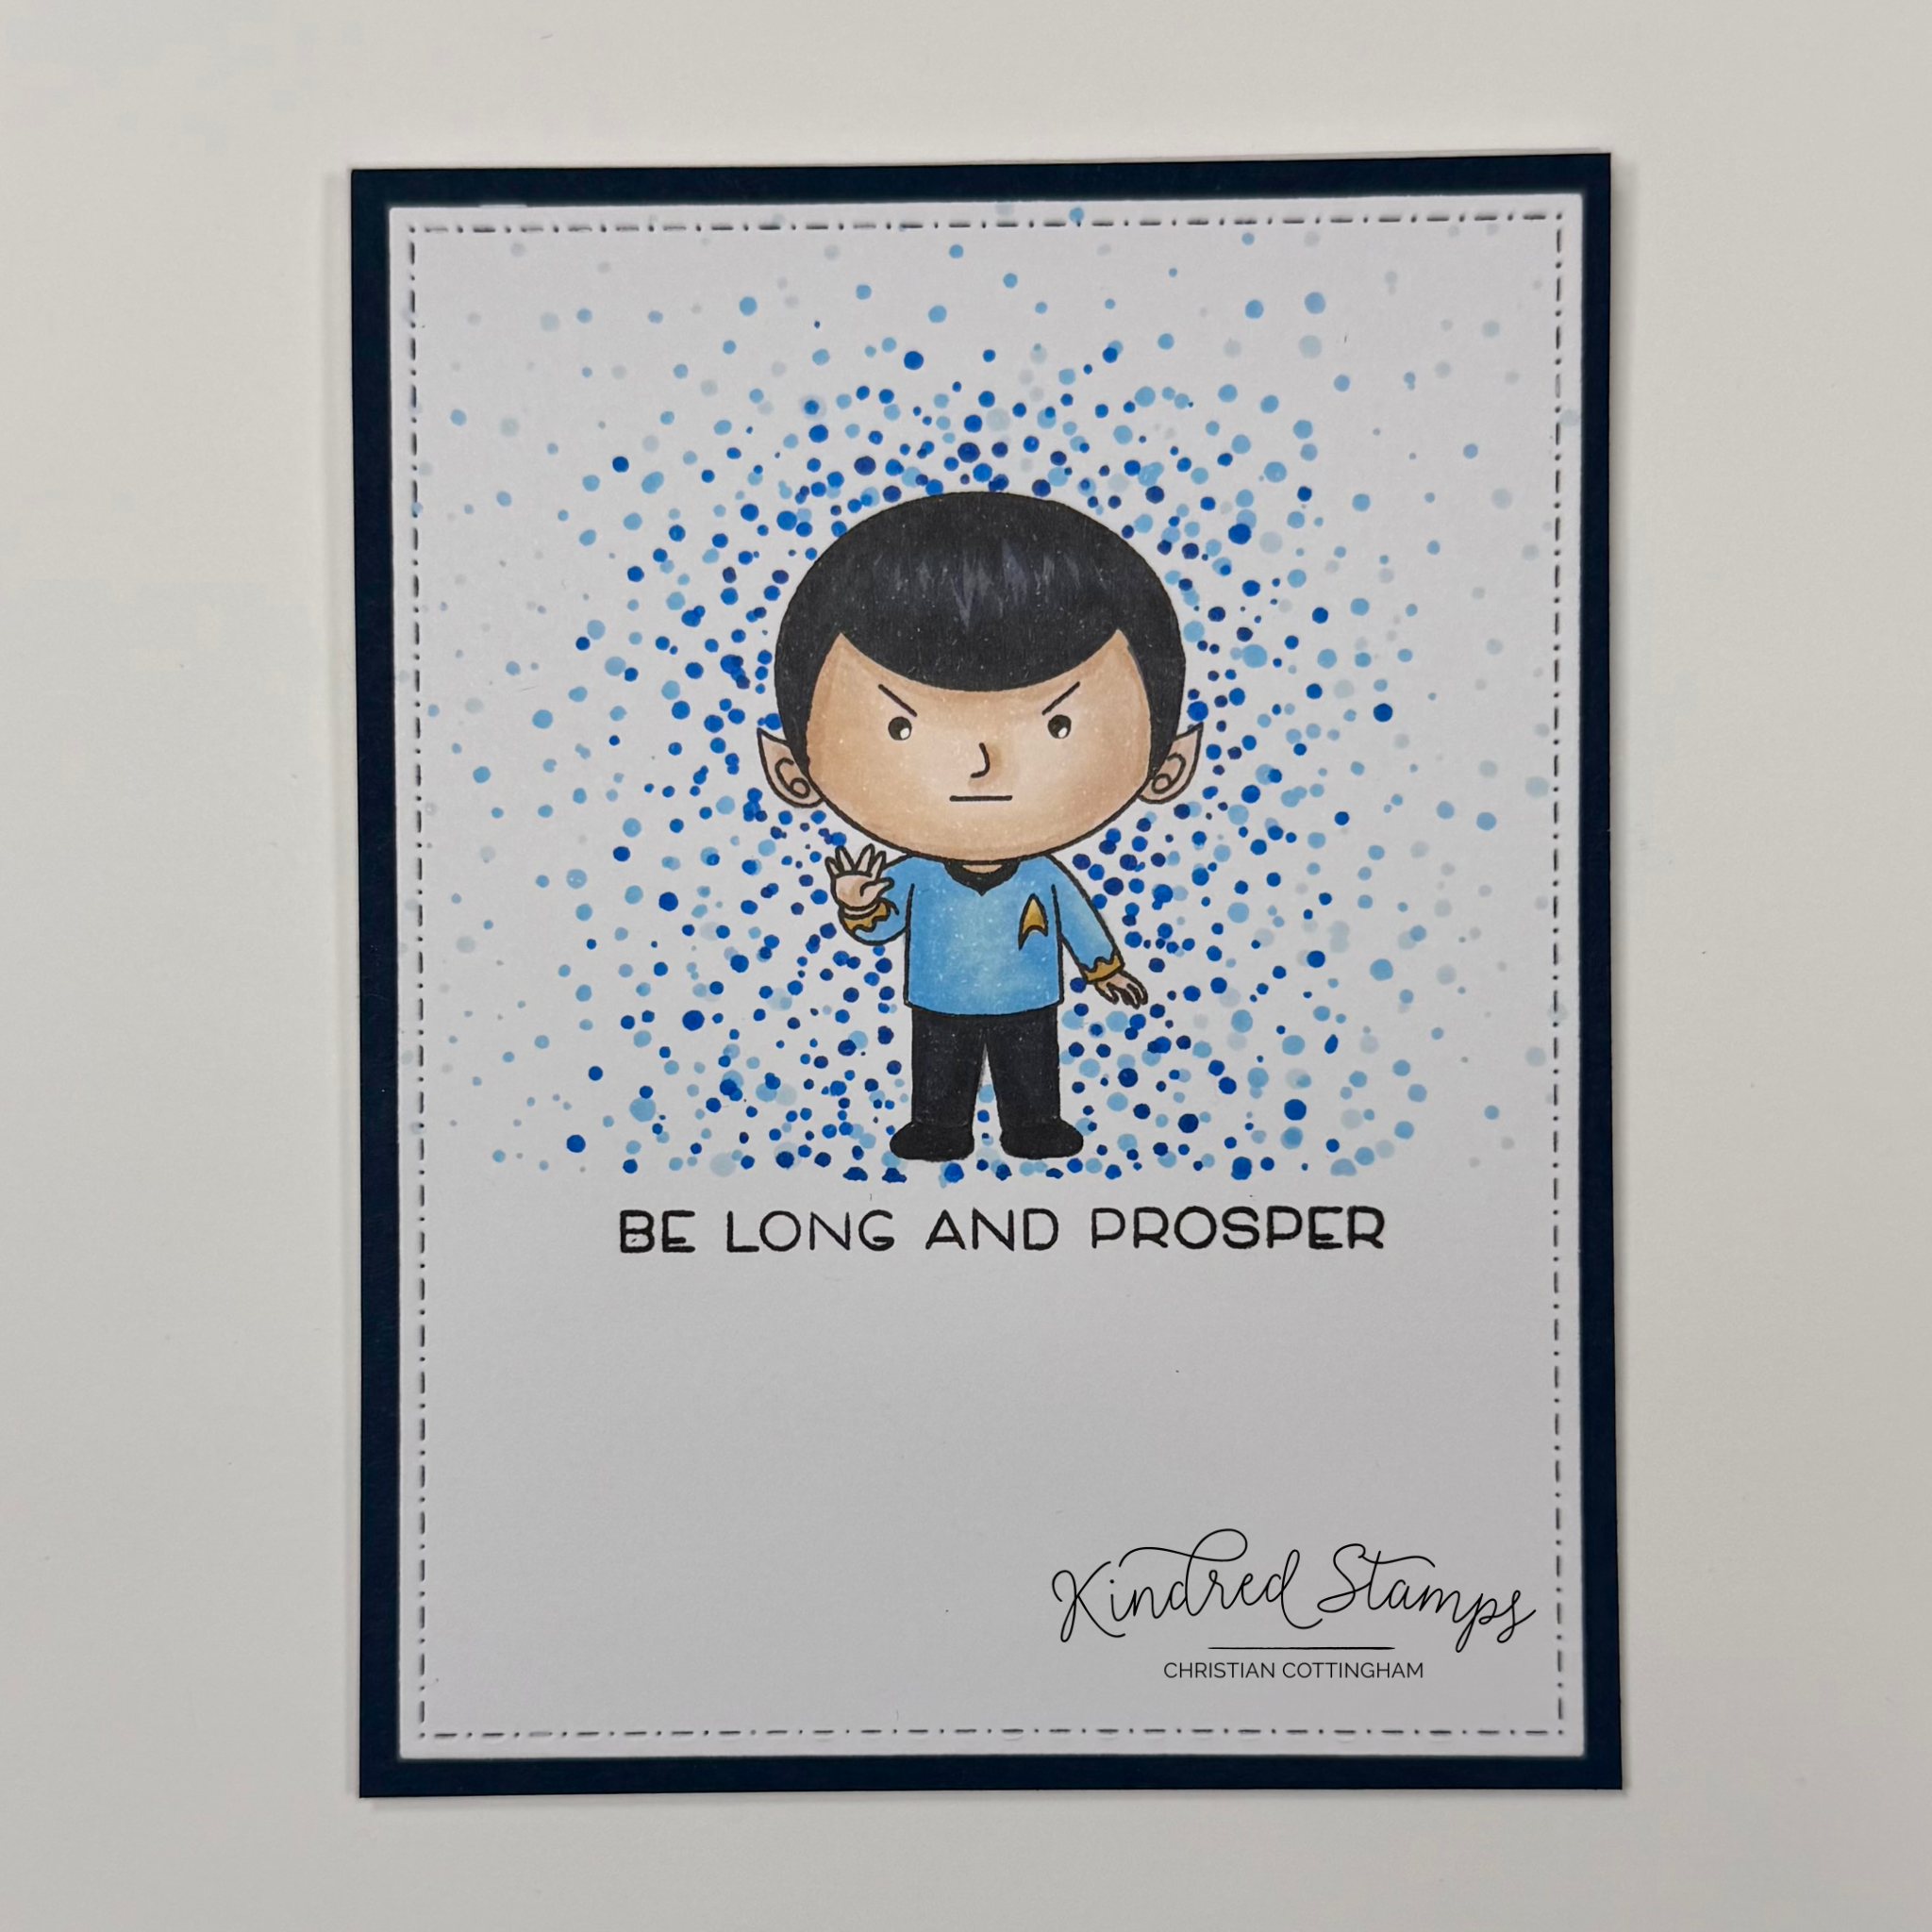
Space Smut, Kindred Stamps
Be Long and Prosper…. This simple card shows off the Space Smut set perfectly with one image!
On an A2 panel the Pointy Ears image (Space Explorers) was stamped with alcohol safe ink in the upper third of the card panel. The image was colored with Olo Markers (See Color Guide). A mask of the image was stamped and fussy cut out on the line. The mask was applied over the stamped and colored image.
The sentiment from the Space Smut set was stamped in pigment ink. Clear Embossing Powder was applied and heat set with a heat gun. A piece of masking paper was then applied in a straight line above the sentiment.
The burst dotted background was then stippled in with Olo Markers. The concentration of dots were placed closure to the image outline and lighter and further apart as the dots moved outward. The gradient of colors included: B0.7/ B0.6/ B0.5/ B0.4/ B0.3/ and B0.2. These colors were selected based on the color of the shirt.
The masks were removed and the stamped and dotted panel was die cut with the rectangle die from the Card Basic Dies. Thin foam tape was applied to the back of the die cut panel. A card base was prepped and a navy colored piece of cardstock was applied. The colored panel was then popped up on the base. This card didn’t take long to create, but it will prosper for a long time to come.
Card Size: 5.5 inches by 4.25 inches (A2)
Card Six: Prime Directive
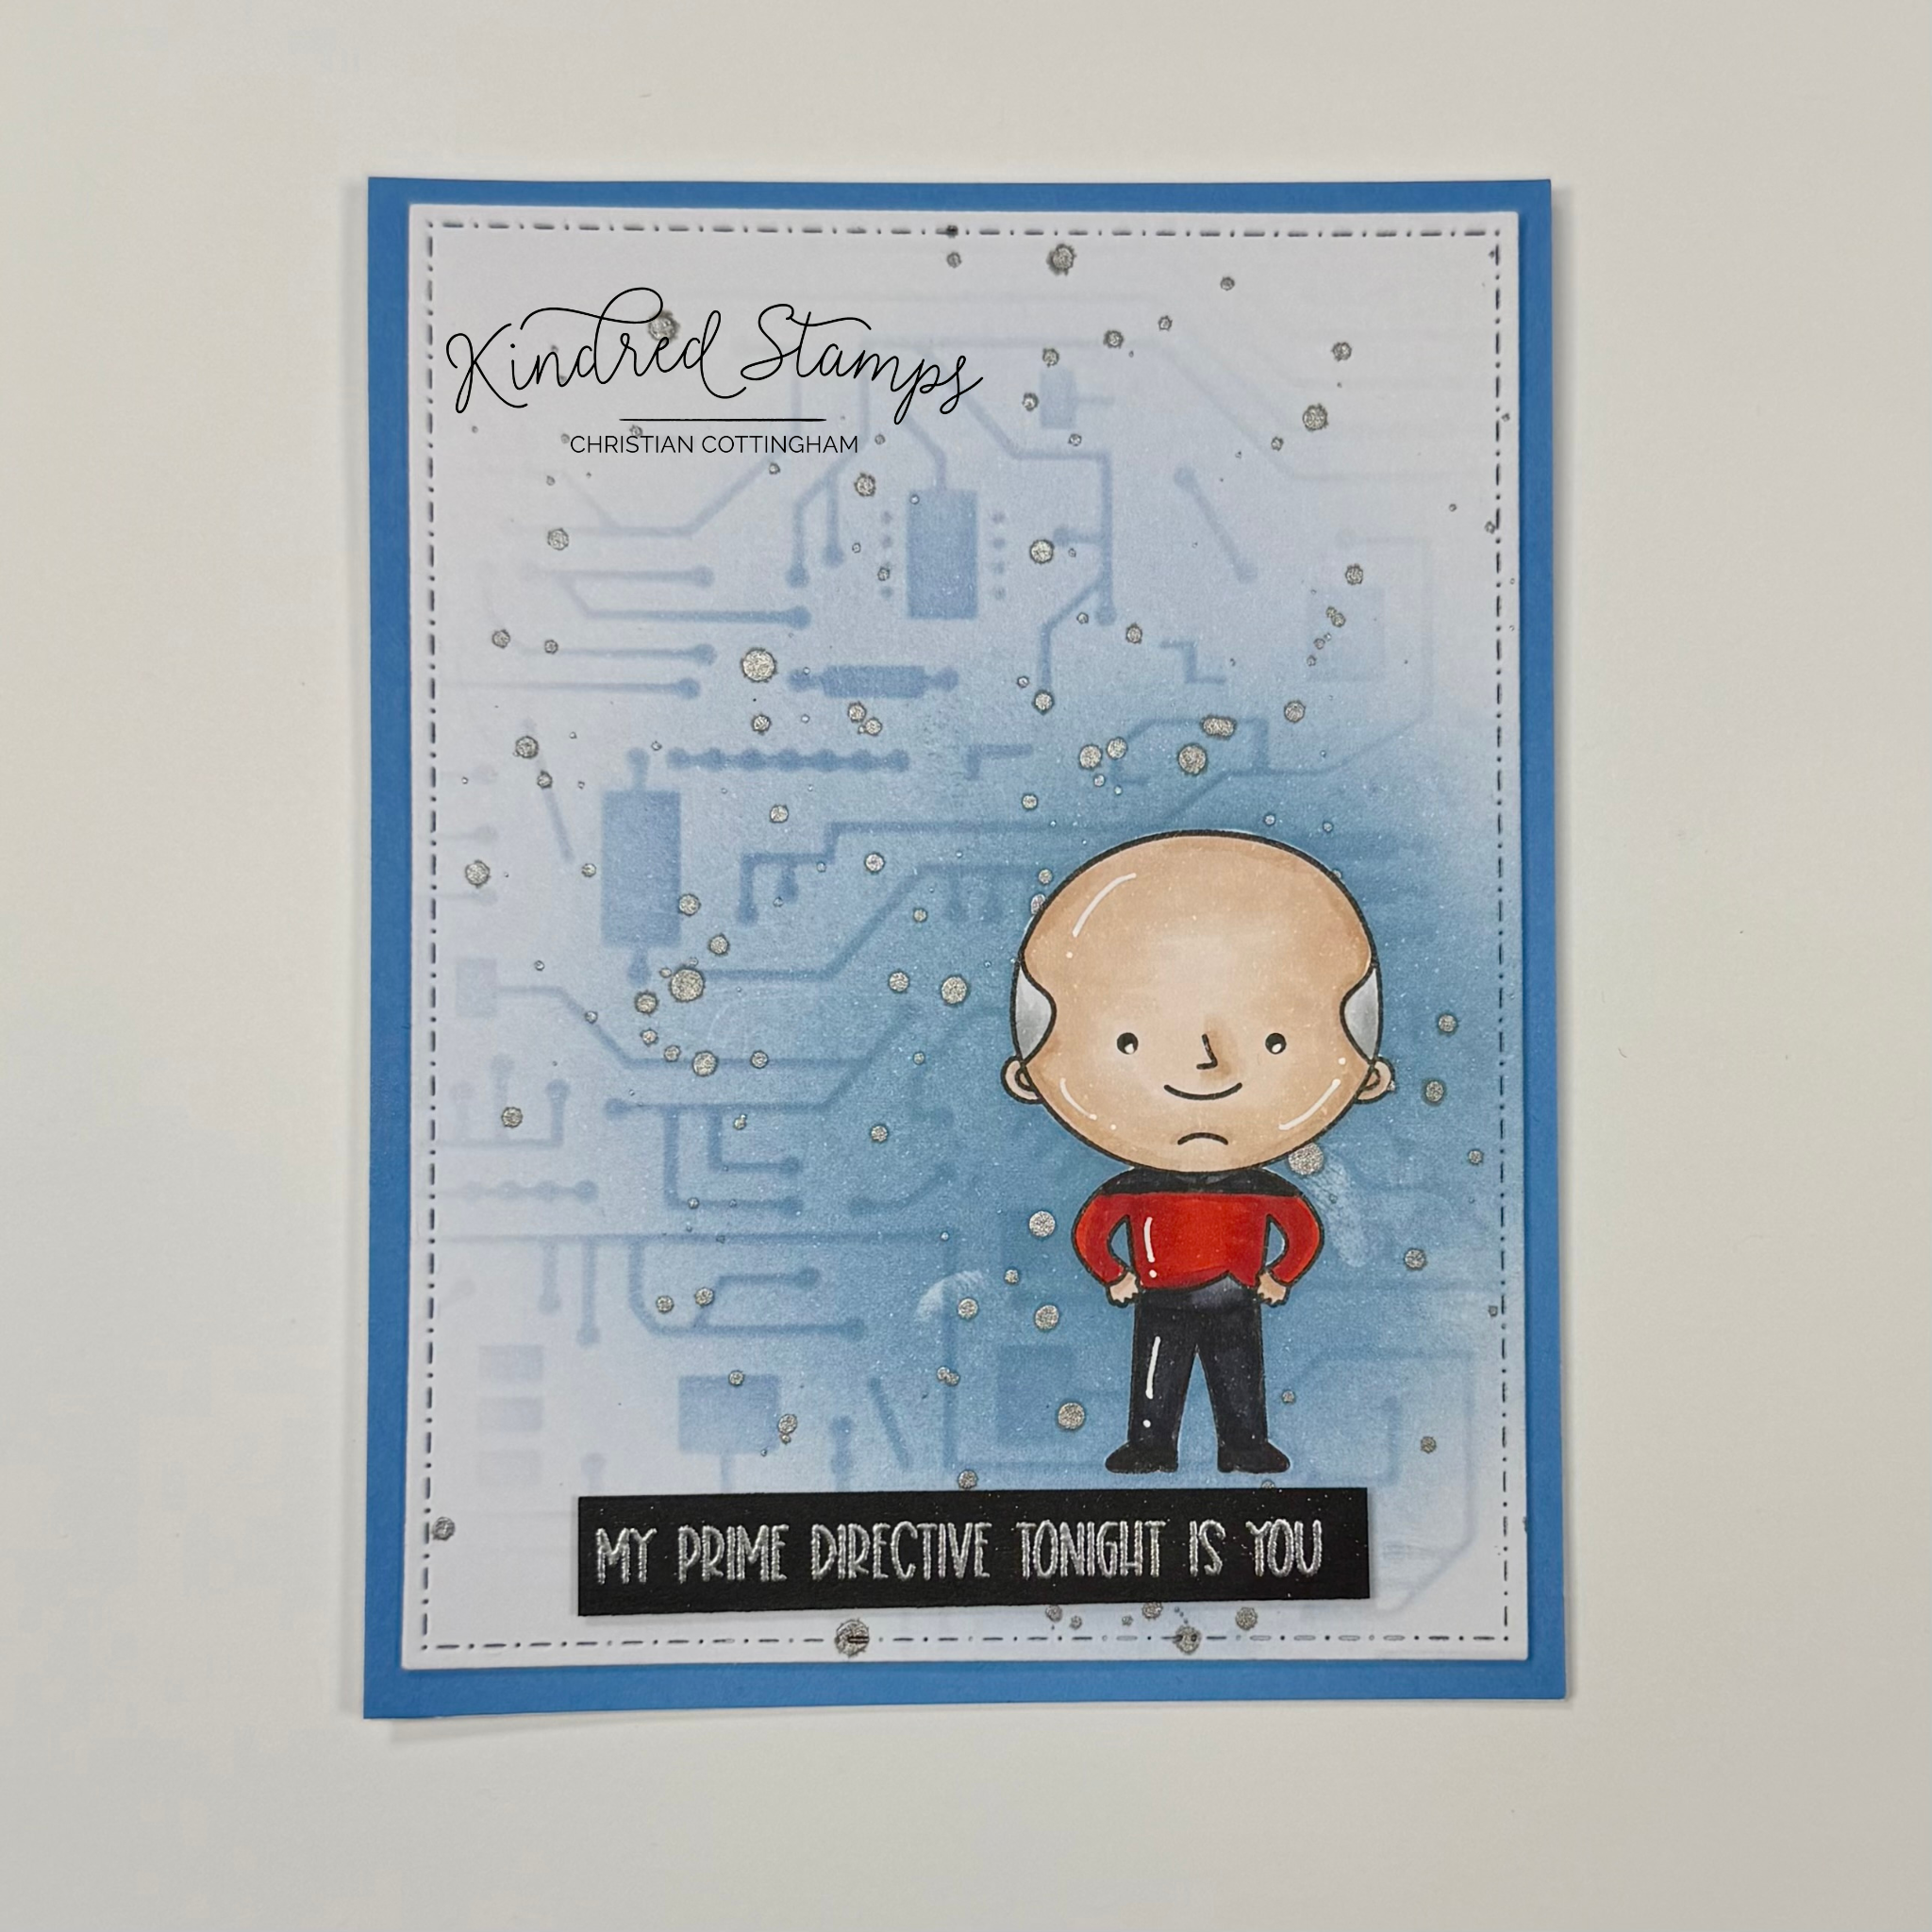
Space Smut, Kindred Stamps
Having goals is what it’s all about, and the Space Smut even says so! Here’s a breakdown of how this simple card was made.
The Next Leader (The Next Space Explorers) was stamped in alcohol ink safe ink on the bottom right corner of the panel. The image was also stamped on a piece of masking paper, fussy cut out on the line and applied to the stamped image.
A halo of ink was blended from the center of the masked image to the edges with heaviest application around the masked image to white on the edges (Cadet, Gina K Designs). To add some texture to the background, the Circuit Stencil (retired) was blended with the remaining ink on the brush in the same application process. Finally, the panel was spattered with Irongate Distress Mica Stain.
When the panel was dry, the mask was removed from The Next Leader. The image was colored with Olo Markers (See Color Guide). The completed panel was then die cut with the rectangle from the Card Basics Dies. Thin foam tape was applied to the back of the panel.
The sentiment was stamped in embossing ink on a piece of black cardstock prepped with an antistatic tool. Silver embossing powder was applied and heat seat. The sentiment was cut down into a strip and thin foam tape applied to the back. The Prime Directive has been established and the card is ready to be assembled!
To assemble, a card base was prepped. A piece of blue cardstock was trimmed down and adhered to the card base. The inky spattered card panel was applied. Finally, the Prime Directive sentiment was placed as the anchor point for the character. Goal was achieved…
Card Size: 5.5 inches by 4.25 inches (A2)
Card Seven: Exploration
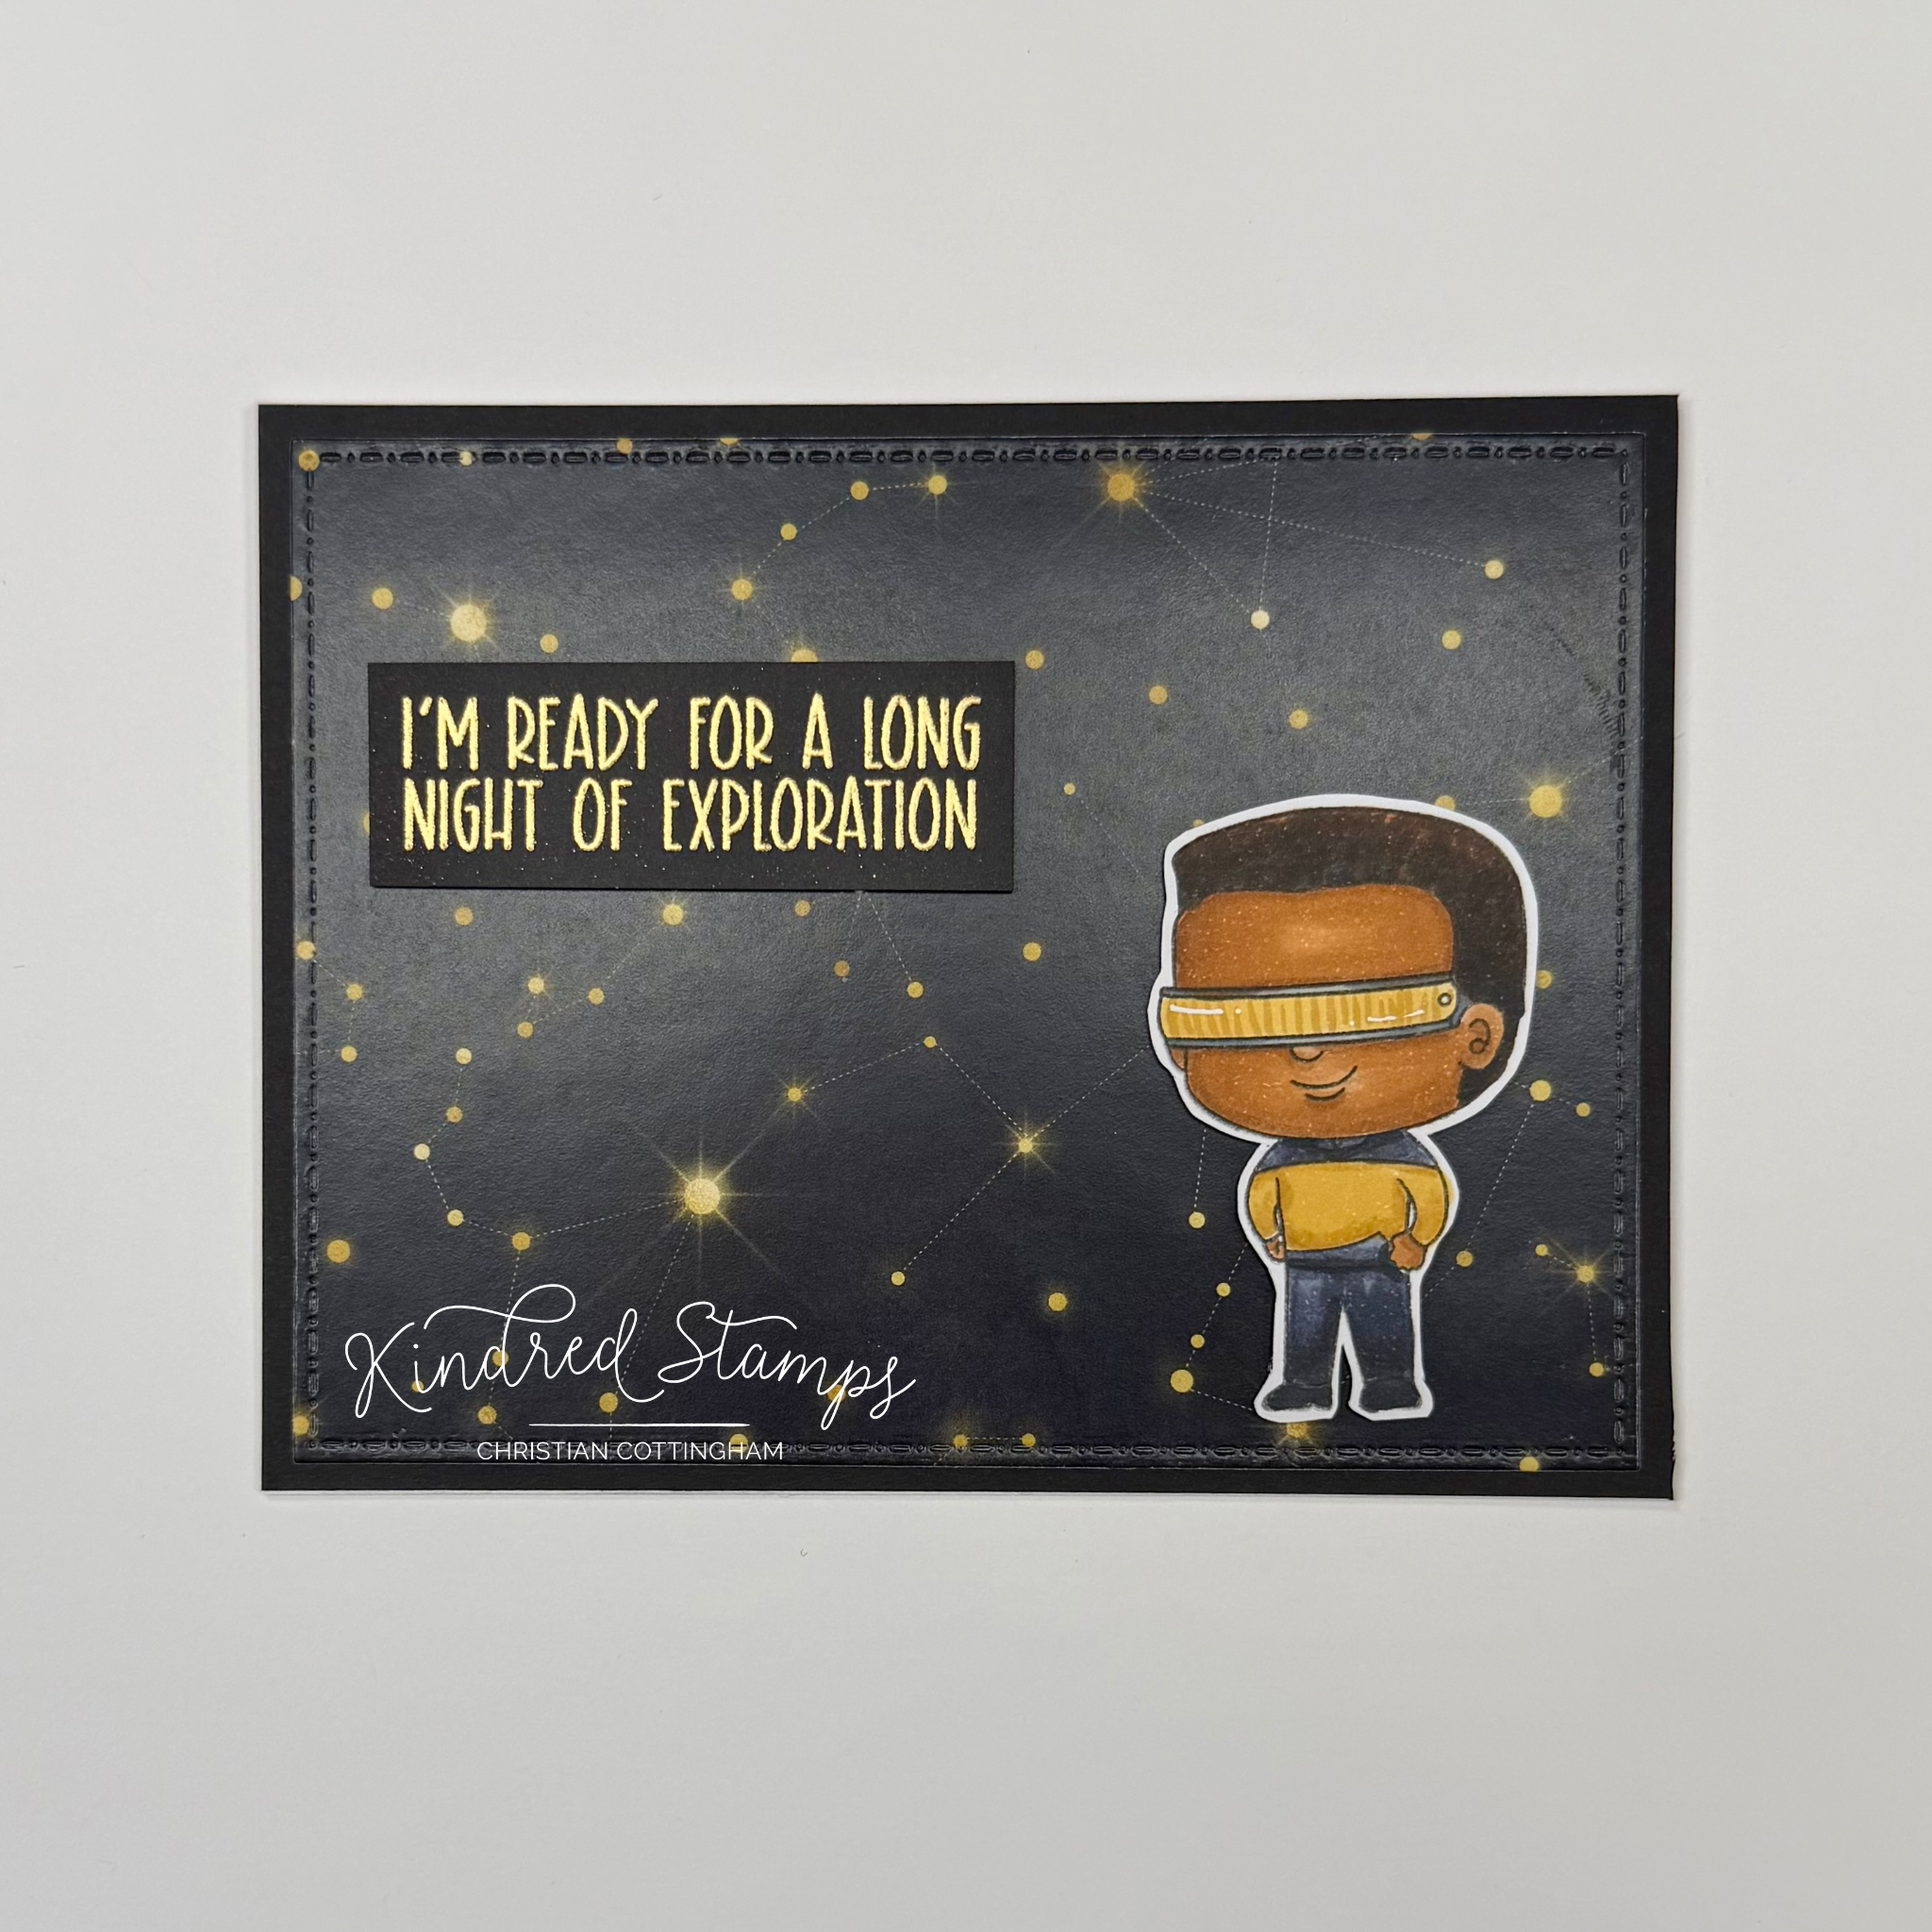
Space Smut, Kindred Stamps
Ready for a long night of exploration?? The sentiment from Space Smut says it all… This simple card gets the point across and comes together in no time at all!
The sentiment from Space Smut, was stamped with embossing ink on a piece of black cardstock prepped with an antistatic tool. Gold embossing powder was applied and heat set. The sentiment was trimmed to be a sentiment strip and thin black foam table was applied to the back side. This was set aside.
The Celestial Paper Pack provided the perfect stars for the backdrop of this card. The paper was selected and cut with the rectangle from the Card Basic Dies. Thin black foam tape was applied to the back of the panel. Since I was cutting, a piece of black card stock was cut down to 4.25 by 5.5 inches. This will be the mat for the star background.
Finally, the Visor Man (The Next Explorers) was stamped on a scrap of smooth white cardstock. The image was colored with Olo Markers (See Color Guide). The image was then cut out leaving a thin white boarder. The boarder is intention as I didn’t want the image to get lost on the dark background. Thin foam tape was applied to the backside of the image.
To assemble, a card base was prepped. The black mat cardstock was applied. Finally the sentiment was applied to the top left third of the card and the Visor Man applied to the lower right third of the panel. Exploration all night long…
Card Size: 5.5 inches by 4.25 inches (A2)
The entire Kindred Stamps release will be available this Friday at 8am PST/11am EST. Be sure to subscribe to the Kindred Stamps blog to see a daily line up of sneak peeks from our amazing Design Team! Come join the Fan Club and release event to be part of the release fun, and you may just win some Kindred Stamps credit!!
Coloring Guide:
Leader
Flesh> OR7.1/OR7.2/ OR2.0
Hair> O7.8/O7.7
Shirt> G5.3/ G5.2; YO2.5/ YO2.3
Pants> CG9/ CG7
Shoes> BK/ CG9
R0.6/ R0.7
Pointy Ears
Flesh> OR7.1/ OR7.2/ OR2.0
Shirt> B0.3/ B0.2/ Y2.3/ Y2.2; CG9
Pants> CG9/ CG7
Shoes> BK/ CG9
Hair> BK/ CG9/ CG7
Engineer
Flesh> OR7.2/ OR7.1/ OR2.0
Shirt> YO2.5/ YO2.3; R0.6/ R0.5
Hair> OR4.8/ OR4.7; OR3.7
Pants> CG9/ CG7/ CG5
Shoes> BK CG7
Ship
Lights/ Windows> Y2.0
Ship> WG7/ WG5/ WG3; OR2.5/ OR2.3/ OR2.2
The Next Leader
Flesh> OR7.2/ OR7.1/ OR2.0
Pants> CG9/ CG7/ CG5
Shirt> R0.5/ R0.6; CG9/ CG7/CG5
Hair> NG3/ NG1
Shoes> K
Woman
Flesh> OR7.1/ OR7.2/ OR2.0; R5.3
Hair> OR3.8/ OR3.7/ OR3.4
Uniform> R0.6/ R0.5; CG9/CG7
Visor Man
Flesh> OR3.7/ OR3.4/ OR3.2
Glasses> WG7/ WG5;; YO2.3/ YO2.2/ YO2.5
Hair> OR3.8/ OR3.7/ BK
Uniform> YO2.5/ YO2.3; CG9/ CG7/ CG5