Pocket Witches: Kindred Stamps Sept Release
Come we cast spells and fly tiny… right into your cart! The Pocket Witches from Kindred Stamps bring these witches into our pockets so they can go anywhere. This stamp set is the star of the show, large enough to cover an A2 card front and versatile enough to be used in different ways. Grab your eye of newt and let’s stir up some cards.
This blog utilizes affiliate links. If you choose to click on the links provided to purchase, you are supporting me as I receive compensation for your purchase. If purchasing is not in your books, no worries, I hope you find inspiration for projects you design. By clicking on the links, you are letting Kindred Stamps know that you like my content and to keep bringing me back. Thanks for your time and let look at some tiny things!
Project One: Table Top Pocket Witches
Pocket Witches, Kindred Stamps
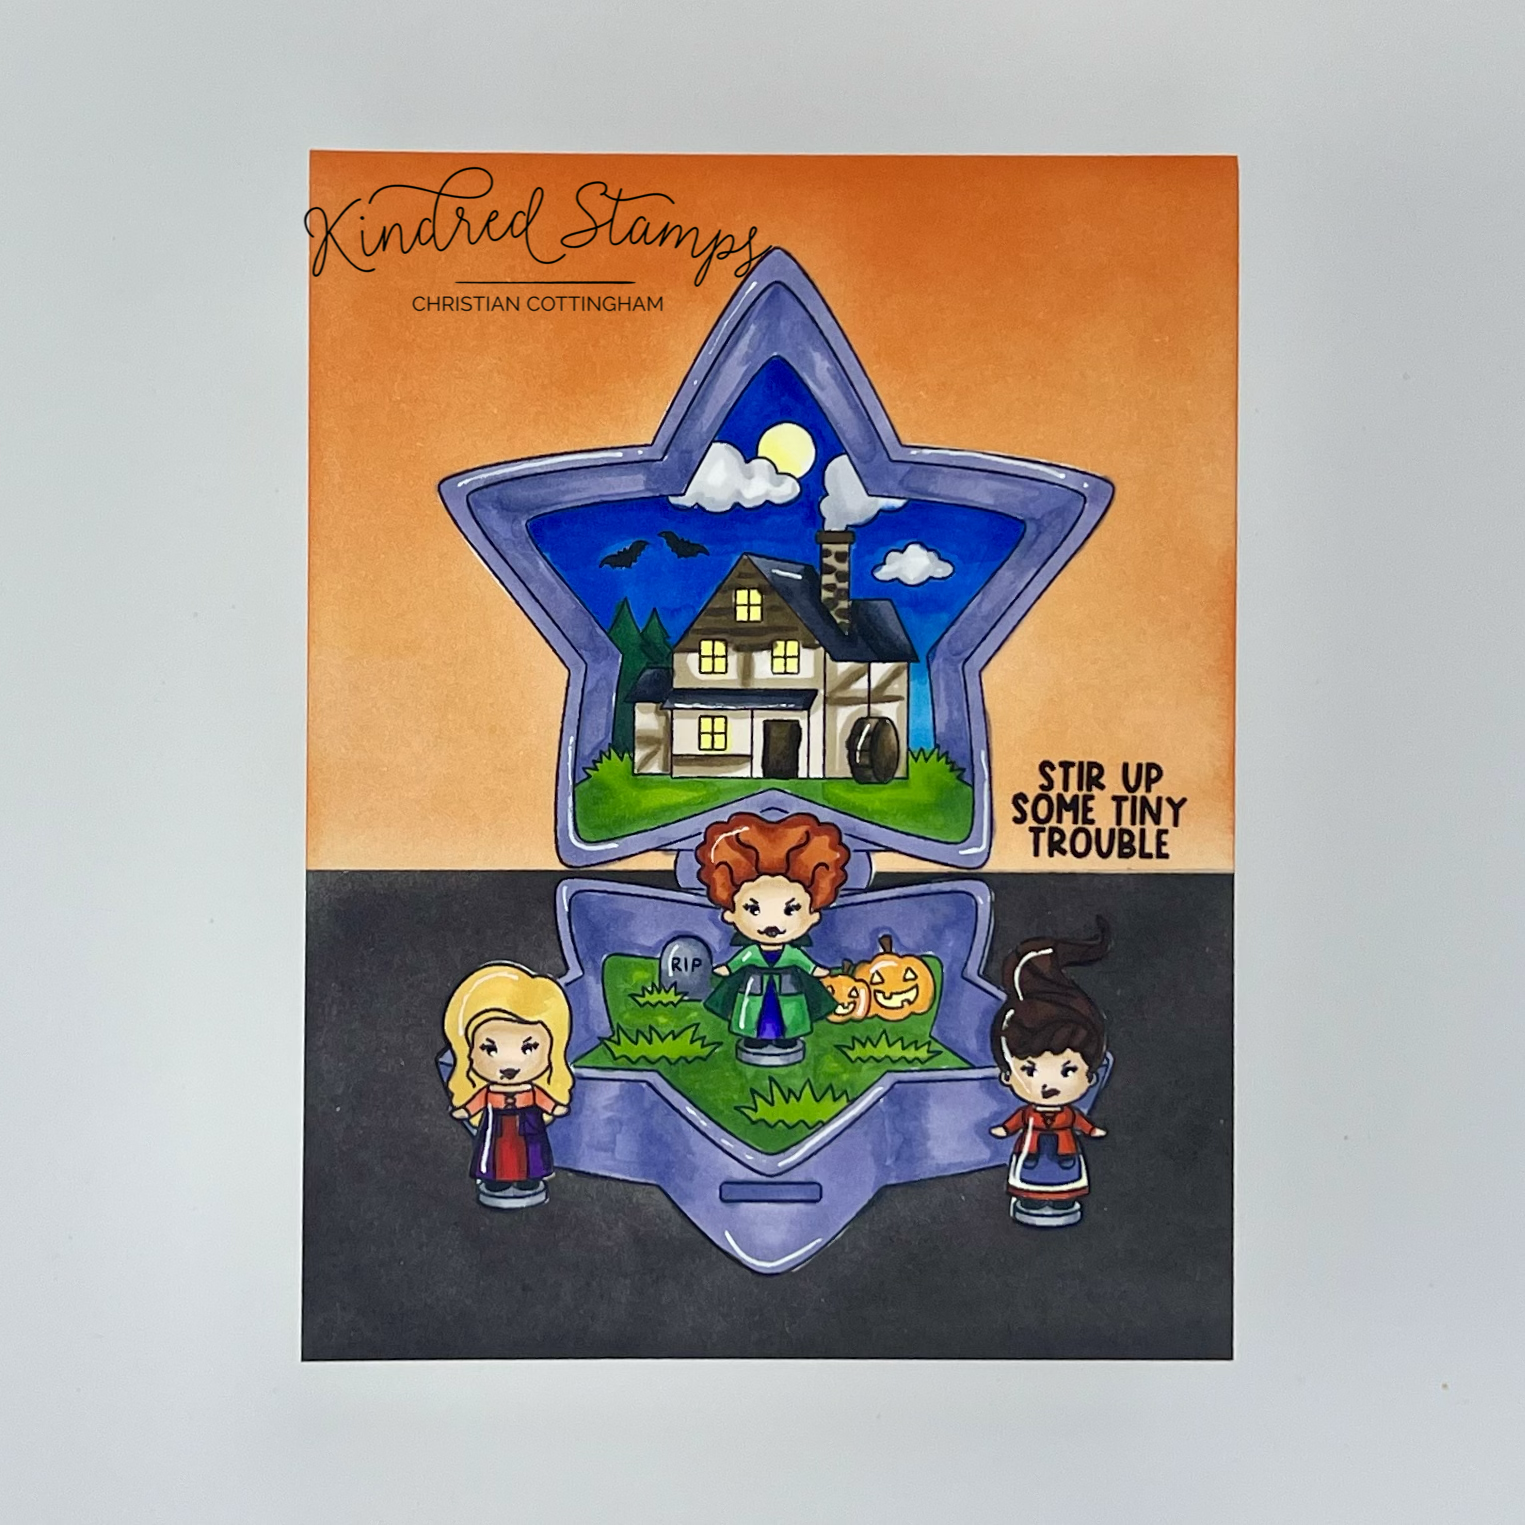
The Pocket Witches are stirring up trouble on this single layer card. By using simple masking techniques, the witches are in the scene with no fussy cutting and the background can be inked up any way you’d like!
The pocket scene and the three witches were stamped on masking paper and fussy cut out on the line. (These masks will be used on all 3 of the card projects so the prep time was worth it. I store the masks on the back of the stamp acetate to use as many times as I can.). Now with the masks at the ready, it was time to stamp the panel.
To ensure that my images were centered, I did place the pocket scene mask on the card panel (with the backing still attached). The three witches were placed over the masked pocket cutout in their designated areas, one on each side outside of the pocket and then one in the center of the pocket base. The stamps were picked up with the stamping platform and the pocket scene mask was removed. The witches were stamped in alcohol safe ink and their respective masks were applied. The pocket scene stamp was then placed on the panel over the masked witches and stamped with alcohol safe ink. The mask for the pocket scene was then applied over the the scene (with the witches underneath). The panel was removed from the stamping platform and with a piece of low tack tape the table top line was determined. Utilizing Tangerine Twist (Gina K Designs) the top of the card was blended from the top down so there was more intensity of color at the top of the card. The low tack tape was then repositioned for the blending of the base. Black Onyx ink (Gina K Designs) was blended smoothly on the bottom portion of the card. All masks were removed and it was finally time to get some coloring done.
The Pocket Witches images were colored with Olo Markers (Pocket Design II; See Color Guide). White gel pen accents were placed to give a little pop to the images and to mimic the plastic sheen. The sentiment was stamped in a black pigment ink and embossed with Clear Embossing Powder.
These tiny witches stir up trouble where ever they go. Now they are portable so who knows where they will show up!
Card Size: A2 (5.5 inches by 4.25 inches)
Project Two: Shaking Witches
Pocket Witches, Kindred Stamps
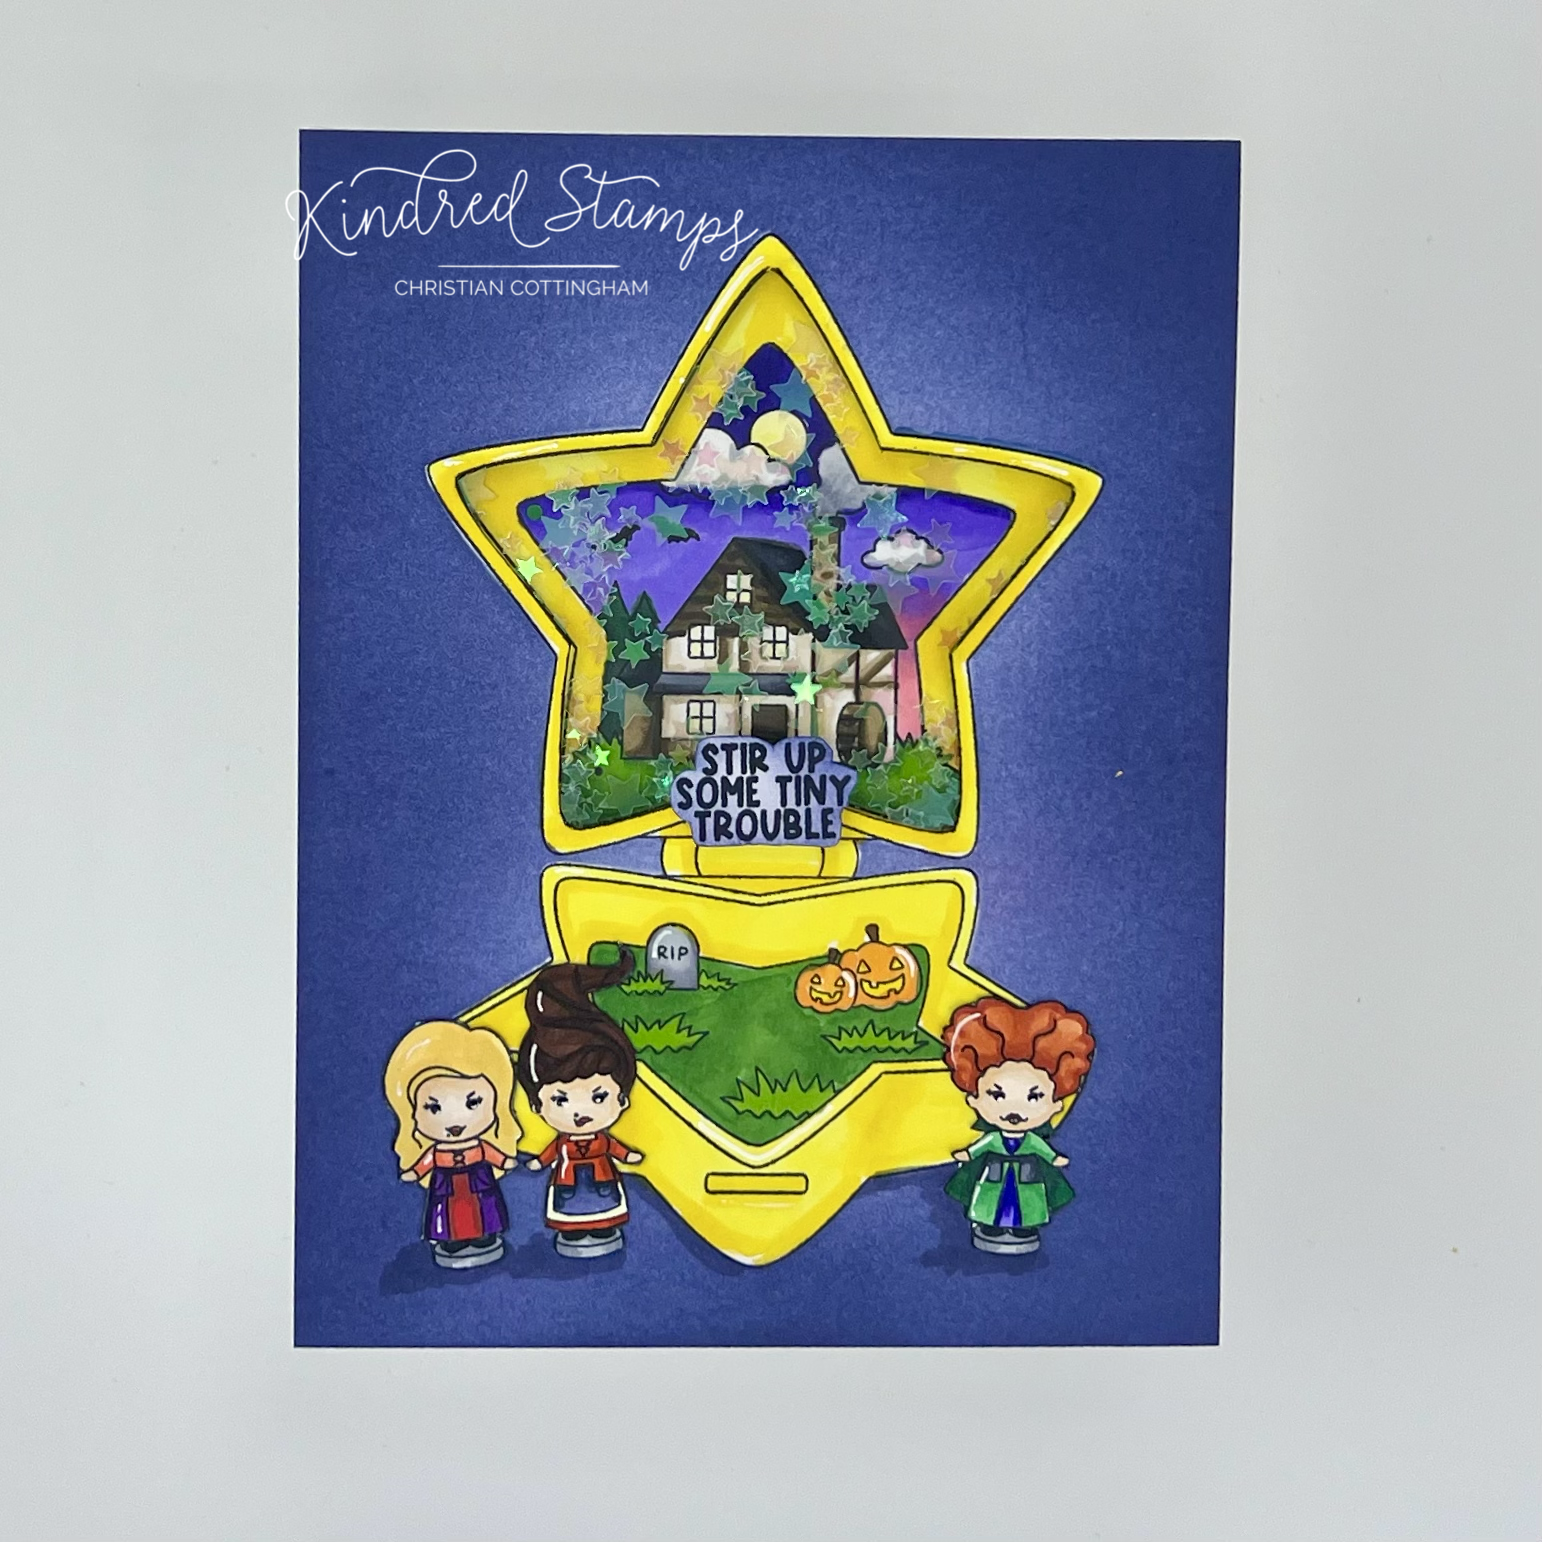
The Pocket Witches are shaking things up with this fun card! Even though the stamp is one solid image you can still modify your approach to shake it up… Let’s drive in.
On an A2 panel (4.25 by 5.5 inches) of Neenah Classic Crest Solar White (80 pound) the main image of the Pocket Witches was centered and stamped in alcohol safe ink. Keeping the stamp in my stamping platform, the image was stamped in the exact spot on another A2 panel. This will provide the window image and the background image for the shaker itself. Pulling out the trusty craft knife and mat, the second star line from the outside edge of the upper pocket was cut out of one of the panels. At this point I realized that I should have done the background coloring before I cut out the star… don’t be me, make it easier on yourself… I didn’t stamp the bottom of the scene on the second panel and had already removed the stamp from the platform… So be cool and don’t cut out your panel until after the mask was applied to the panel. Utilizing Stargazer ink (Pinkfresh Studio) color was brought from the outside to the inside of the panel. This application allowed me to have a one color blend with the intensity on the outside edges and halo around the design. The mask was removed and it was time to color! The pocket was colored with Olo Markers (See Pocket Design I in the Color Guide) on both the top shaker window panel and the inside shaker scene. Make sure to add color outside the lines on the inside shaker panel. This will give you grace if you don’t like it up exactly when adhering the 2 panels.
A piece of stamp packaging was cut down and adhered to the backside of the window panel with a strong double sided adhesive Foam tape was applied with no gaps around the colored inside panel. Shaker bits were placed in the center well. Slowly and carefully remove the backing from the foam tape and align the top panel over the star image. Because the paper was exact, you can utilize your score board/ Misti/ or other right angle to align the image.
With the shaker complete, it was time to play with the Pocket Witches. The witches were stamped in alcohol safe ink and colored with Olo Markers (See Color Guide). They were then fussy cut out on the line so they look like they were part of the scene. Taking a brush tipped fine liner, the images were edged to hide any white line or bad cutting. The witches were adhered down with some liquid glue. Pulling out a CG3 Olo Marker, shading was placed below the witches and the base of the pocket.
Finally, the sentiment was stamped on a scrap piece of white card stock and fussy cut out. The brightness of the sentiment didn’t jive with the scene, so out came the Stargazer ink (Pinkfresh Studio) and the sentiment was blended in the same fashion as the background to provide the halo in the center of the sentiment. The sentiment was popped up with a thin foam tape on the center hinge. To complete the card, the front panel was adhered to an A2 top folding card base.
These Pocket Witches shake up everything they come in contact with and this card proves it!
Card Size> A2 (5.5 inches by 4.25 inches
Project Three: Pop-up Witches

Pocket Witches, Kindred Stamps
Tiny things come in tiny packages, and this card holds proves it. The front of the card gives a hint to what lies inside and the big surprise pops when they open the card! Let’s break down how the Pocket Witches are truly a big wow.

Pocket Witches, Kindred Stamps
The card base was prepped first. A piece of Neenah Classic Crest Solar White (110 lb) card base was cut down (5.5 inches by 8.5 inches) and scored at the 4.25 inch line to make a book fold card. Prior to folding, the pocket image from the Pocket Witches was stamped in alcohol safe ink with the design centered at the hinge on the score line. The pocket image was colored with Olo markers (Pocket Design III in the Color Guide). Masking paper was applied over the image and Tangerine Twist ink (Gina K Designs) was lightly blended from the center out. The card base was creased. To add a little sparkle, Wink of Stella was applied over the top house scene.
The 3 witches were stamped with alcohol safe ink and colored with Olo Markers (See Color Guide). After cutting out the witches on the line the were edged the with a black brush fine liner to finish the edges of the images. The pop-up mechanism was up next. A 4 inch by 2 inch piece of paper was placed onto the score board horizontally. The paper was scored at 0.5 inch marks 4 times. The score lines were reinforced and the top flap was glued to the base flap. This shaped a square tube. The square tube was cut into 0.25 inch piece. Three squares were prepped to be placed behind the witches and to the inside panels of the card base. With liquid glue the squares were glued to the back of the witches. Once dry, the witches were then glued into the crease of the card base.
With the inside complete, the card front needed some attention. A piece of black glitter card stock was trimmed to 5.5 by 4.25 inches. With the rectangle from the Card Basics Die, a piece of Cast A Spell pattern paper was cut out. Taking a piece of coordinating paper from the Cast A Spell paper pack, a strip was cut down and then run through the same rectangle die from the Card Basics Die. These papers were glued flat to the front of the card front. To make the appearance of the front of the pocket to mimic the look of the pocket opening, the top portion of the Pocket Witches was stamped on a piece of Neenah Classic Crest Solar White (80 lb) card stock. The star was cut out on the line and then flipped upside down. With the same pink Olo Markers, the blank star was colored. Thin foam tape was applied to the back of the star and centered on the card front. Finally, the sentiment was stamped in pigment ink and Clear Embossing powder was heat set. The sentiment was fussy cut out, thin foam tape was applied and the centered onto the card front.
The tiny surprises pop to life when the card is opened. Now, who won’t want to open this card!
Card Size: 5.5 inches by 4.25 inches
Color Guide (Olo Markers):
Red Witch:
Flesh> OR3.2/ OR7.1/ OR2.0
Hair> OR2.6/ OR2.3
Undercoat> BV1.7/ BV1.4
Gown> G1.5/ G1.4
Apron> CG7/ CG5
Robe> CG5/ Cg7
Base> CG5/ CG7
Shoes> CG9
Brown Witch:
Flesh> OR3.2/ OR7.1/ OR2.0
Hair> OR2.6/ OR2.3
Undercoat> BV1.7/ BV1.4
Gown> G1.5/ G1.4
Apron> BV4.7/ BV4.5
Skit> Y2.0/ OR2.6/ R0.5
Shirt> OR2.6/ OR2.5
Blonde Witch:
Flesh> OR3.2/ OR7.1/ OR2.0
Hair> YO2.3/ YO2.2
Base> CG3/ CG5
Undercoat> R1.7/ R1.5
Shirt> R0.4/ R0.3
Shoes> CG9
Base Coat> V2.8/ V2.6
Pocket Designs:
Moon> Y1.1/ Y2.0
Trees> G1.8/ G1.7
Grass> YG1.6/ YG1.4
Pumpkins> O2.4/ O1.3; Y2.3; OR3.7
Bats> CG7
Roof> CG9/ CG7/ CG5
House> O7.8/ O7.7/ O7.3/ O4.0
Tombstone> CG5/ CG3
Clouds> CG3/ CG1
Pocket Design I
Star> Y2.3/ Y1.2
Sky> BV1.7/ BV1.4/ RV0.2
Pocket Design II
Star> BV4.5/ BV4.4
Sky> B0.7/ B0.5/ B2.4
Pocket Design III
Star> RV1.5/ RV1.3
Sky> V2.8/ V2.7/ V2.6/ V2.4