Naughty Kids: Kindred Stamps Oct. 2026 Release
Are you still besties with your friends from middle school? The ones that went through that awkward transition stage between single digits to teenager… you remember your school pictures…. Well these Naughty Kids from the Kindred Stamps October Release harness that awkward pre-teen energy, snakiness and mouthiness while learning the hormones that are flooding their bodies. Before we breakdown the cards, let’s take a break for a public service announcement…
This blog utilizes affiliate links. If you choose to click on the links provided to purchase, you are supporting me as I receive compensation for your purchase. If purchasing is not in your books, no worries, I hope you find inspiration for projects you design. By clicking on the links, you are letting Kindred Stamps know that you like my content and to keep bringing me back. Thanks for your time.
Project One: Wood Sign Card
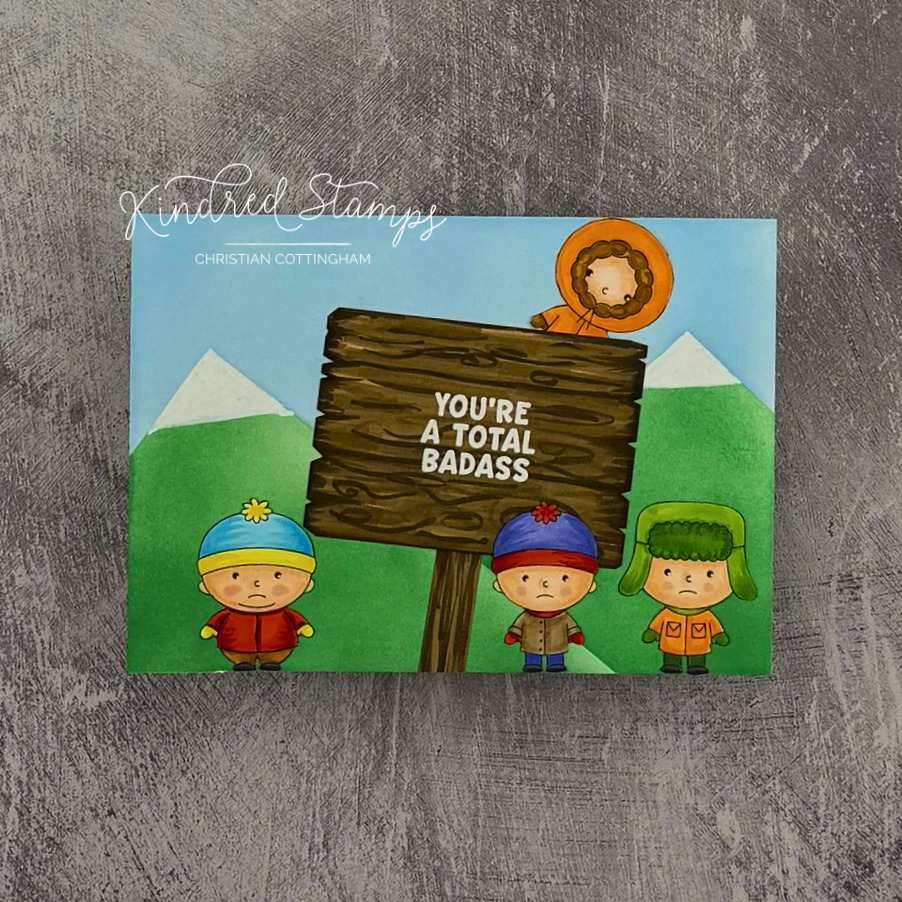
Naughty Kids, Kindred Stamps
Sometimes you just need someone to tell you, you are a badass and the Naughty Kids are the perfect medium to convey the message! Let’s break it down.
This simple backdrop gives the illusion of mountains in the background with ink blended softness and textured white snow caps. This will be the backdrop for the Naughty Kids and sign. Using a piece of masking paper, two mountains were trimmed and placed onto a panel of Hammermill cardstock. The sky was blended with Blue Sky ink (Gina K Designs). The masks were removed. Sticky notes were utilized as masks for each of the mountains. The mountains were blended with Kelly Green ink (Gina K Designs) in their entirety knowing the textured snow caps would cover the ink applied. Before removing the sticky note masks, another notes was placed below the tip of the mountain to block off a snow cap. Utilizing an acrylic white marker, the snow was applied in a dotted application. After allowing the paint to dry, the application was repeat to more stippled texture. The masks were removed and the panel was set aside to dry.
The Naughty Kids were stamped in alcohol safe ink on Olo paper and colored with Olo Markers (See Color Guide). The images were fussy cut on the line and then edged with a brush tipped fine liner. The boys were set aside to make the sign.
A rectangle was trimmed down from a piece of Hammermill cardstock. Wood boards were penciled onto the rectangle (okay I drew a couple straight lines). Little notches were cut randomly from the sides of the rectangle. With Olo Markers (O7.8/ O7.7), the woodgrain was drawn in. By woodgrain, I mean, I traced over the straight lines where the boards would be with the darkest marker and then I made lines and squiggles. The edges and notched sections were colored with the same dark marker. Finally, entire panel was colored with the light tone. Yes it looks horrid before you add the next color. You are just giving the illusion of woodgrain your recipient will fill in the blanks in their brains when they see the card. The sign was set aside to dry. The Sign post was pulled from the scrap pile and streaks were placed with the dark color and then filled in with the light color.When the sign was dry, it was prepped with an antistatic tool. The sentiment was stamped in watermark ink, Snowfall Embossing Powder was applied and heat set.
To assemble the card, the sign post was applied to the sign. An A7 card base was prepped and the mountain scene panel was adhered flat to the card base. The Orange Jumper Boy was adhered to behind the sign with his hand over the top of the sign. The sign with the boy attached was then adhered flat to the card base. The remaining boys were arranged and glued flat to the card base.
This card let’s your recipient know that you believe in them, in your own way!
Card Size: A7 (5 inches by 7 inches)
Project Two: Bathroom Surprise Card
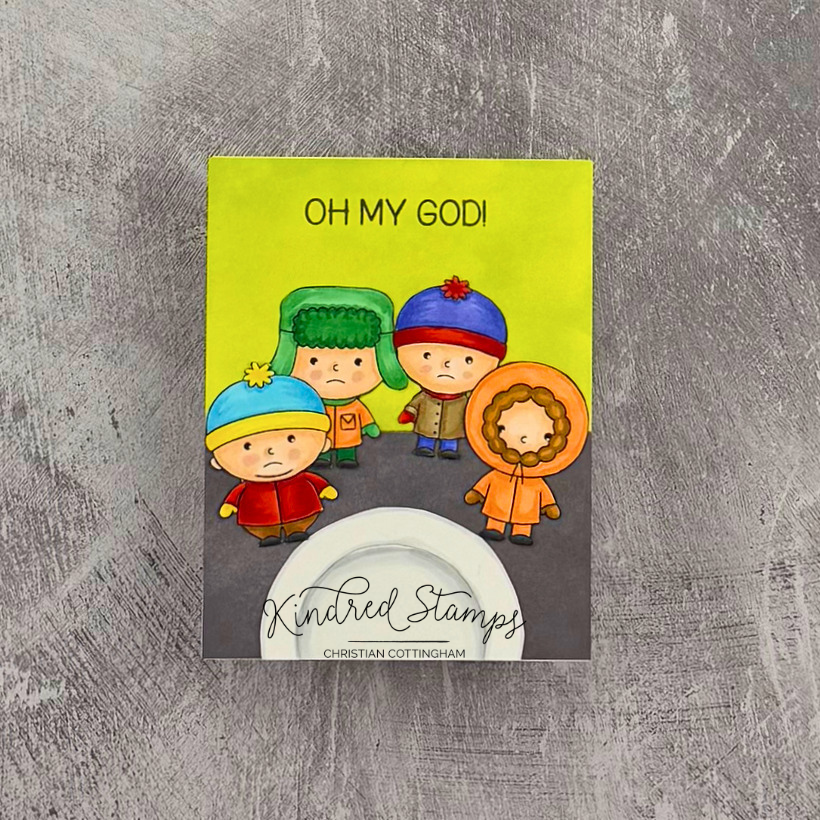
Naughty Kids, Kindred Stamps
These best friends are counting down the days until the holidays just like we are! This bright card accents these Naughty Kids perfectly! Let’s break it down…
An A2 panel (4.25 inches by 5.5 inches) was masked with a piece of masking tape to separate the wall from the floor. The top of the card was blended first with a bright green ink (Key Lime Gina K Designs). The mask was removed and repositioned on the panel. With a mid-gray ink, the floor was blended (Slate Gina K Designs). This panel was set aside to prep the Naughty Kids.
The four boys were stamped on Olo paper and the images were colored with Olo Markers (See Color Guide). The images were fussy cut out on the line and then edged with a brush tip fine liner.
The toilet was up next! Since I was on vacation and I didn’t actually pack the things I needed, I improvised. The circle was traced from a glass twice and then the inner diameter was traced from a roll of low tack tape on one of the circles. The circles were fussy cut out (a little wonky, but it works!). Using Olo Markers shading was applied (NG3/ NG1/ NG0). The pieces were layered and adhered together.
The sentiment was stamped in black in on the top of the panel. To assemble, the ink blended card panel was glued to a card base. The toilet was place on the bottom of the panel with over hang. The Naughty Boys were arranged on the card around the rim of the toilet. Finally the excess toilet was trimmed off the card base.
This card is not for everyone, but it makes me giggle like a middle schooler….
Card Size: A2 (4.25 inches by 5.5 inches)
Project Three: RIP Sidewalk Card
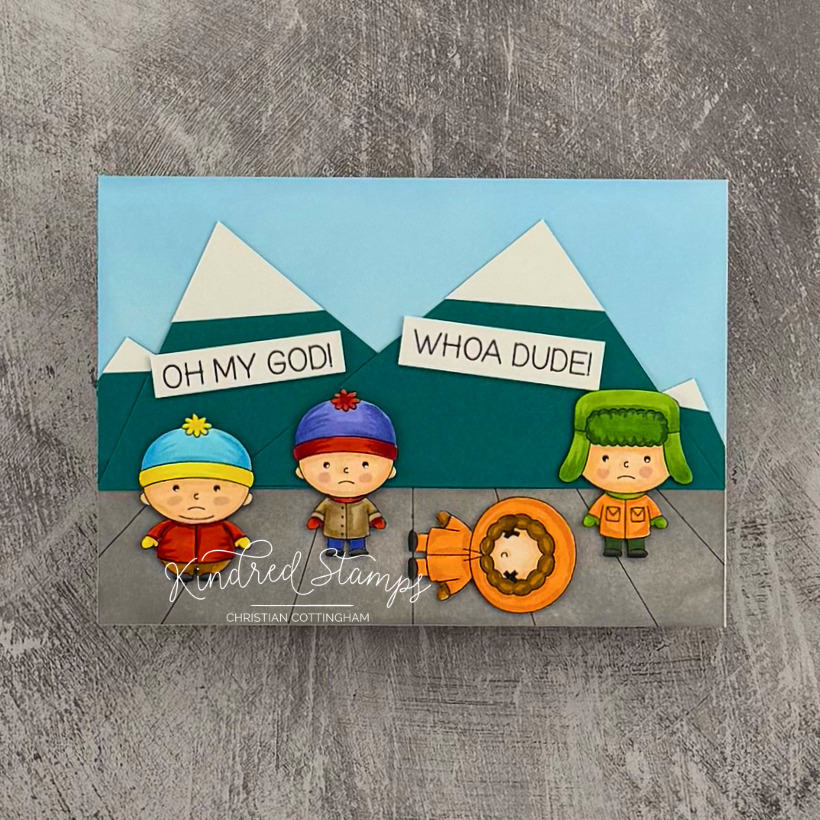
Naughty Kids, Kindred Stamps
This all purpose card is a nod to the adventures of childhood. By modifying a stamp slightly a new scene can be made. Let’s breakdown this dimensional card.
An A7 panel of Hammermill cardstock was masked with piece of low tack tape one third of the way up the card. The top section of the card was blended with Blue Sky ink (Gina K Designs). The low tack tape was repositioned and Stormy Sky ink was blended (Gina K Designs). To give perspective to the “sidewalk” (the gray blended section) the lines were drawn with a fine liner pen. This panel was set aside.
The Naughty Kids were stamped on Olo paper and colored with Olo Markers (See Color Guide). The images were fussy cut out and edged with a brush tipped fine liner pen. The Orange Jumper Boy was modified with a fine liner by extending the stamped eye into an X. Thin foam tape was applied to the back of the images. The sentiments were stamped on a scrap of white cardstock and cut to be into sentiment strips. Thin foam tape was applied to the back of the strips.
Finally, the mountains were cut in various degrees of triangles from a green cardstock. White card stock was glued to the tip of the mountains and excess was trimmed. To assemble the card an A7 card base was prepped and the ink blended panel was adhered flat. The mountains were applied to the card along the line of the sidewalk. The Naughty Kids were arranged on the card and adhered. Finally, the sentiment strips were applied. This card makes me giggle.
Card Size: A7 (5 inches by 7 inches)
Project Four: Crossing Sign Card
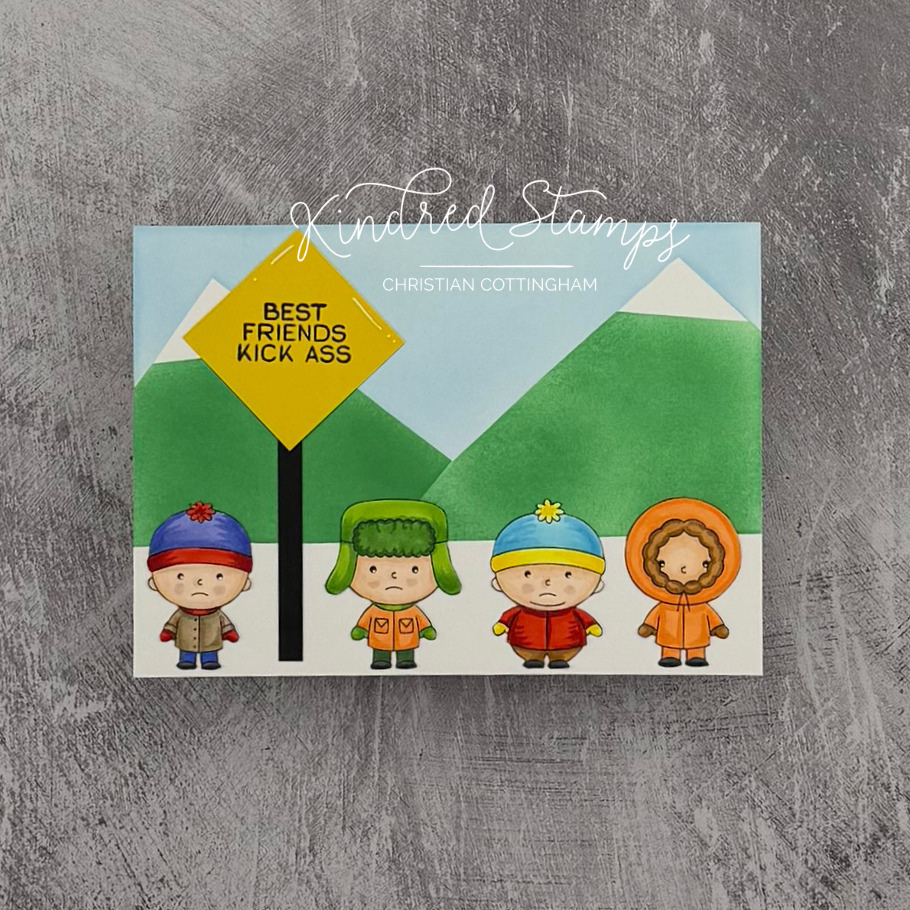
Naughty Kids, Kindred Stamps
As a kid, the bus stop was a community of its own. Just like school there were all of the clicks and drama. There was that one friend that you could stand next to help you through the social awkwardness as we navigated the nuances of adolescence. These Naughty Kids are besties and they stick together no matter what. Let’s break down bus stop.
The background was designed first. Using a piece of masking paper, some “mountains” were cut…okay a wonky zig zag but it will be simple mountains. This was done in the center of the masking paper to allow for two masks (think positive and negative pieces of a stencil).
A piece of Hammermill card stock was cut to an A7 panel (5 inches by 7 inches). A piece of low tack tape was placed on the bottom of the horizontal panel to act as the snow on the ground. The sky was ink blended first. The mask was applied and Blue Sky ink (Gina K Designs) was utilized. The mask was removed and then the sky mask was placed. A small sticky note will act as the mask to extend the mountain to the masked snowy ground. Sticky notes were also applied to the top of the mountains to act as snow. Each mountain was ink blended and masks shifted to color (Kelly Green Gina K Designs). All masks were removed and the panel was set aside to dry.
The Naughty Kids were stamped in alcohol safe ink on Olo paper and colored with Olo Markers (See Color Guide). The images were then fussy cut out on the line and edged with a brush tipped fine liner. These were set aside to work on the sign.
A piece of scrap black cardstock that I found under my guillotine cutter… no judgement… worked perfectly for a sign post. The sign itself was just as easy! A piece of scrap yellow cardstock was squared off to be 1.75 inch square. When tilted at an angle the sentiment will fit perfectly. The sentiment was stamped in black pigment ink. The sign post was applied to the sign and the excess sign post was trimmed off. The sign takes almost the entire height of the card to give the illusion that the Naughty Kids are proportionally accurate.
To assemble the this bus stop scene, the blended card panel was applied to a card base. The Naught Kids and sign were adhered flat to the card front. This card has no extra bulk so will send perfectly through the mail… Maybe to your bust stop bestie!
Card Size: A7 (5 inches by 7 inches)
Project Five: Photo Bomb Birthday
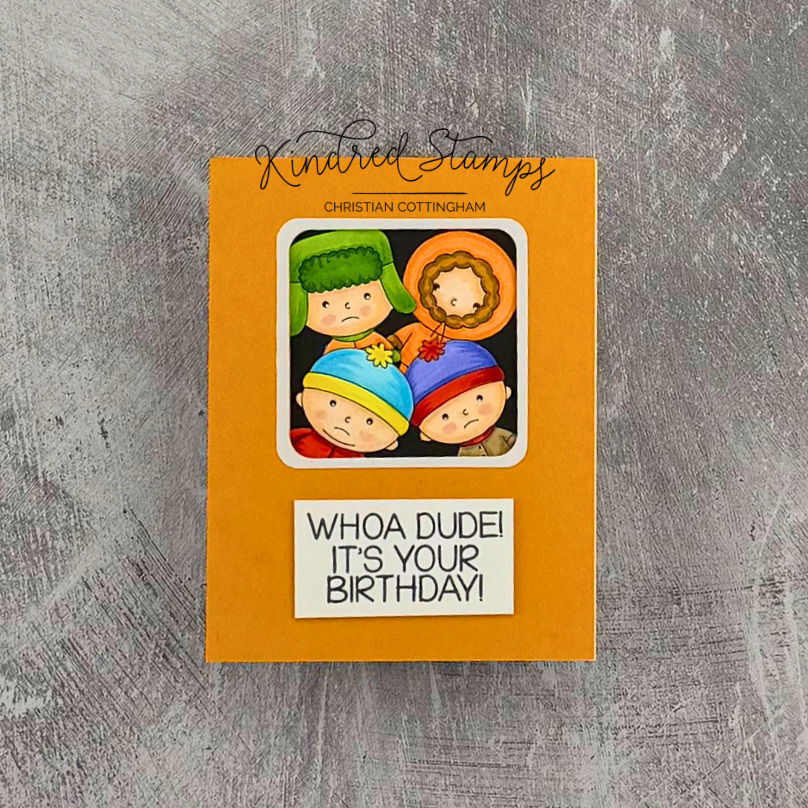
Naughty Kids, Kindred Stamps
Smile pretty! The Naughty Kids are sending birthday wishes in their own way. Let’s break this card down.
An A2 (4.25 inches by 5.5 inches) panel of orange card stock was trimmed down. Using a rounded corner square die, a window was cut in the top third of the card. A frame was cut with the nesting dies out of a glossy white card stock. The frame was glued flat to the card panel around the circle.
The Naughty Kids were stamped on Olo paper and colored with Olo Markers (See Color Guide). The images were fussy cut out on the line and then edged with a brush tipped fine liner. On a piece of scrap black card stock the boys were arranged using the window as the guide to ensure the arrangement was within the edges of the window.
Thin foam tape was applied around the entire back panel of the orange card stock. The foam tape was removed. Looking through the window, the boys were centered and the image was picked up by lightly taping the foam tape to the boys. Liquid glue was applied to foam tape for a little forgiveness when applying the panel to a prepared card base.
The sentiments were stamped in two layers to ensure the spacing coordinated between the sentences. This was trimmed down and thin foam was applied. The sentiment was then centered below the window. This bright photo bomb card is the perfect way to say happy birthday!
Card Size: A2 (4.25 inches by 5.5 inches)
The entire Kindred Stamps release will be available this Friday at 8am PST/11am EST. Be sure to subscribe to the Kindred Stamps blog to see a daily line up of sneak peeks from our amazing Design Team! Come join the Fan Club and release event to be part of the release fun, and you may just win some Kindred Stamps credit!!
Coloring Guide:
Red Jacket Boy
Flesh> OR3.2/ OR4.2/ OR2.0; R5.3
Mittens> Y2.3/ Y1.2
Hat> Y2.3/ Y1.2; B2.4/ B2.2
Pants> OR3.7/ OR3.4
Jacket> R0.6/ R0.5
Shoes> NG9/ NG7
Brown Jacket Boy
Flesh> OR3.2/ OR4.2/ OR2.0; R5.3
Mittens> R0.6/ R0.5
Pants> BV2.6/ BV2.4
Hat> BV2.6/ BV2.4; R0.6/ R0.5
Jacket> O7.5/ O7.3
Shoes> NG9/ NG7
Orange Jacket Boy
Flesh> OR3.2/ OR4.2/ OR2.0; R5.3
Pants> YG1.7
Jacket> OR1.4/ OR1.3
Hat> YG1.7/ YG1.6/ YG1.4 (Except for one image- grabbed the wrong colors> G1.7/ G1.5/ G1.4)
Shoes> NG9/ NG7
Orange Jumper Boy
Flesh> OR3.2/ OR4.2/ OR2.0
Jumper> OR1.4/ OR1.3; OR3.7/ OR3.4
Shoes> NG9/ NG7
Mittens> OR3.7/ OR3.4