Kindred August 2026 Throwback
Camping season is coming to an end, but the adventures don’t have to stop now! This month, the Kindred August release is a throwback and I have the pleasure of playing with the Camper Die. Get those marshmallows ready and buckle in for some inspiration that mixes and matches all the things!
Before our trip, let’s take a pit stop. This blog utilizes affiliate links. If you choose to click on the links provided to purchase, you are supporting me as I receive compensation for your purchase. If purchasing is not in your books, no worries, I hope you find inspiration for projects you design. By clicking on the links, you are letting Kindred Stamps know that you like my content and to keep bringing me back. Thanks for your time.
Project One: Is It Too Early for Christmas??
Camper Dies, Kindred Stamps
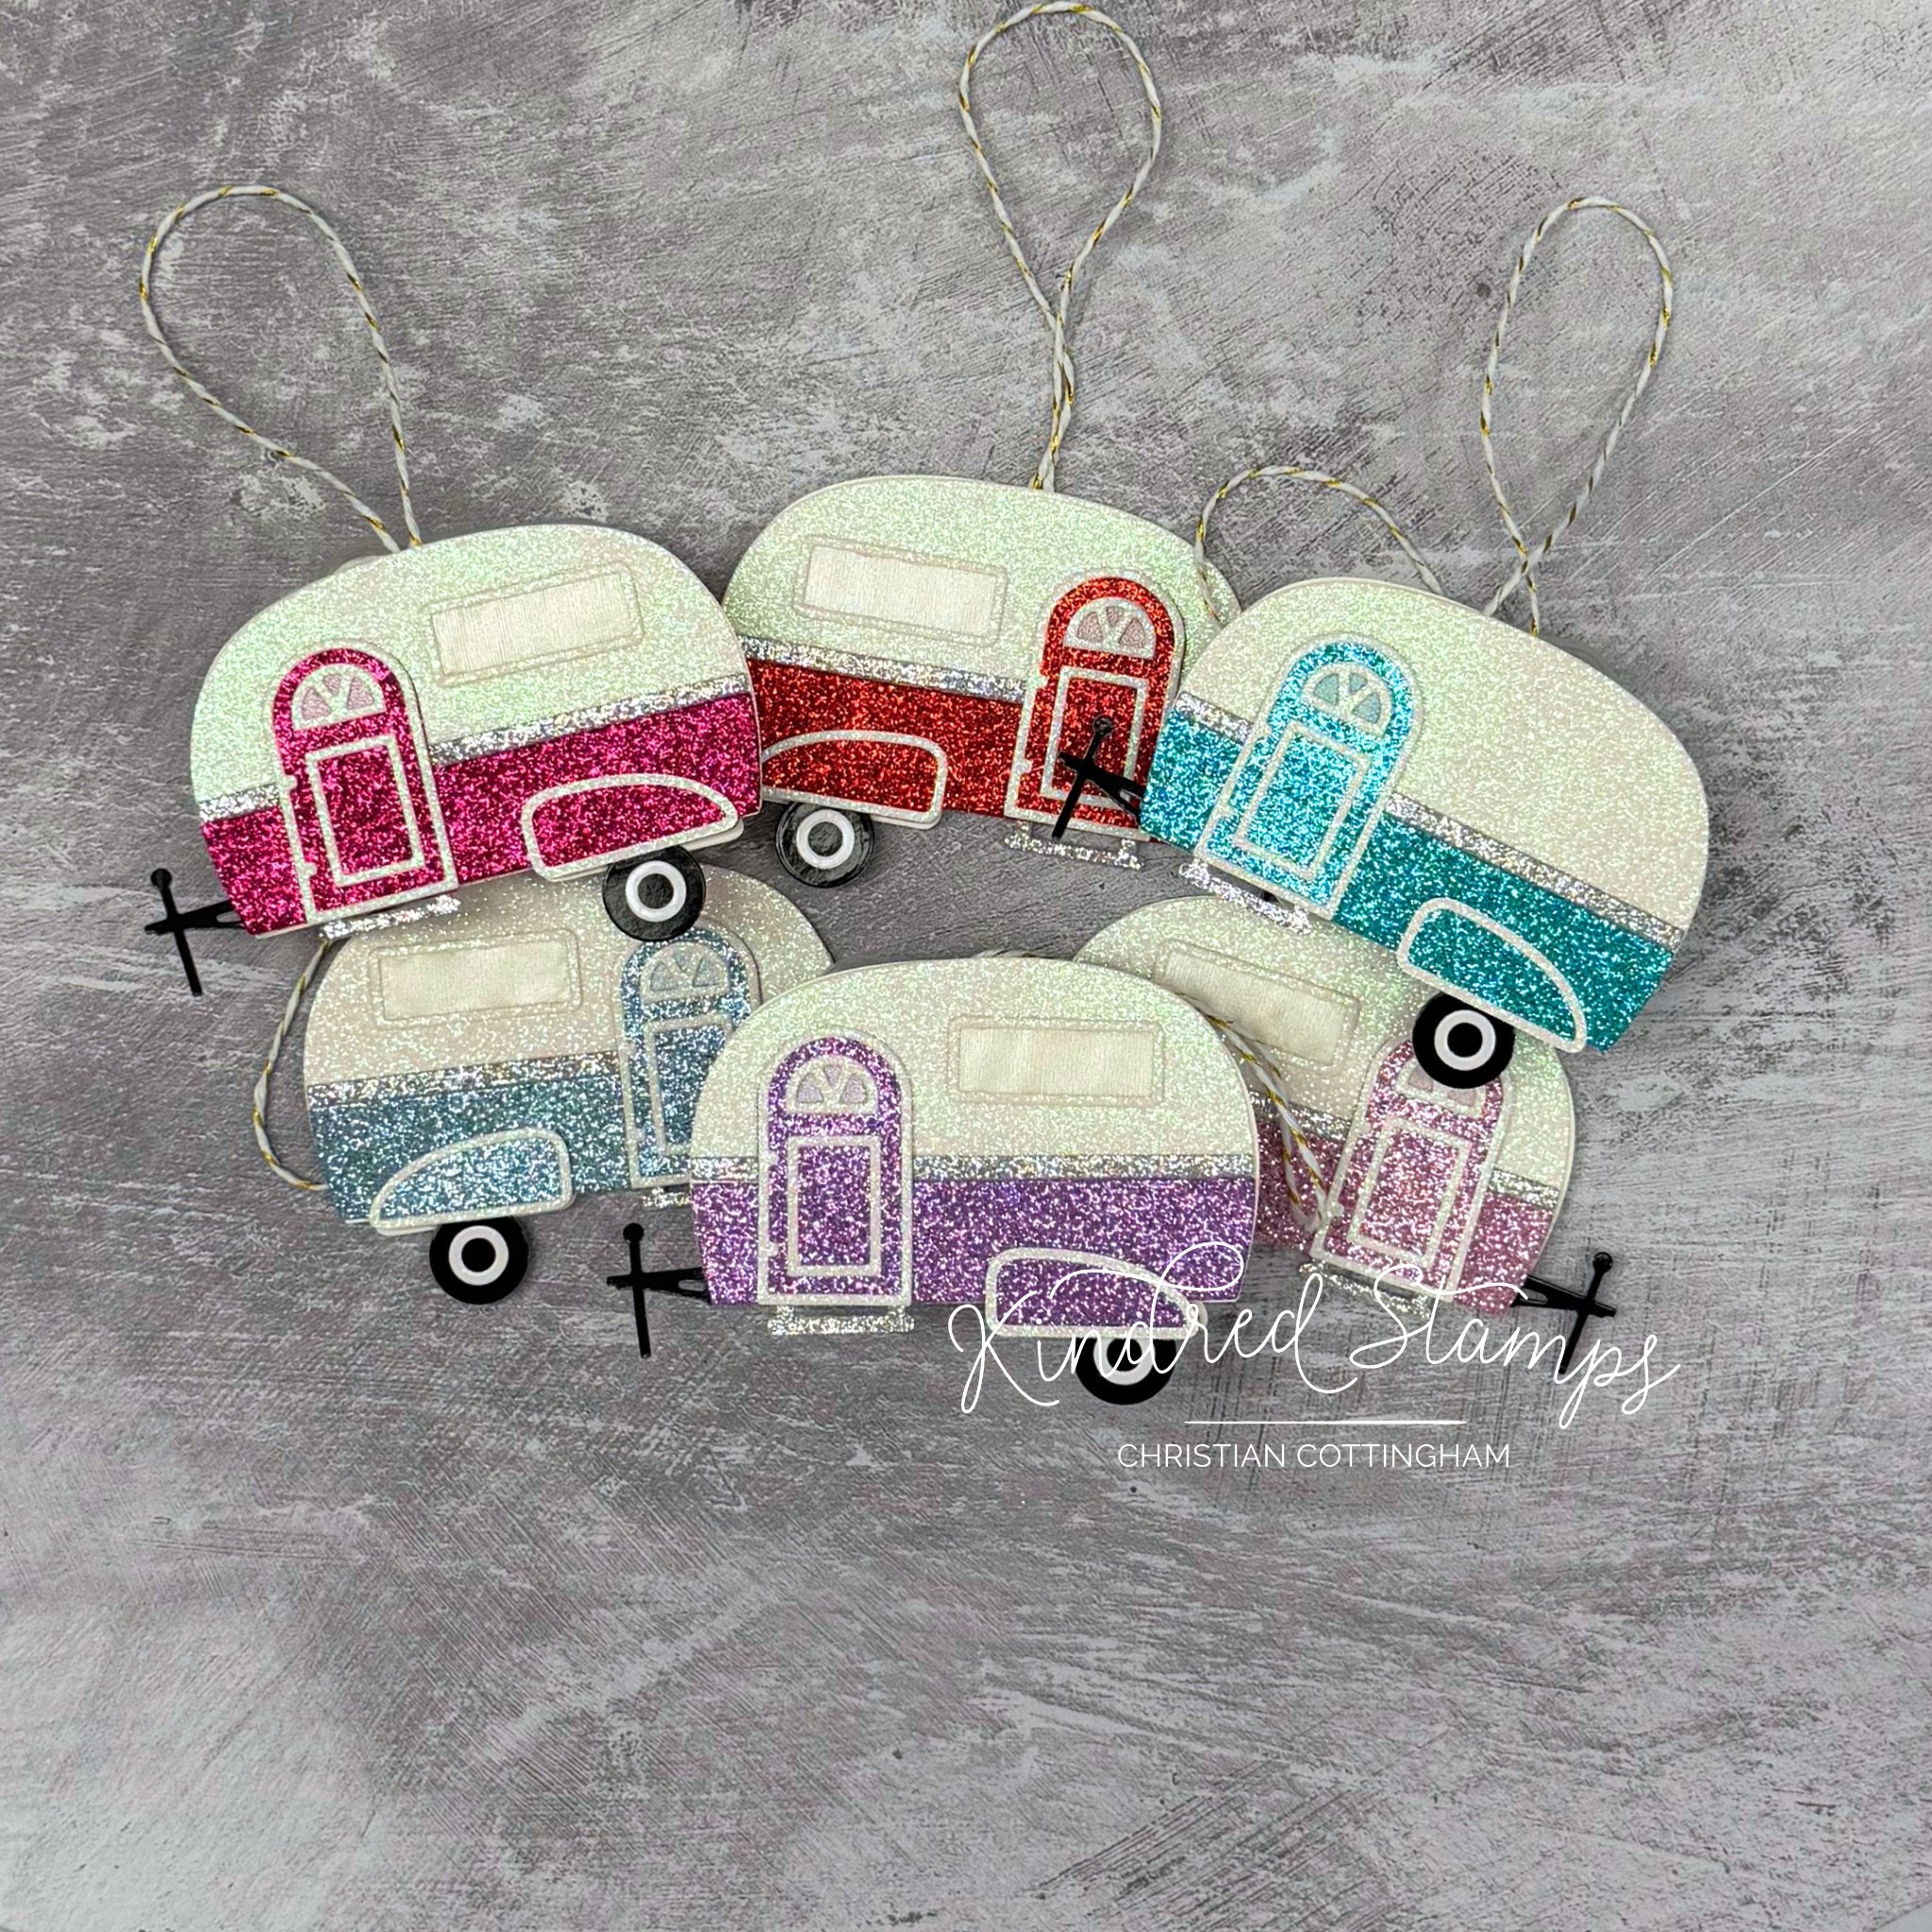
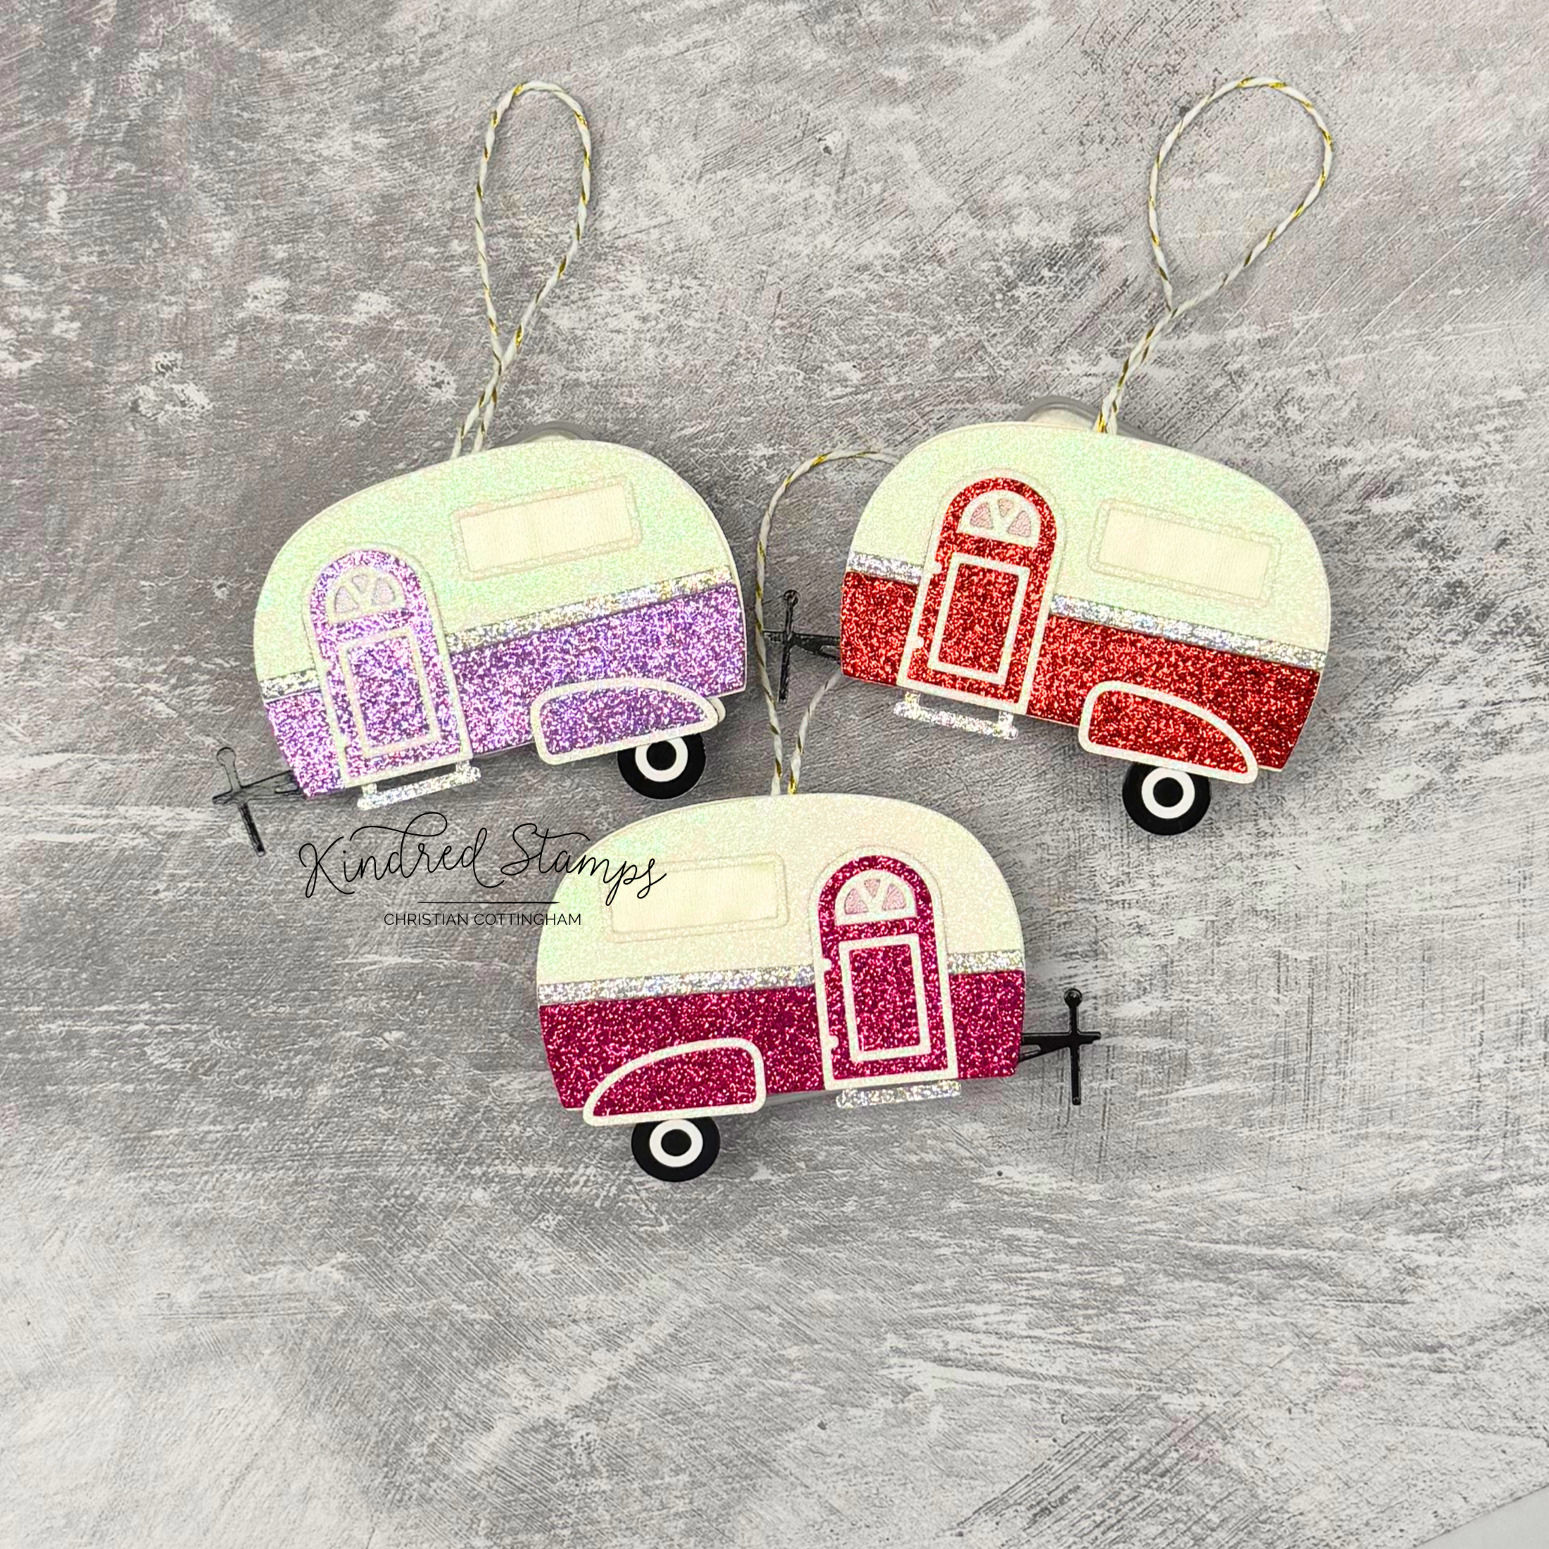
My parents are camp ground hosts and when I saw the Camper Die I knew I could make a set of ornaments that can be shared with their closest friends. The ornaments were designed to have both the front and the back of the ornament decorated. To do this some of the dies were die cut from the reverse side of the paper to provide reversed die cut. Let’s break down how this set of ornaments were made.
A selection of glitter cardstock was pulled from my stash and it was time to start die cutting. The Topper was cut 12 times out of an iridescent white glitter paper. The Window Frame/ Door Frame/ Door Panel/ and Door Window we also die cut from the same paper. The stripe was cut 12 times from a silver glitter cardstock. The bases to the camper were cut twice in each of 6 colors. The respective Doors were die cut twice for each color way.
Camper Dies, Kindred Stamps
Glossy black and white paper were utilized to die cut 12 wheels. Using the large circle tire die, twelve circles were cut from shimmering velum. These circles will be utilized behind the Door Window frames.
The remainder of the pieces were then cut 6 times with the die on the glitter or glossy side of the card stock, and then die cut with the die on the back side of the card stock to provide the mirror image of the die cut.
Camper Die, Kindred Stamps
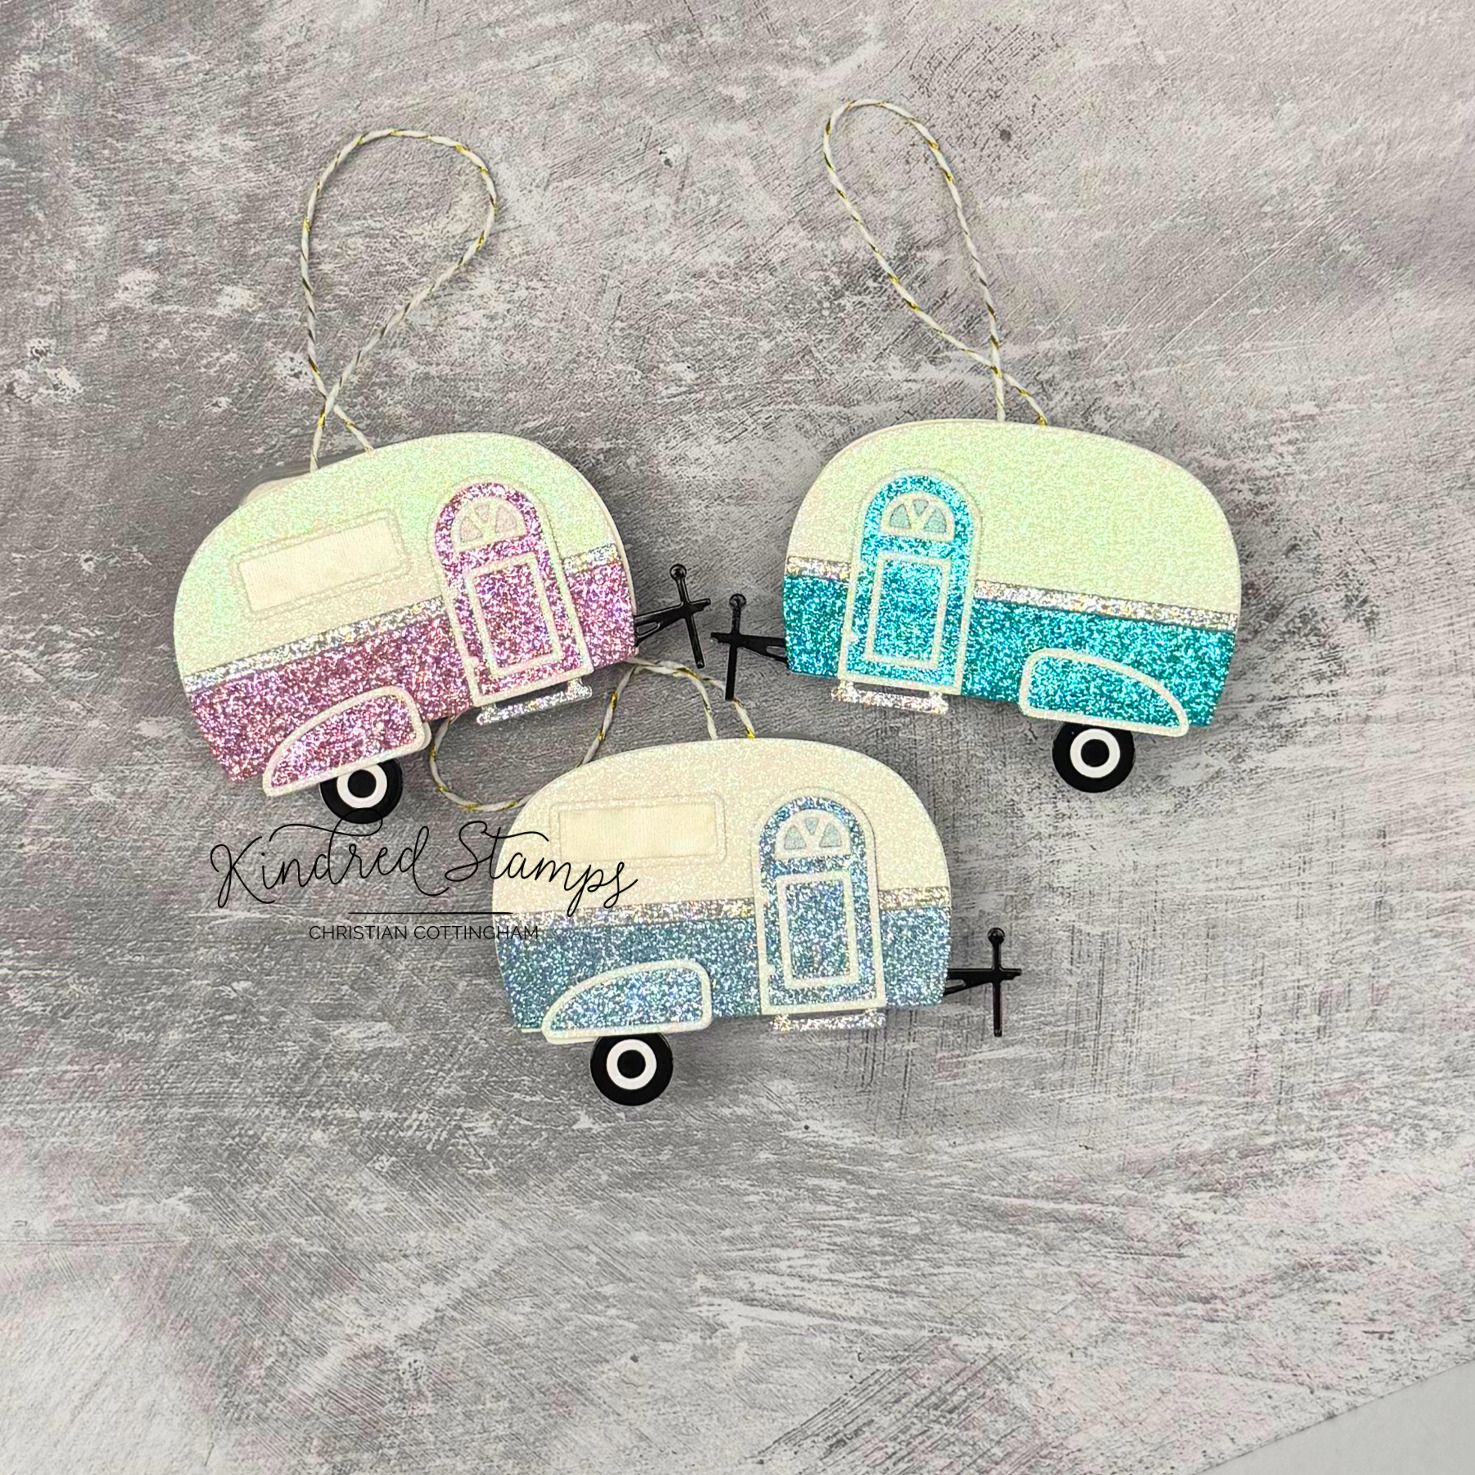
To assemble, an entire Camper was glued together. The mirror image of the Camper was then assembled, centering the door, tire and hub cap on the backside of the original Camper. Once the mirror image was dry, double-sided adhesive was placed in between the campers. A piece of twine was adhered and liquid glue applied. The front and back pieces were then sandwiched together. The ornaments were complete! I can’t wait to see one sparkling on a tree.
Size: Camper Die
Project Two: Watch Those Picnic Baskets
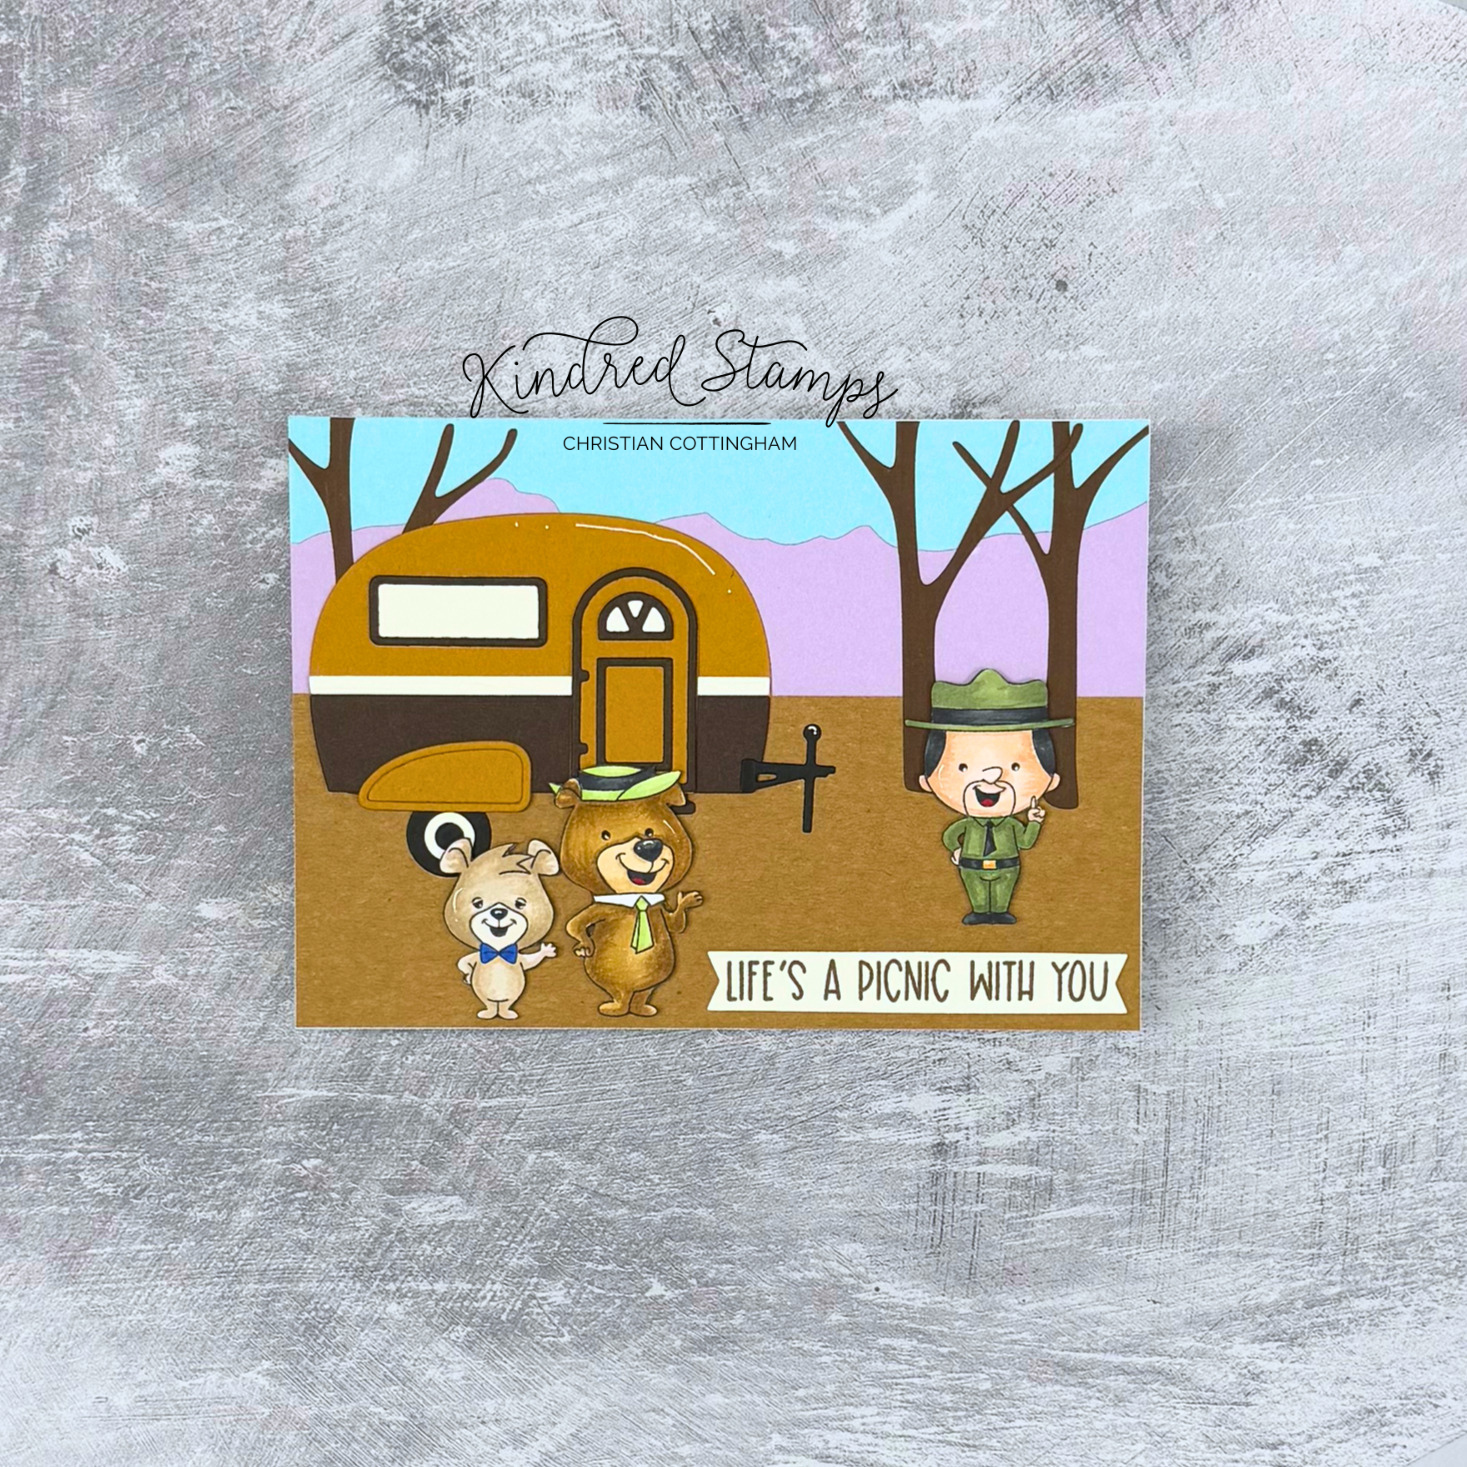
Camper Die/ Bare Tree Die/ Picnic Pal Stamp Set/ Desert Scene Die Kindred Stamps
This retro looking Camper Die pairs perfectly with the Picnic Pals stamp set. This card will make you so jelly… Lets breakdown how this large card has a nod to years gone by.
The Camper die was die cut from a mustard- prickly pear type color, ivory, and brown card stock. The die was assembled and set aside to dry. With another shade of brown, the Bare Tree dies were cut out.
An A7 card base was prepped. A piece of dark khaki brown cardstock was cut to act as the ground (3 inches by 7 inches). Aqua cardstock was trimmed to 2.5 inches by 7 inches and set aside. Finally, a piece of purple cardstock was die cut with the Dessert Scene Die (approximately 2.5 inches by 7 inches). The background was adhered with glue to the card base and set aside to dry.
The Big Bear, Little Bear, and Forest Ranger were stamped with alcohol safe ink on cardstock. The images were colored with Olo Markers (See Color Guide) and cut out on the line, including in between the arms. The images were edged with a fine liner and thin foam tape was applied to the backside of the image.
The sentiment was stamped on a piece of ivory cardstock with Dark Chocolate ink (Gina K Designs). The sentiment was die cut with a label die. Thin foam tape was applied to the back of the sentiment.
To assemble the card, the Bare Trees were glued flat to card base. The branches were positioned to be higher in the tree to give the illusion that the tree leaves are above the scene. The Camper Die cut was the applied flat to the card base on the left hand side of the scene. Finally, the Picnic Pal images and sentiment were popped up on the card base. I think the picnic basket is safe… for now…
Size: A7 (5 inches by 7 inches)
Project Three: Enjoy The Ride
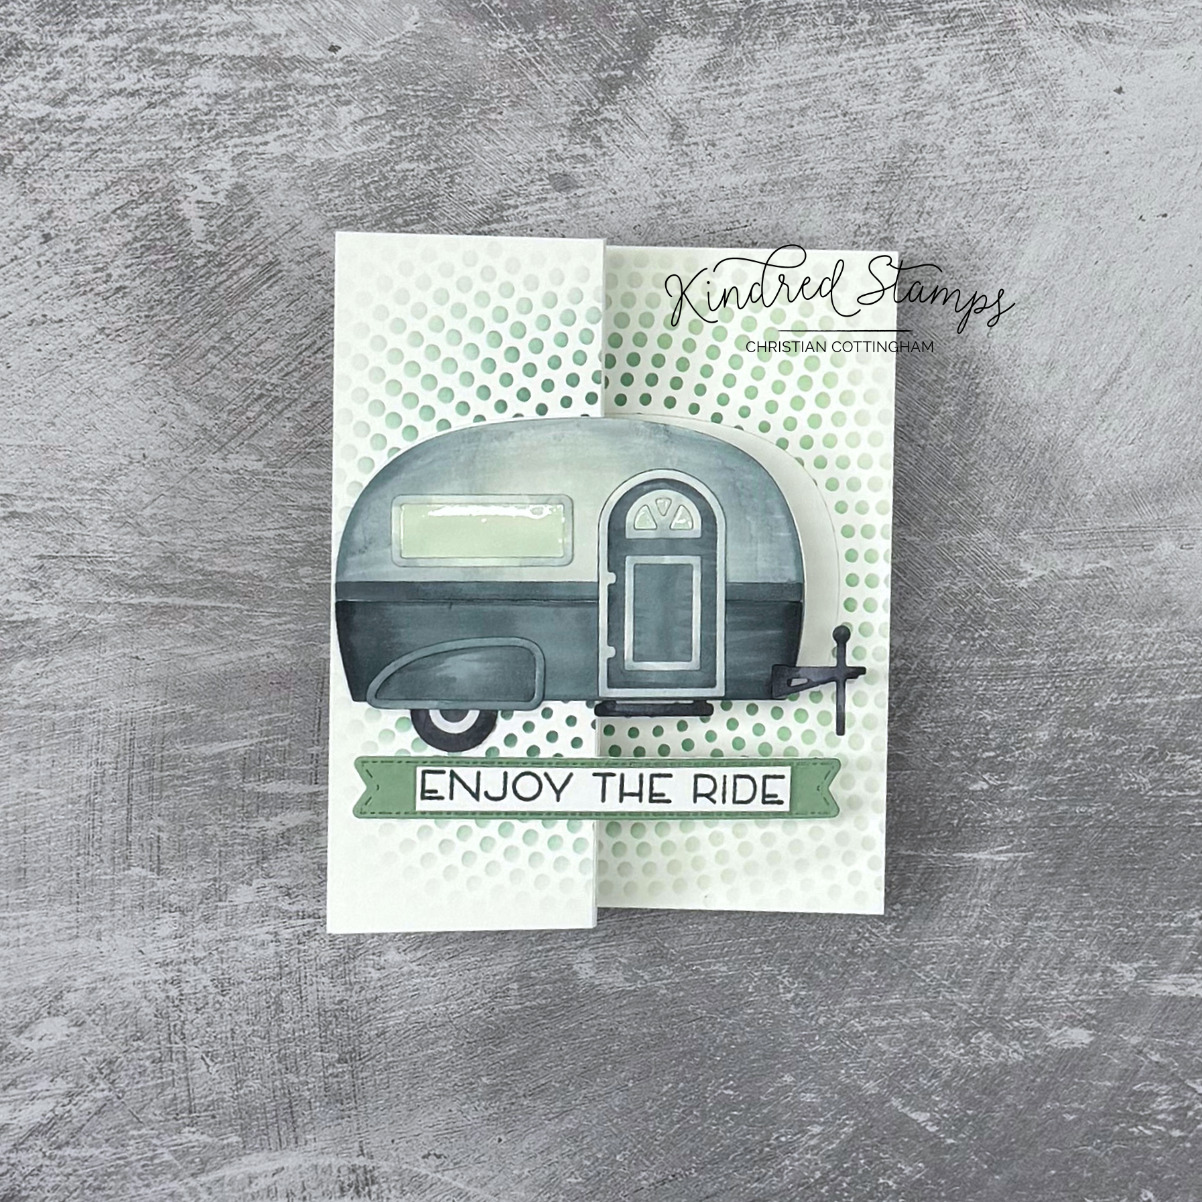
Camper Die/ Bikers Stamp Set/ Half Tone Circle Stencil
Sometimes all we can do is sit back and enjoy the ride, and that may mean Camper style. This fun fold card has a mesmerizing background that continues on each panel with a hidden area for your personal message (that’s just peaking out on this image). Let’s break it down.
The Camper die was cut from 80 lb. Neenah Classic Crest Solar White paper. The body of the camper was cut twice with the second piece left white for an area to write. The Camper Die components were colored with Olo Markers (CG5/ CG3/ CG7; BG 5.1; BG6.3/ BG6.5/ BG6.3/ BG6.0). The door windows inside pieces were colored and replaced into the die cut. The die was assembled and Glossy Accents were applied to the windows.
Two A2 panels (4.25 by 5.5 inch) of Neenah 80 lb. Classic Crest Solar White paper were stenciled in the same positioning with two inks using the Half Tone Stencil. The lightest color was ink blended from the center to edges with the heaviest ink starting in the center and fading to the outside edges. Then the darker ink color was concentrated in the center pulling the ink out only a couple centimeters to allow a gradient transition. Colors utilized were muted greens to match the moody camper (Medium Spruce/ Dark Spruce Gina K Designs).
The sentiment from the Bikers stamp set was stamped with the same Dark Spruce ink on a scrap piece of the same weight and brand paper. This sentiment was trimmed down to fit within the edges of the Sentiment Strip Dies. Light Spruce ink was then smeared onto another scrap of paper to have a perfect match. The Stitched Sentiment Strip die was used to cut the colored paper, and another piece of the 80 lb cardstock. The white sentiment got a layer of thin foam tape and was then adhered to the inked sentiment strip. The plain white sentiment strip was adhered to the back of the green sentiment with the reverse sides touching. This provides stability to the lighter weight cardstock and covers any yucky coloring on the back of the scrap cardstock I used.
To assemble the card, an A2 card base was prepped. The front panel of the card base was scored at the 2 1/8 inches and then the fold reinforced. This is a Z-Fold card. Nice way to change up a card and it makes it look like you worked forever on it.
One of the Half Tone stenciled panels was cut in half. The panel that will be on the top fold was adhered with liquid glue. The other half panel was then trimmed on the side that would be nearest the inside fold (1/32nd of an inch). This will allow you to adhere the panel into the card and not have overhang because of the inside seam.
The second Half Tone stencil piece got the same little haircut (1/32nd of an inch) so it too would have the space it needs on the inner seam line. This was adhered with liquid glue. The card base when open has to full colored panels.
The Camper Die was then adhered to only the top folded panel. Meaning there was only glue on the back half of the camper (I used the window as my guide). When the panel is open, the camper will appear to be on the left hand side of the card. The sentiment was applied in the same fashion with adhesive only from the flag end through the word “enjoy.”
The white Camper Die base got a dose of adhesive and then was placed on the panel behind the camper so it would be hidden when the card is closed. This is a place where the personal message can be written. The card was now ready to sit back and enjoy the ride!
Size: A2 (4.25 inches by 5.5 inches)
Project Four: Sweetest Adventures
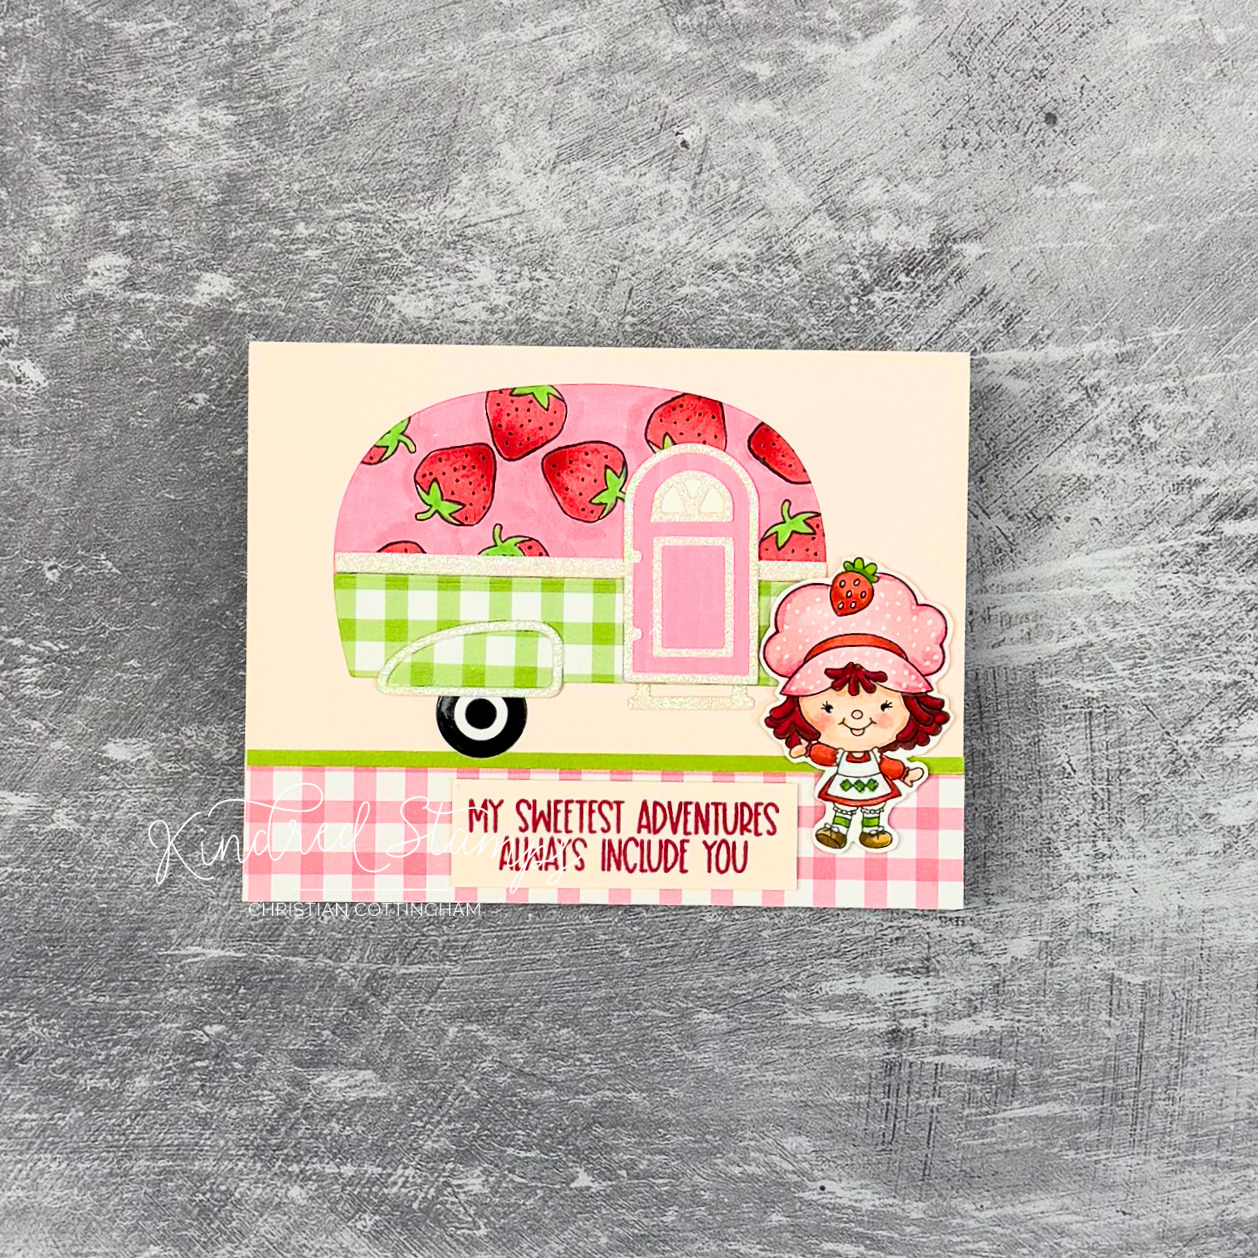
Camper Die/ Fruit Friends Stamp Set/ Woodland Adventures Stamp Set Kindred Stamps
Who says you can’t turn the Camper Die into a bit of nostalgia? This card takes me on a trip to through my childhood. Let’s break it down…
The Fruit Friends stamp set will provide the strawberry topper for the camper. On a piece of white cardstock the strawberry stamp was stamped randomly in alcohol safe ink. The background was colored in first and then the strawberries with Altenew Artist Markers (R107/ R105; G503; R304). This homemade pattern paper was then die cut with the Camper Die. Using the same R304 marker on a piece of paper, the door was cut out. The trim and accents were cut from white glitter card stock. The tire from glossy black and glossy white paper. Finally, the Sweet Strawberry Paper Pack provided the green gingham pattern for the base and wheel well. The die was assembled and set aside to dry.
The Berry Girl from the Fruit Friends stamp set was stamped with alcohol safe ink, colored with Olo Markers (See Color Guide) and fussy cut out leaving a thin white boarder.
The sentiment from Woodland Adventures was stamped on a piece of pale pink cardstock with a dark pink ink (Dark Carnation, Gina K Designs). The sentiment was trimmed to be a strip and thin foam tape was applied to the back.
To complete the card, an A2 card base was prepared. A panel of the same pale pink cardstock as the sentiment was glued flat to the card base. The pink gingham paper from the Sweet Strawberry Paper Pack was trimmed to go along the base of the card. This was glued flat to the pink panel. Digging through the remanence of my paper pack, I found a green solid strip from the vertical strawberry paper that I was able to trim off and adhere just above the pink gingham paper to act as a accent to separate the top from the bottom and be a grounding place for the camper tire.
The strawberry Camper Die cut was glued flat in the center of the card. The sentiment was popped up in the center of the gingham pattern. Thin foam tape was placed behind the Berry Girl and she was applied to the right hand side of the card bridging the top and bottom sections.
This card take me back to my pink bedroom and the adventures my Berry Girl would go on. I just love it!
Size: A2 (4.25 inches by 5.5 inches)
Project Five: Retirement? Yes Please!
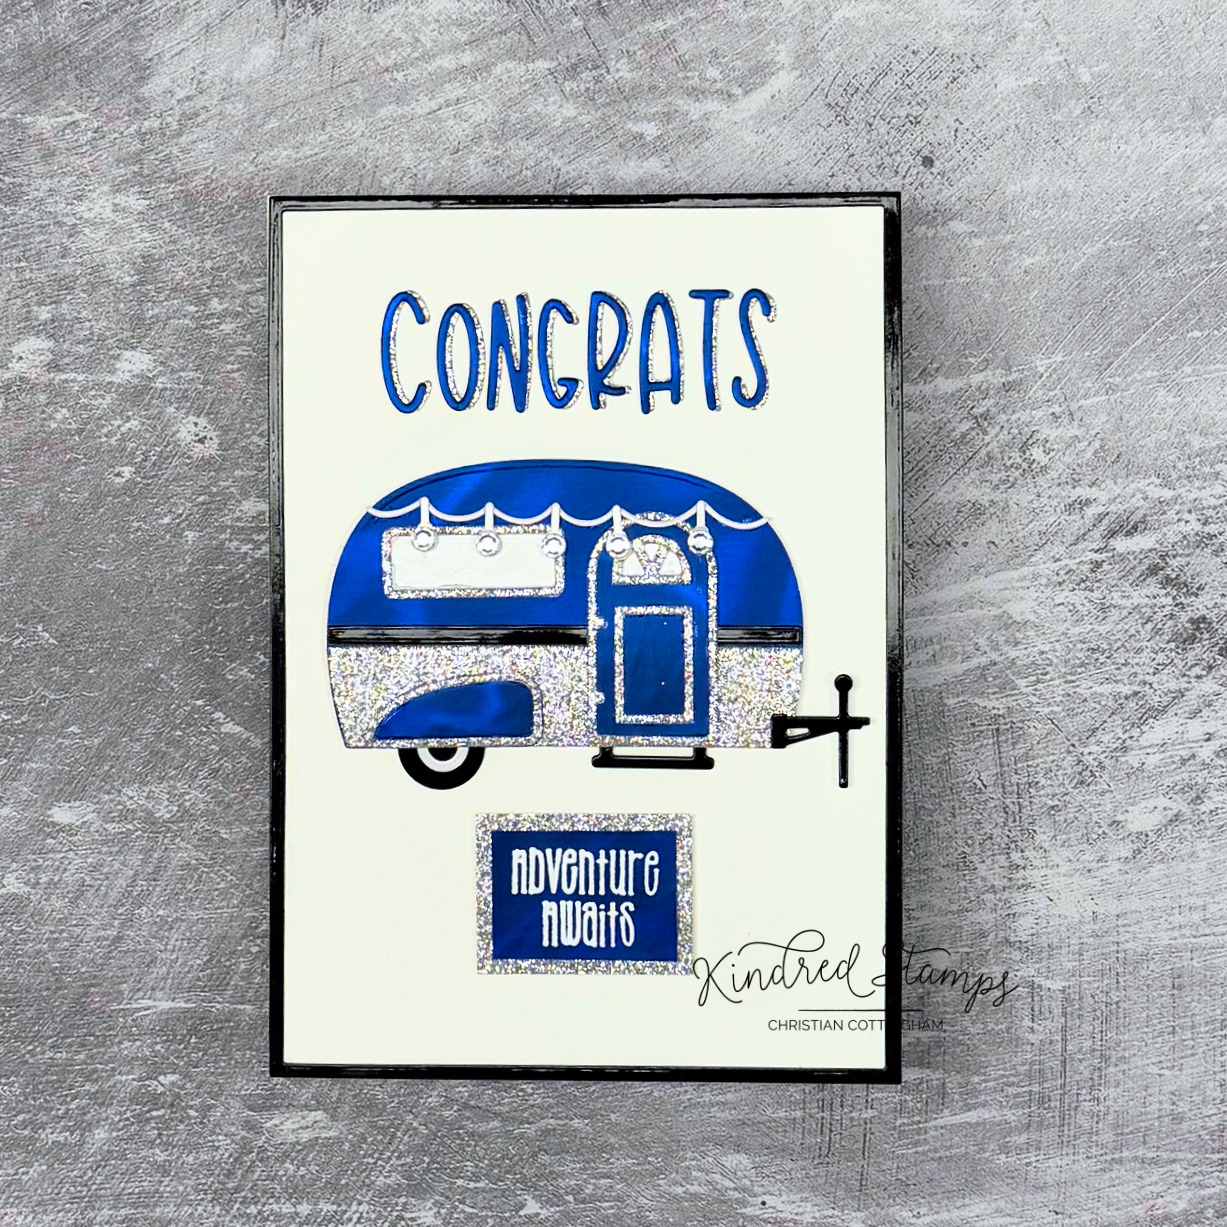
Camper Die/ It’s About Time Stamp Set/ Adaline Alpha Dies Kindred Stamps
How about a bold camper to celebrate retirement?!? This large showy card screams congratulations, let’s break it down…
The Camper Die was die cut from fancy papers (high gloss/ glitter/ and a metallic holographic type paper). The die was assembled. Clear rhinestones were adhered to the hanging lights for even more bling. This was set aside to dry.
A scrap piece of the blue cardstock was prepped with an antistatic tool. The sentiment from It’s About Time was stamped with embossing ink and Snowfall Embossing Powder was applied. The heat gun was allowed to warm up for a longer period of time. This was done to ensure that when the sentiment was heat set on the coated paper, there would be no burning or bubbling of the coating. By warming up the heat gun I would have the least amount of time needed to melt the powder. The sentiment and a glitter mat were trimmed. The sentiment was glued flat to the glitter paper and a weight was applied to allow the glue and glitter to adhere.
With the Adaline Alpha dies, the word “CONGRATS” was die cut from both the blue and silver paper. Each letter was glued to its counterpart to give the illusion of the drop shadow. The letters were lined up on the glass mat and low tack tape was applied to act as the transport vehicle to apply to the card when ready. Final piece to make was the frame. Using an A7 nesting dies, a frame was cut from a glossy paper.
An A7 card base was prepped. The frame was glued flat to the card base. The Camper Die cut was glued flat to the center of the card. The “CONGRATS” die cut loaded up with liquid glue and transported to the card. The sentiment was stuck down and held in place with the low-tack tape until it was dried. Finally, the matted sentiment was popped up with thin foam tape and adhered below the camper.
Size: A7 (5 inches by 7 inches)
The entire Kindred Stamps release will be available this Friday at 8am PST/11am EST. Be sure to subscribe to the Kindred Stamps blog to see a daily line up of sneak peeks from our amazing Design Team! Come join the Fan Club and release event to be part of the release fun, and you may just win some Kindred Stamps credit!!
Coloring Guide:
Big Bear
Hat>
YG3.4/ YG3.2; NG9/ NG7
Tie>
YG3.4/ YG3.2
Nose>
NG9/ NG7/ NG5
Mussel>
O4.3/ O4.1
Body>
O4.6/ O4.3
Tongue>
R0.6
Little Bear
Body>
O7.3/ O7.1; OR3.0
Tie>
B0.5/ B0.6
Tongue>
R0.6
Forest Ranger
Flesh>
OR7.2/ OR7.1/ OR2.0
Mouth>
R0.5/ NG9
Uniform>
YG8.6/ YG8.5
Berry Girl
Flesh>
OR7.2/ OR7.1/ OR2.0/R5.3
Hat>
R2.2/ R2.4; R0.5/ R0.4
Apron>
NG1; YG1.4/YG1.6
Tights>
NG1; YG1.4/ YG1.6
Dress>
R0.4/ R0.5
Strawberry>
R0.4/R0.5; YG1.4/YG1.6
Shoes>
O4.3/ O4.6
Hair>
R1.5/ R1.7